Making a New Shotgun Firing Pin in 9 Photos

   08.14.17

Making a New Shotgun Firing Pin in 9 Photos

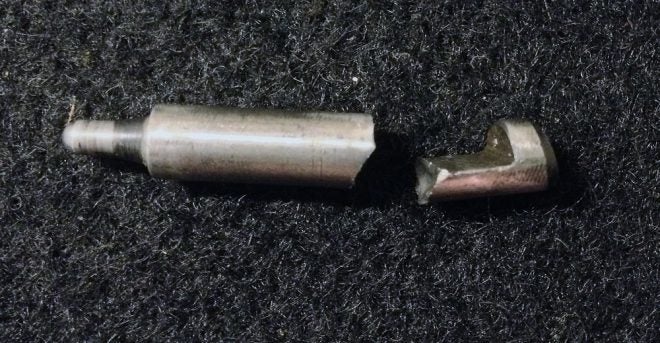
A while back, Dad’s old much-worn but treasured Browning Superposed shotgun gave me trouble at the skeet range. When I dug into it, I discovered the top firing pin had broken. After a lot of online searching, I found many firing pins available–all of them wrong for this gun. So I went to work and built one!

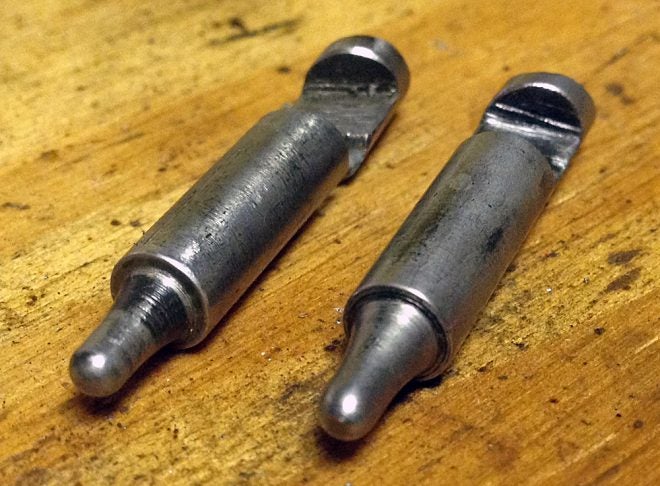
My first attempt (not pictured) turned out poorly, but served well as a model of what not to do.

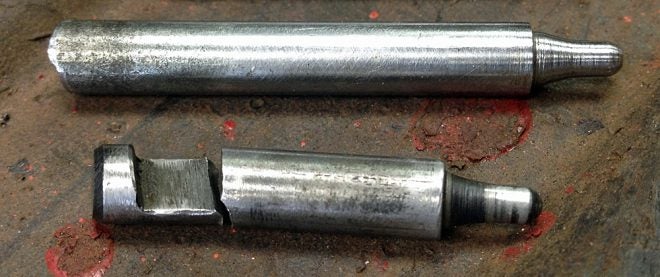
I removed the trigger guard and butt stock, and found part of the broken pin jammed down in front of one of the hammers. Un-good!

The arrow shows part of the broken firing pin blocking the hammer. I hate it when that happens! (Photo © Russ Chastain)

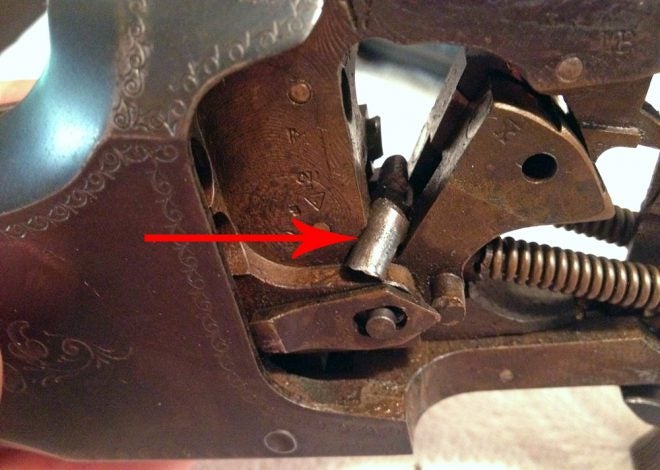
I definitely had a problem.

The broken firing pin. (Photo © Russ Chastain)
The broken firing pin.
(Photo © Russ Chastain)

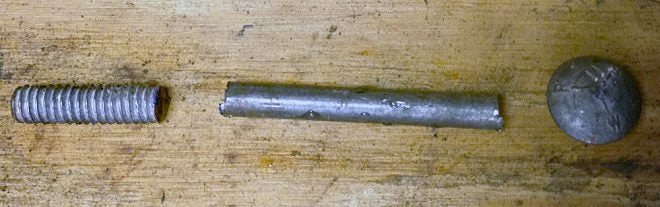
I hunted around the shop and decided to use the unthreaded portion of this 1/4″ bolt to make a new firing pin.

This bolt doesn't know it yet, but it's really a shotgun firing pin. (Photo © Russ Chastain)
This bolt doesn’t know it yet, but it’s really a shotgun firing pin.
(Photo © Russ Chastain)

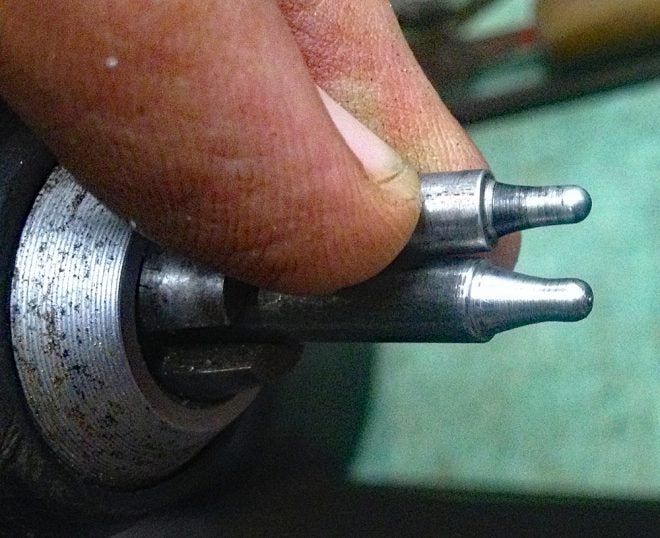
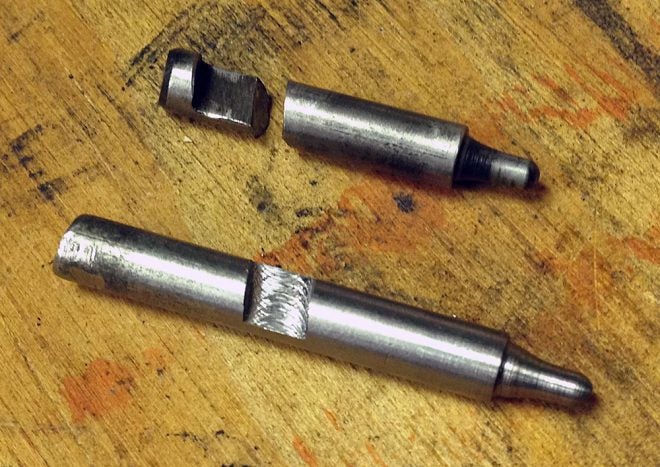
After I turned the bolt down to the correct diameter, I did most of the shaping by chucking it in a drill and using files to form it. Here you can see it taking shape, but still too large on the tip.

Starting to get there. (Photo © Russ Chastain)
Starting to get there.
(Photo © Russ Chastain)

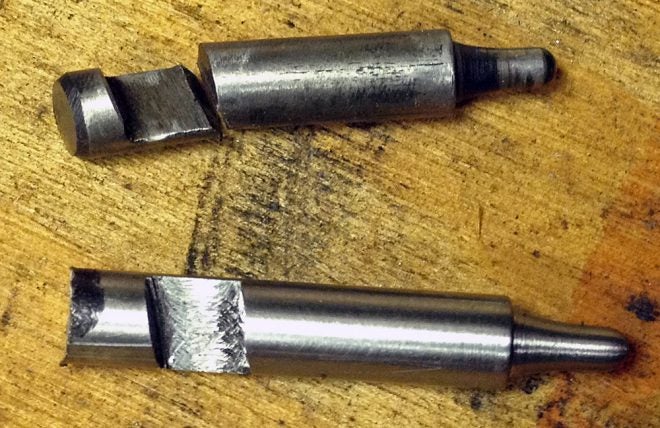
Once I had the tip shaped and sized correctly, I had to cut a notch into its side. This was easier said than done, because the notch is angled.

Tip complete; now for that angled notch. (Photo © Russ Chastain)

I ended up using a small milling machine to cut the notch. I would later fine-tune the notch using files.

Initial notch cut.
Initial notch cut.

Next, I needed to cut the pin to length. Forming the end was tricky, because the pin goes through the receiver at a compound angle (upwards and to the right) and the rear surface of the pin has to be square to the hammer face. And of course the pin had to be just the right length as well.

As always, I left it a bit long when I initially cut it off. (Photo © Russ Chastain)

After a lot of slow, careful fitting and filing, I tempered the pin. This was the final result.

Finished. New pin on left, old broken pin on right. (Photo © Russ Chastain)

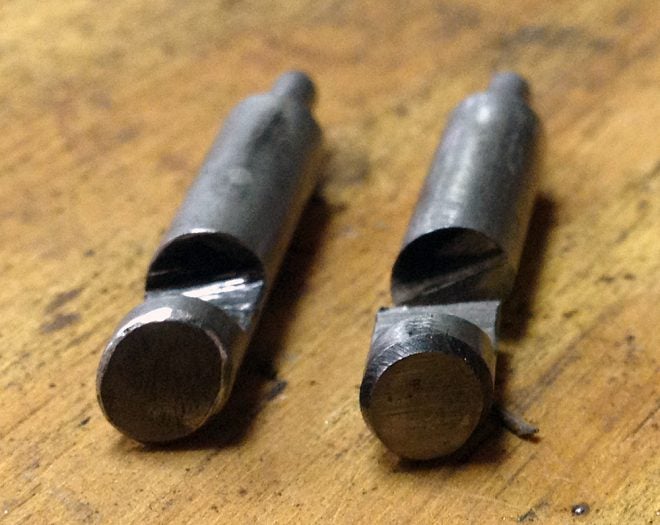
For tempering, I heated the pin red hot and quenched it in 30W oil. It’s been doing well for a couple of years now.

Homemade firing pin on the right, factory pin on the left. (Photo © Russ Chastain)

So next time you have a broken part but can’t find a replacement–and if, like me, you have more time than money–consider making what you need.

Avatar Author ID 61 - 1623757055

Editor & Contributing Writer Russ Chastain is a lifelong hunter and shooter who has spent his life learning about hunting, shooting, guns, ammunition, gunsmithing, reloading, and bullet casting. He started toting his own gun in the woods at age nine and he's pursued deer with rifles since 1982, so his hunting knowledge has been growing for more than three and a half decades. His desire and ability to share this knowledge with others has also grown, and Russ has been professionally writing and editing original hunting & shooting content since 1998. Russ Chastain has a passion for sharing accurate, honest, interesting hunting & shooting knowledge and stories with people of all skill levels.

Read More