24 Photos of Ruger 44 Carbine Disassembly, Cleaning, and Assembly
Russ Chastain 10.04.17

The Ruger Model 44 Carbine was the first long gun Bill Ruger ever put into production (yes, it came before the 10/22), and it was a great gun. Drawing on traits of previous designers’ creations, it was the epitome of a handy, useful medium-range (up to about 100 yards) gun for game including deer and hogs, and some would even say black bears. Initially called the Deerstalker, that moniker was removed after Ithaca sued Ruger. The 44 carbine was made until the early 1980s.
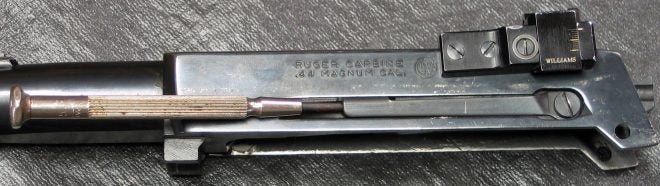
Officially known as the Model 44, I have never seen one with that name marked on it.
Oh, and these are NOT the same as Ruger’s later concoction which he named the Model 99/44 Deerfield Carbine, which is not nearly as good a gun in my opinion.
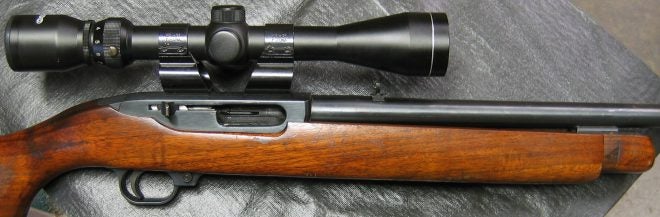
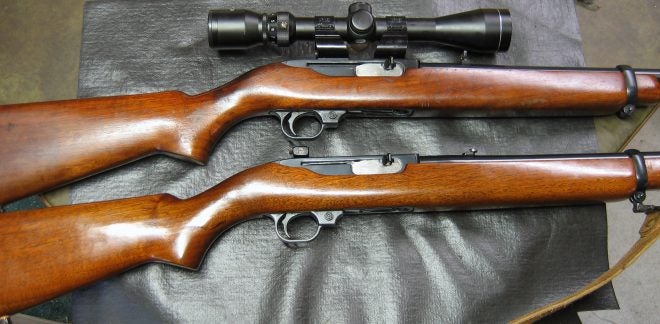
For the first two decades of my big game hunting, I hunted exclusively with the carbine on top in the above photo; between my father and me, we took 20+ deer and at least 7 hogs with 44 carbines over the years — and never lost a one.
While they are great little guns and are usually reliable, they do need the gas system cleaned out every few decades. This will tell you how to thoroughly clean your carbine in as simple language as I can manage.
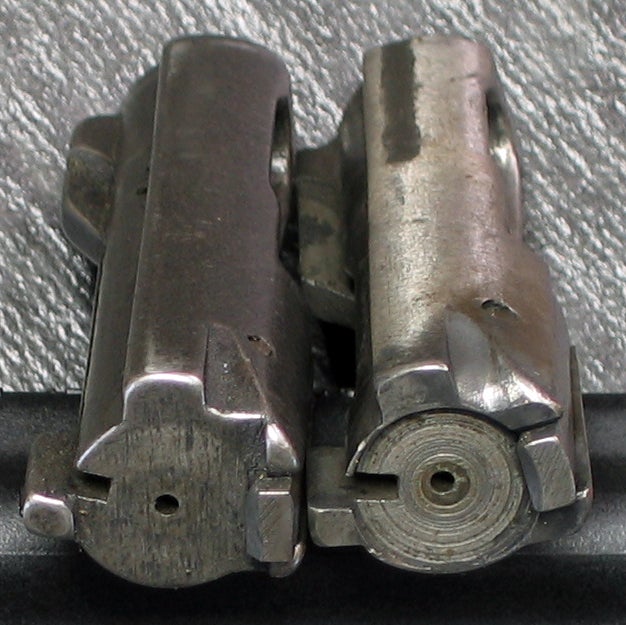
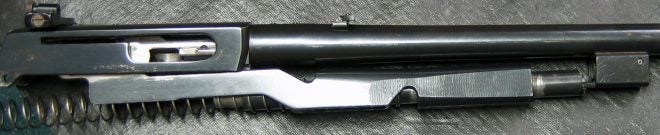
As we walk through the process, we will look at two rifles; one was made very early and the other, much later. There are some differences, and you do NOT want to mix-and-match parts between guns of different vintages if you can help it.
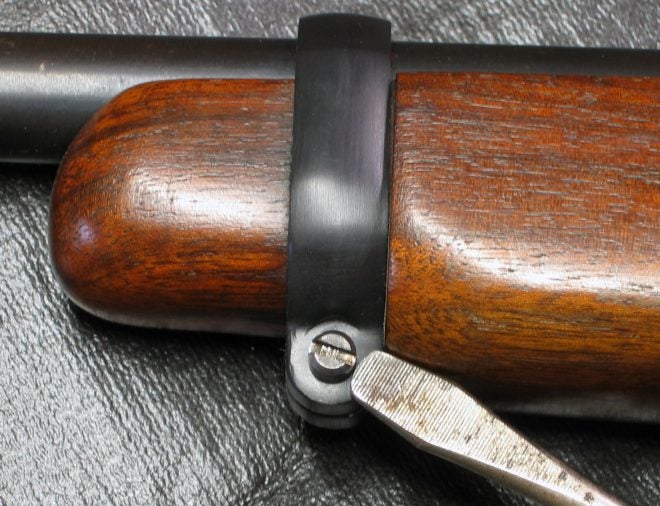
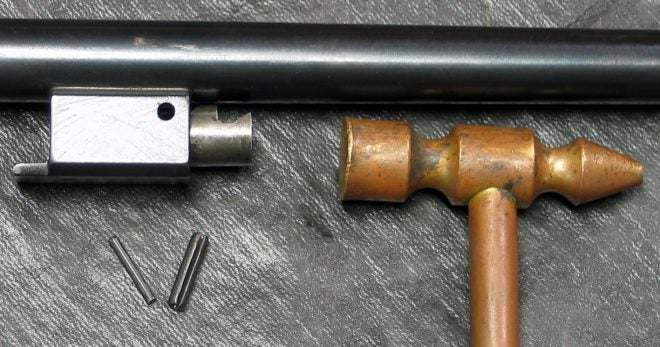
After making sure your carbine is unloaded, you’ll need to remove the barrel band. These were made using screws with coin-slotted screws; the screwdriver slot is curved and thick so you can supposedly remove it using a coin. Good idea on paper; not great in practice. You’ll do well to find an old cheap screwdriver and grind it to fit, as I’ve done above. Otherwise the screwdriver WILL slip and gouge your stock, the band, yourself, or all of the above.
Anyhow, loosen the screw and slide the band forward and off, but don’t remove the barrel & action from the stock until you read the next step.
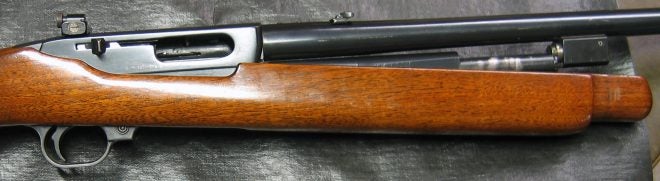
To remove the barreled action from the stock safely, pull the bolt to the rear and allow it to lock open. Next, lift the front of the barrel upward and allow the lug at rear of receiver to hinge up and out of the recoil block, which is a metal piece that stays attached to the stock.
There are some pins in the receiver which may now try to fall out, because they fit loosely, so watch out for that.
Normally, this is as far as you need to go for cleaning. But if you want to clean the gas system, keep reading.
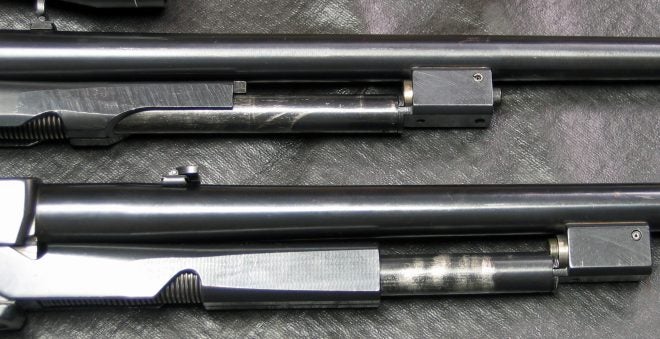
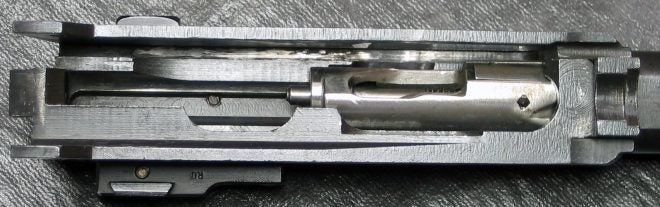
Both carbines in the photo above have their actions locked open; the one on top is the newer one.
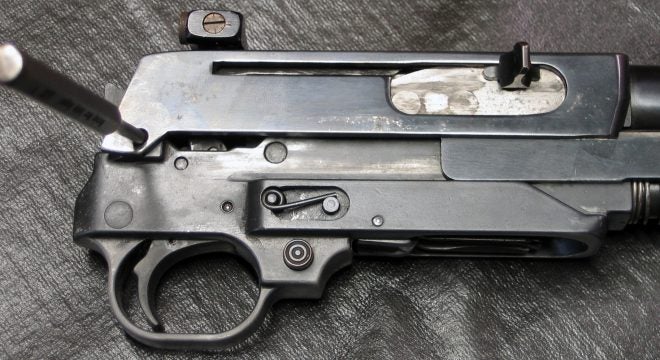
If you need to dig deeper — and if you are truly capable of it — proceed by removing the trigger assembly. Close the action SLOWLY (never let it slam except when chambering a round).
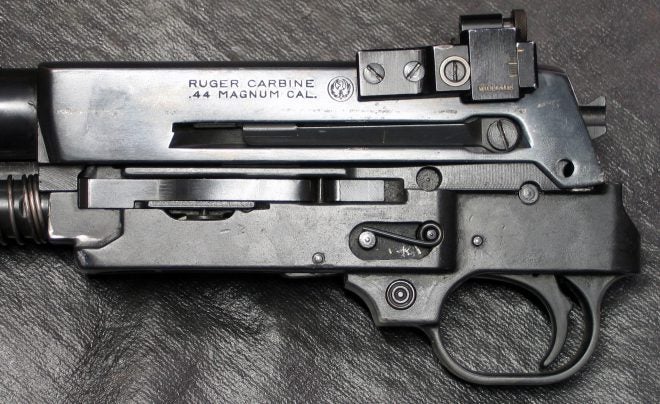
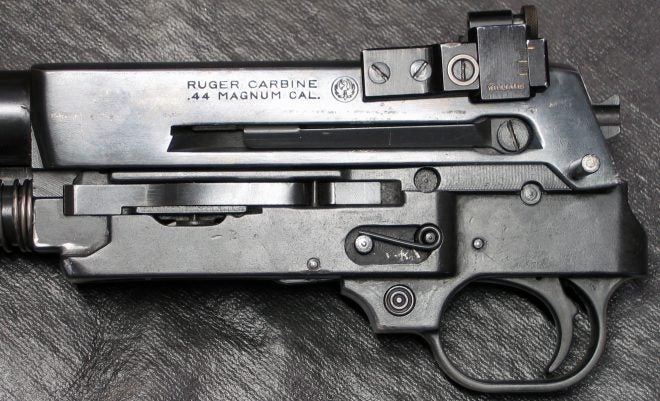
Ruger calls the bolt release a “lifter latch,” and it’s on the bottom of the receiver just in front of the trigger guard. Press it upward to release the bolt.
Place the safety in the “safe” position.
Push out the rear pin, as shown above, and move the assembly towards the back of the gun about 1/8″, then bring it down out of the receiver. Handle the action & barrel assembly carefully, so it doesn’t accidentally come apart.
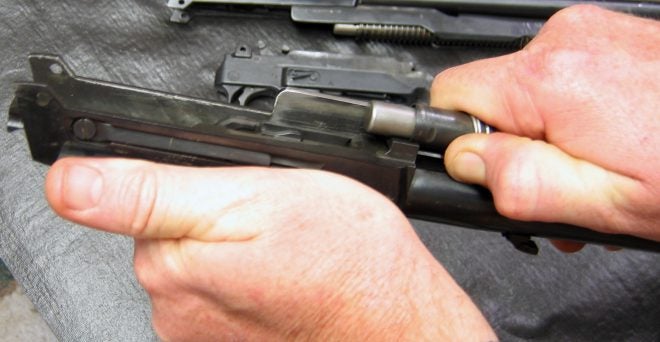
Ya know how easy it’s been so far? That’s about to change.
Turn the gun upside-down and compress the action spring so the spring’s tension is being restrained by your hand rather than by the shoulder at rear of receiver. While doing that, you’ll have to slide the slide towards the receiver about 1/4″ and lift its rear end out and off of the bolt; at this point the bolt handle ought to pretty much fall out (if it doesn’t, just use a punch and small hammer to persuade the bolt handle to come out).
The actions are in opposition; you have to pull the spring forward and then move the slide rearward. Tricky, but you can do it.
Keep the gun over a table while you do this, to catch all the parts that may fall out… like the gas piston, which is now free to fall out of the gas block/cylinder that’s on the bottom of the barrel.
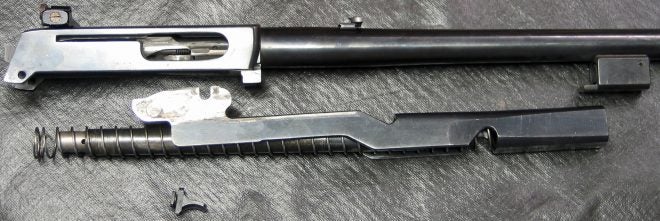
Your parts ought to look like this now.
There’s usually no reason to remove the ejector, but it’s in the way of removing the bolt. So I just used a little screwdriver to hold the spring-loaded rascal out of the way. If you can’t get the screwdriver started under it, use a tool to push it from the inside of the receiver.
Don’t go nuts here… too much can ruin the ejector. You just want to move it far enough to clear the bolt.
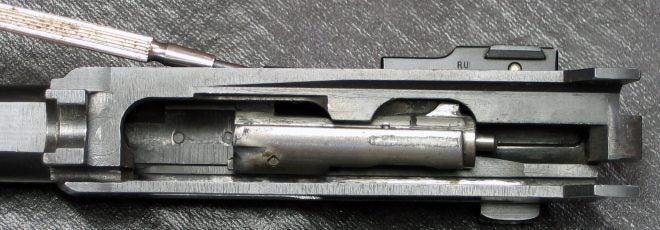
Flip the receiver upside-down. Rotate the bolt towards the ejection opening in the receiver and move it about halfway to the rear (as shown in the pic above). Now you can lift it out of the receiver.
To reassemble, reverse these steps. Oh, and don’t take the bolt apart.
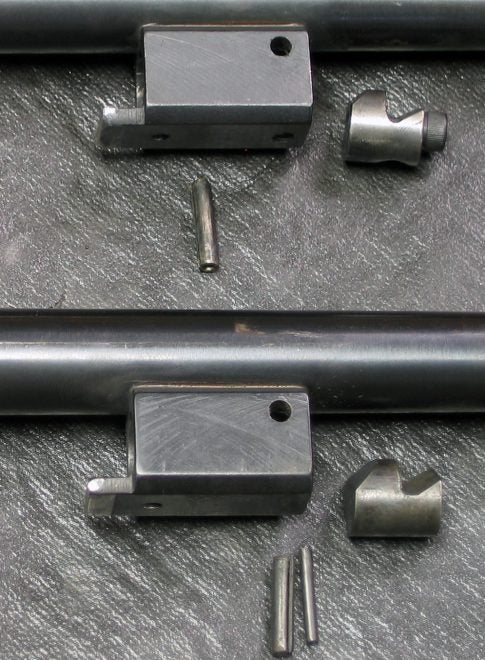
Just a pic to show the differences between the bolts from a newer (left) and older 44 carbine.
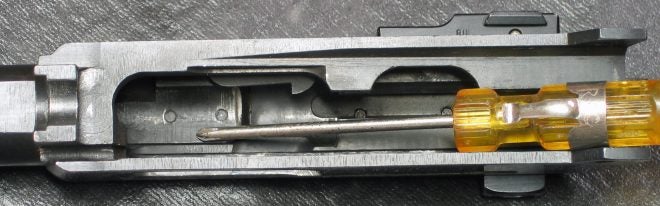
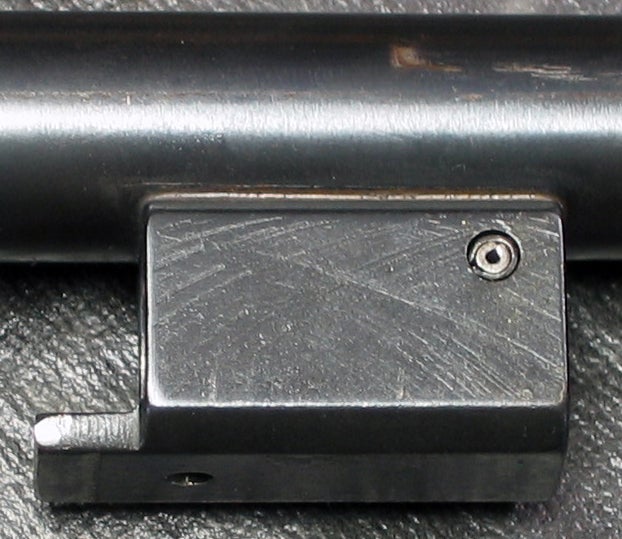
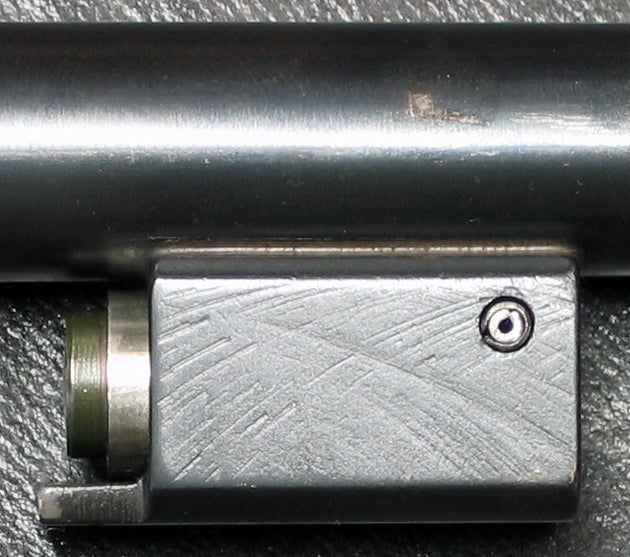
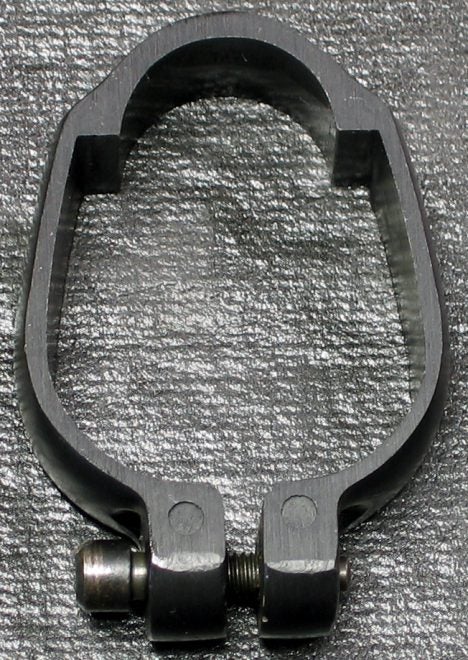
There’s a part — which the end of the screwdriver is resting on in the photo above — called the cartridge guide plate. If this is loose, you will have ammo feed problems.
It is not present on all 44 carbines, so don’t freak out if it’s not there… but if it is, make sure it’s good and tight. Two screws hold it in place; their heads can be accessed on top of the receiver.
If you have gone this far, you probably have feed problems. Often, this is caused by gunk here in the gas port and piston area.
The piston block plug is held in place by two roll pins, one inside the other. You can drive these out separately or as a unit; I tried it both ways and it didn’t really matter.
Now you can drive the plug out towards the front of the gun.
Clean all the black skank off of all these parts, including the piston (not shown) and the inside of that block that’s welded to the barrel.
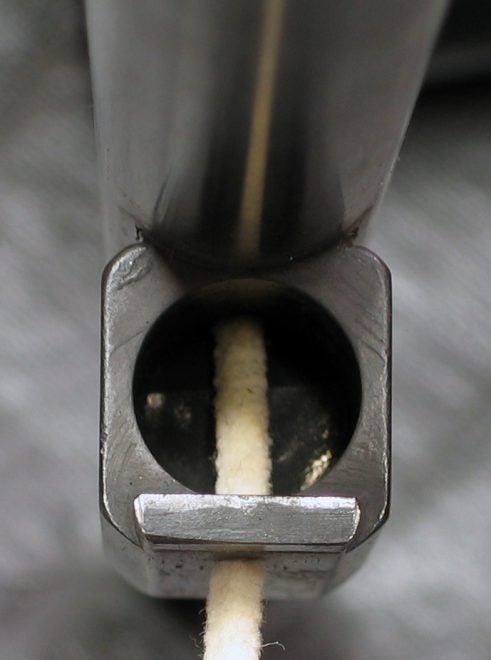
The gas port is an angled hole which was drilled through the steel block as well as the bottom of the barrel, so you can easily clean out the crud. I start with something like a wood toothpick (wood won’t scratch the steel) and follow up with pipe cleaners & solvent. Whatever it takes to get it clean without scratching things up.
Time to reinstall the piston block plug, which is probably a tight fit. Get it started, making sure it’s turned so the cutout will line up with the pin hole. Knock it on in using something softer than steel, such as this brass hammer or a block of wood, etc..
Drive the roll pins in from either side, tapered end first.
Once the plug is installed correctly, it should look like this.
This bolt is properly installed and ready for further assembly.
The gas piston is pretty small, but it’s vital; don’t forget to install it.
Of course you’ve cleaned the magazine, springs, and all related parts, and wiped them with an oily rag.
See photo above for the proper orientation of the mag tube to the barrel. Make sure the top of the mag tube goes towards the barrel; this is indicated by the plug at front end of mag tube. The slot is cut below center of that plug, so the largest part of the plug is the top, or barrel side.
Be sure your bolt handle is nearby.

First, place the slide into the receiver and install the bolt handle. Now, slip the magazine and action spring through the slide and into position on the gas cylinder block, compress the action spring, and lower the rear of the mag tube to the receiver, allowing the spring to engage with its spot at front of receiver — then install the trigger assembly.
You may wish to use a zip-tie near the rear of the mag tube to hold the spring compressed during assembly, then carefully cut it after the trigger group is in place.
This trigger group is almost in place, but not entirely. It must now be slid forward so the pin can be installed at the rear (see how the holes don’t line up?).
Be aware that the hammer must be cocked before installation. Do yourself a favor and put the safety on, too.
Pin installed but still protruding. We’re almost home!
Pull the bolt handle to the rear and allow the action to lock open. Make sure all the receiver pins are flush with the sides of the receiver, then hook the lug at rear of receiver into the recoil block and lower the front of the barrel towards the stock.
Next comes the barrel band. Don’t put it on backwards! The mold marks (those little circles molded into it) should be placed rearward, so they’re not visible after the band is installed.
Spread the band as you slide it home, so you don’t scratch your stock. And of course, tighten up the screw.
Done! Now you can hit the range with some ammo — these guns were designed to be used with 240-grain jacketed bullets — and try out your popper.
Happy hunting!
