Installing Sling Swivel Studs on a Gun Stock
Russ Chastain 10.20.20

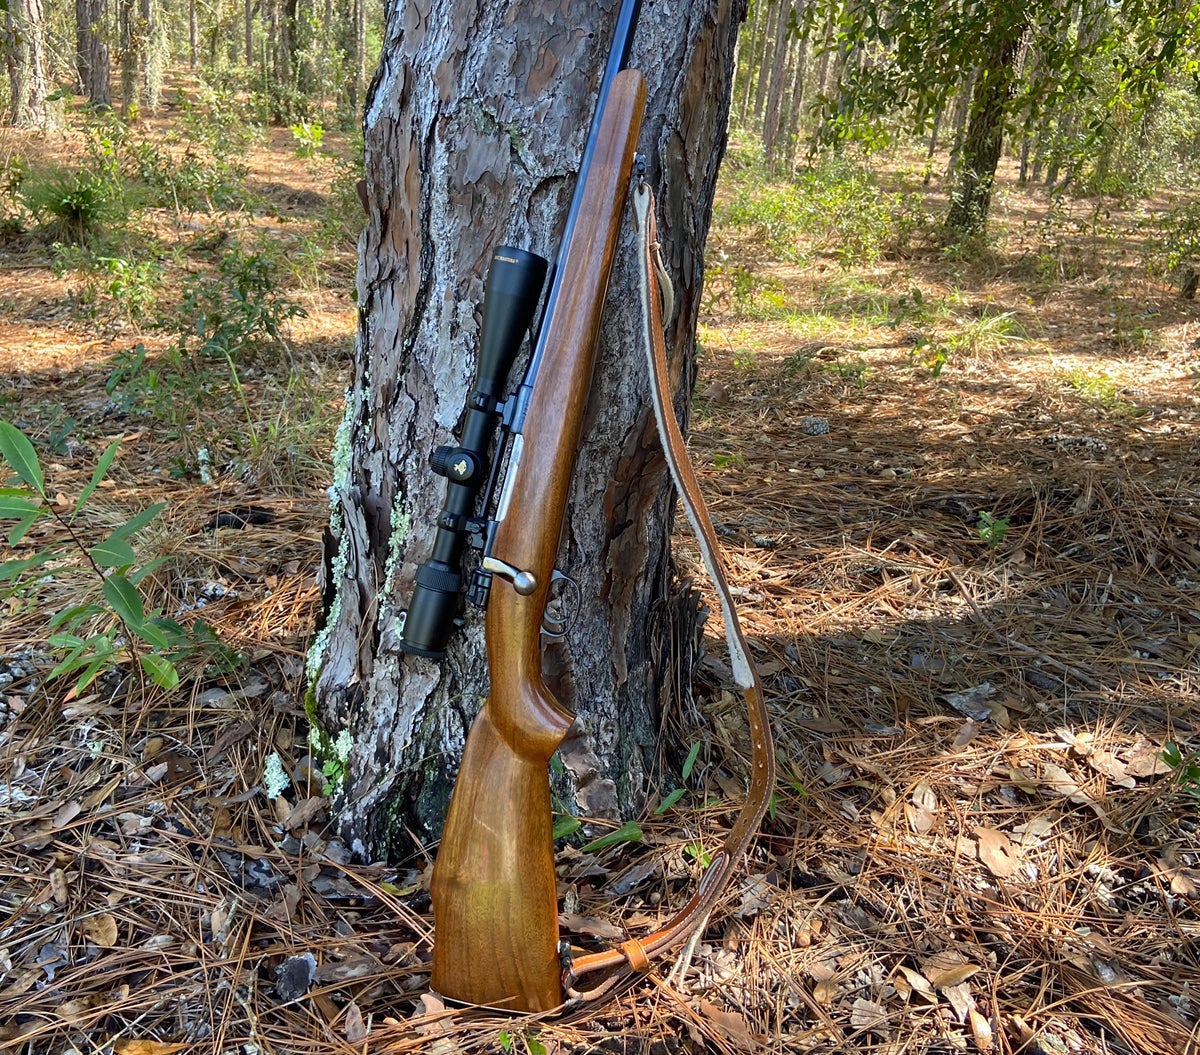
Dad’s old 30-06 “SpringMaus” is essentially a ’98 Mauser action with a barrel from an ’03 Springfield.
(Photo © Russ Chastain)
When it comes to hunting rifles, I tend to experience cycles of nostalgia; I will be happy for a few seasons toting the plain-and-basic 308 which has been dropping deer for years, but then I feel a need to carry something different for whatever reason. This happened last year, when I brought my late father’s custom ’98 Mauser out of retirement to make its first-ever whitetail deer kill.
Dad dubbed this rifle his “SpringMaus” because the 24″ barrel came from an ’03 Springfield rifle before being fitted to an action from a ’98 Mauser. Action made in Germany, rehabbed in Yugoslavia, then later used to build this rifle in the good ol’ USA. This thing has been around!
I enjoyed hunting with it last season and after it provided me with stellar accuracy with Sierra GameChanger ammo this year, I knew I needed to add some sling swivel studs to help me tote its nine-and-a-quarter-pounds (unloaded) through the boonies. I am usually a DIY guy, so I chose that route — for better or worse. And in the end, I got a little of both.
(Photo © Russ Chastain)
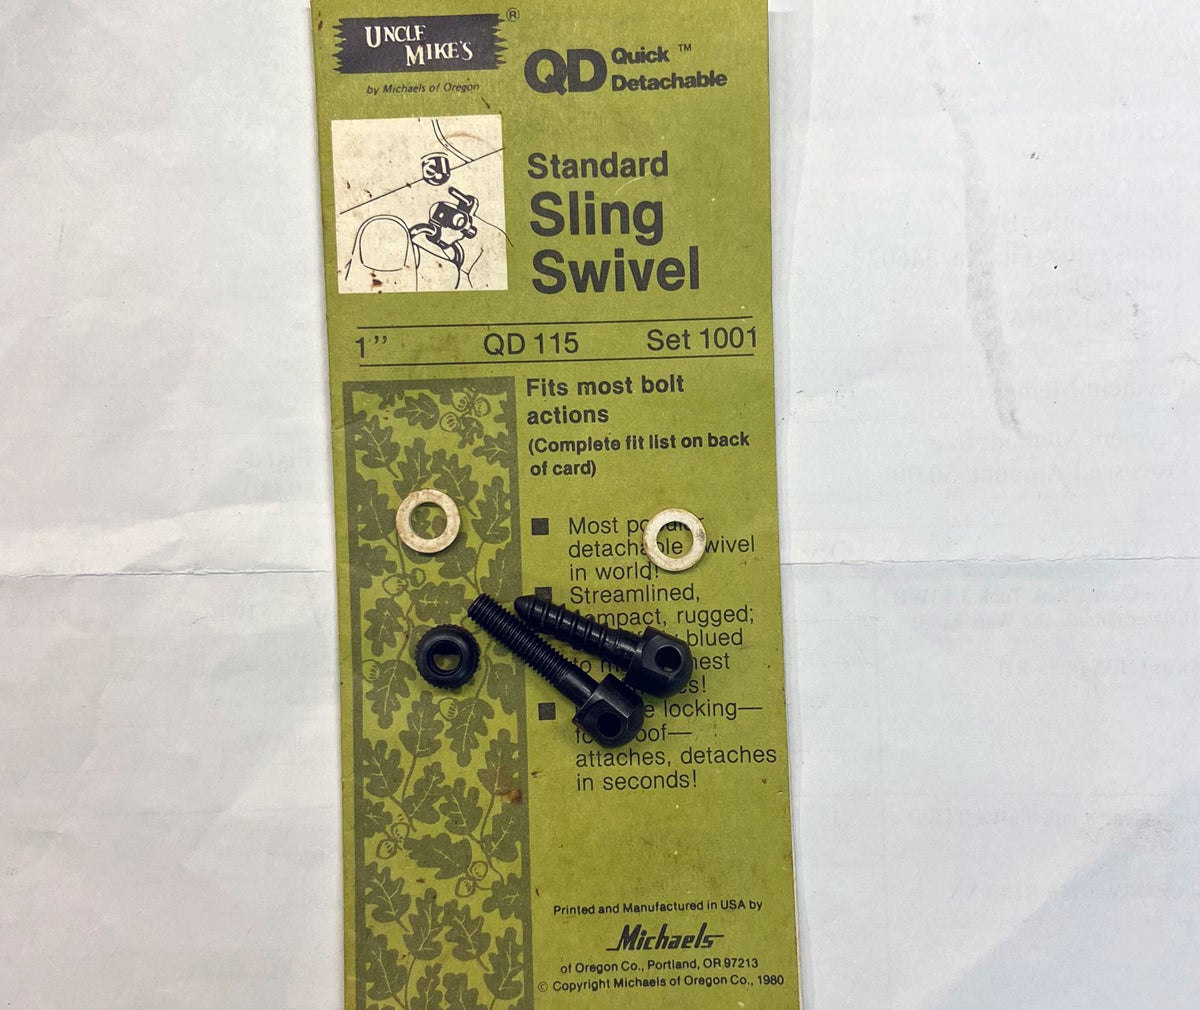
I had an old set from Uncle Mike’s, who back in the day pretty much led the way when it came to detachable sling swivels, at least as far as I could tell. To give you an idea of the age of this set, the copyright date on the paper is 1980. Chances are good Dad bought these for this rifle and never installed them. 40-ish years later, the time had come.
I started by making sure the gun was empty, then removed the barreled action from the stock.
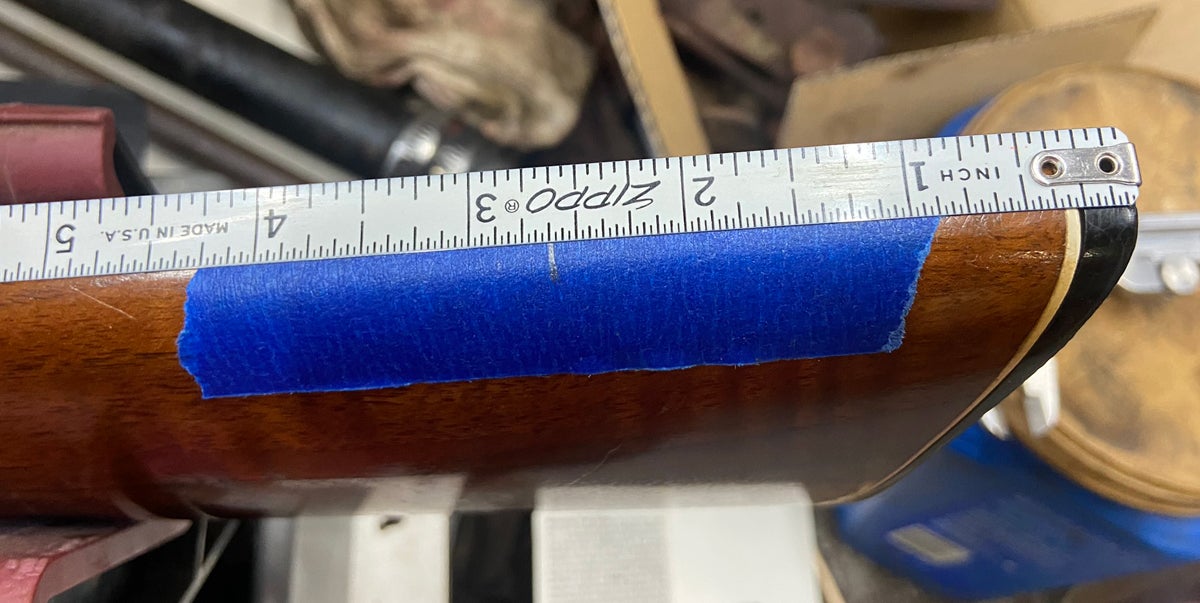
To locate the rear stud, I compared several of my factory rifle stocks. I even consulted the instructions in the kit, believe it or not. Those said to place the rear stud 2.5-3 inches forward of the toe, which more or less matches up with the factory stocks I checked. I decided on 2-5/8″ as a good number, and marked it on some masking tape I’d placed on the stock.
(Photo © Russ Chastain)
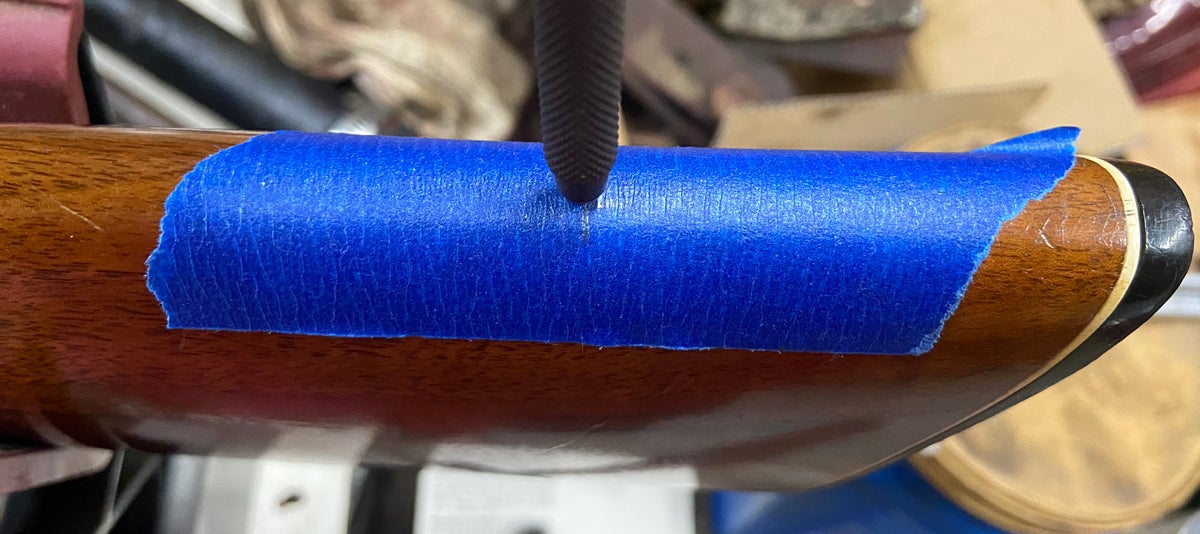
I used a center punch to lightly mark the center of the hole.
(Photo © Russ Chastain)
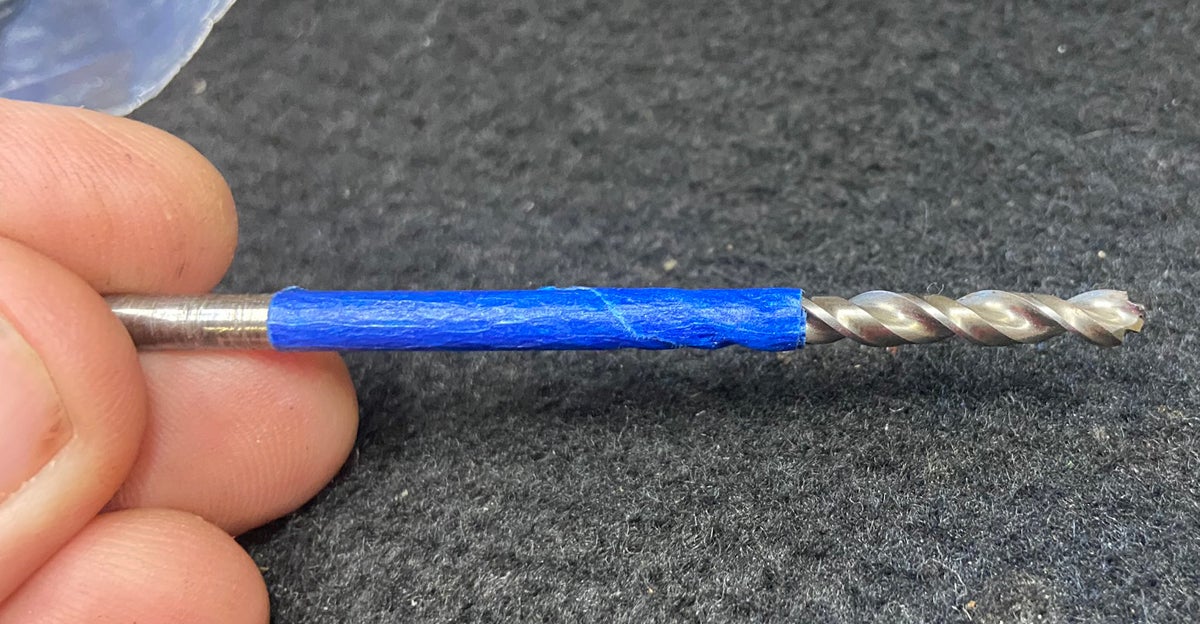
I needed a 5/32″ hole 7/8″-1″ deep, so I put some tape on the bit to tell me when to stop drilling. Once that hole was complete, I used a 7/32″ bit to countersink the hole about 3/16″.
(Photo © Russ Chastain)
I lubricated the stud’s wood screw threads with silicone lube because I didn’t feel like digging up any paraffin wax or a bar of soap, then screwed it in using a pin punch as a wrench. NEVER use a sling swivel for this, because you could easily break the swivel — and it doesn’t give you much leverage anyhow.
(Photo © Russ Chastain)
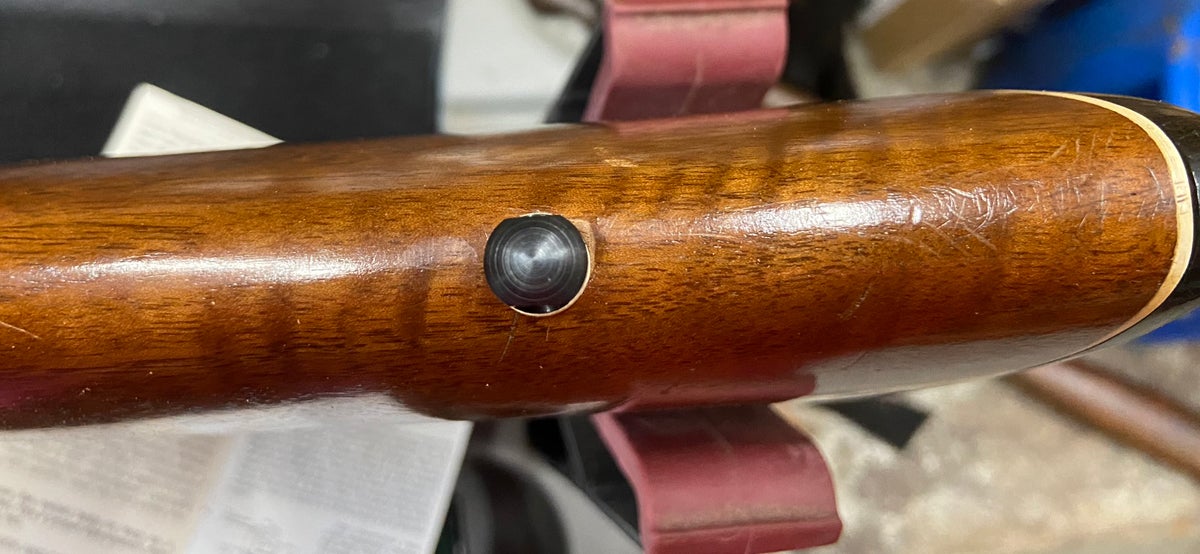
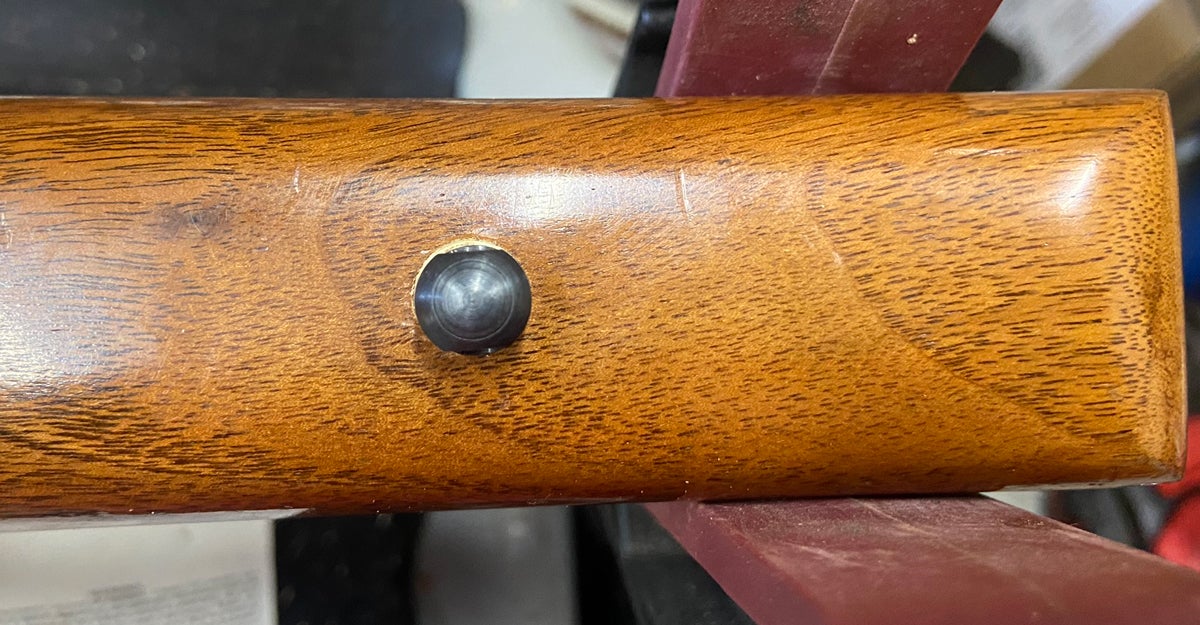
I really should have used a drill press to keep the drill bit from “walking” as the hole was started, but I didn’t; I just eyeballed it. Therefore, it was drilled a bit off-center. It looks pretty good from the one side.
(Photo © Russ Chastain)
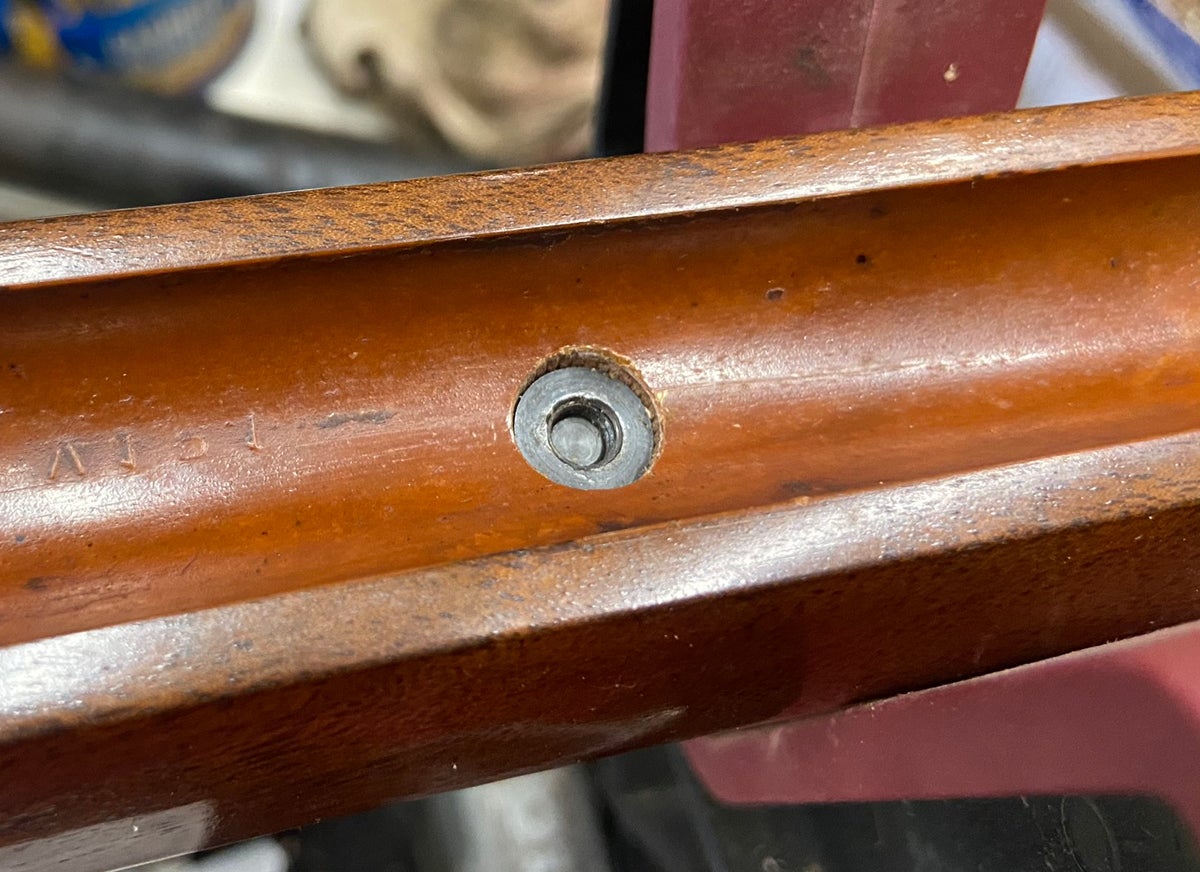
From below, its easy to see it’s off-center, and some unsealed wood is visible where I flattened the wood slightly for the base of the stud using a file. I’ll clean that up later on and seal the wood with Tru-Oil, but since I’m days away from a deer hunt with a lot of stuff on my plate, I’m going to just use it like this for now.
(Photo © Russ Chastain)
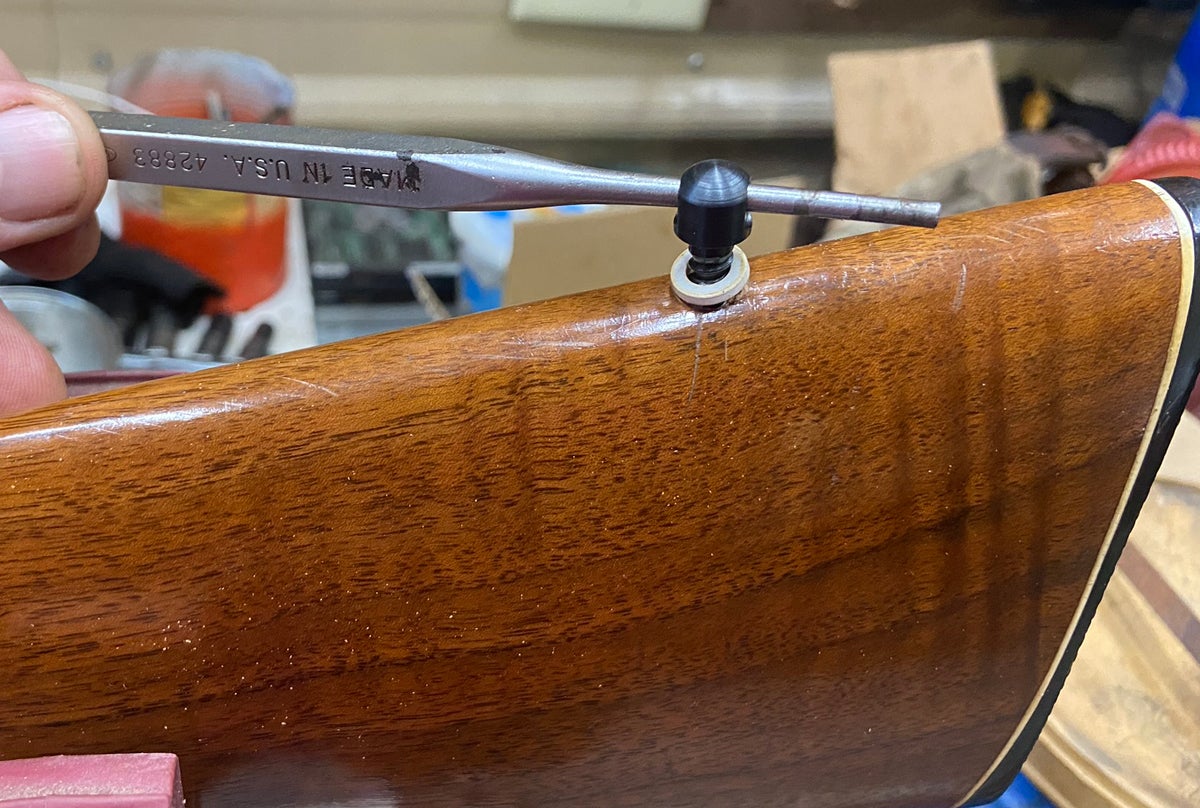
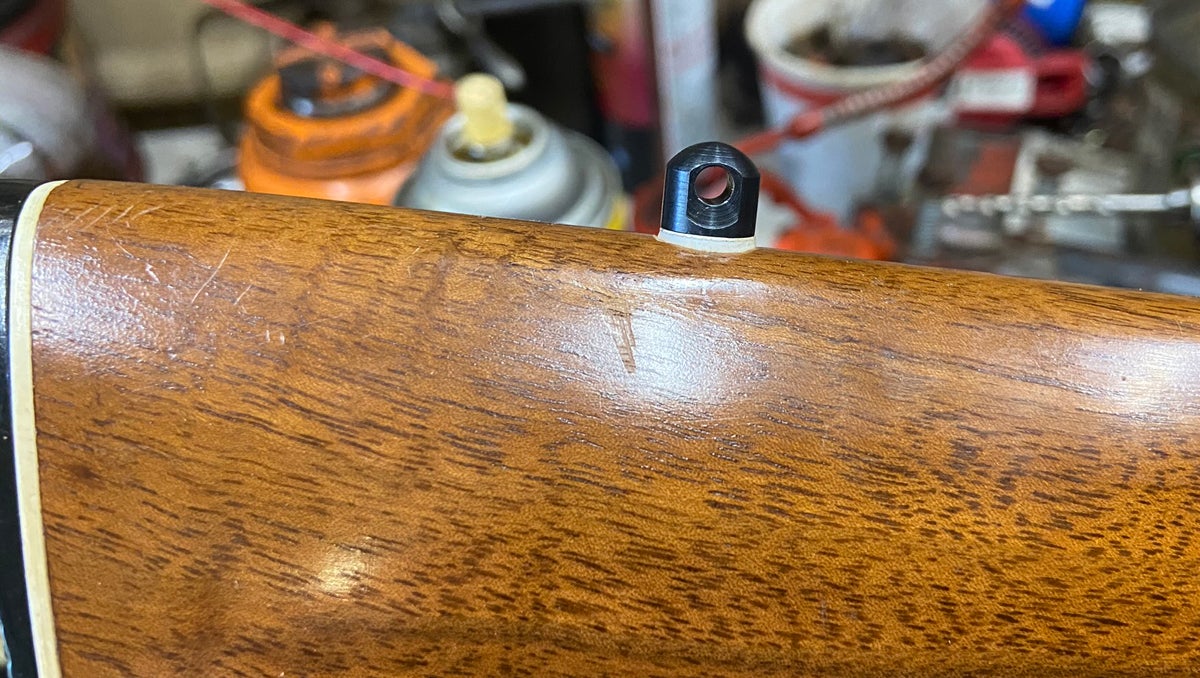
The front sling swivel stud is a through-bolt rather than a wood screw, so you must drill a hole clean through the stock, then enlarge the hole on the top (barrel) side of the stock to give the nut somewhere to be — making sure neither nut nor stud can touch the barrel.
I put mine about 2-1/2″ from the forend tip, which matches factory stocks I have and places it about 15-16 inches forward of the trigger; the instructions say it should be between 13 and 17 inches from the trigger so I called this good, marked it on tape as I did the rear one, and drilled through the stock with a 3/16″ drill bit from the outside (bottom) of the stock.
Then I flipped the stock and used a 23/64″ drill bit to drill out a place for the knurled nut. I did this slow and easy and checked many times, because I didn’t want to drill too deeply.
Then I put the stud through the stock from the bottom, pressed the nut into the stock from above, and threaded the two together. Tightening the stud with the same pin punch drew the nut down into the hole nice and snug — and well away from the barrel.
(Photo © Russ Chastain)
(Photo © Russ Chastain)

(Photo © Russ Chastain)
If perfection is important, most folks shouldn’t install their own sling studs. And a professional would certainly do a better job on the rear stud than I did. But it’s done now, and I don’t mind it being a little off-center.
(Photo © Russ Chastain)
For now, it’s enough for me that I can put a sling on this fine old rifle to help me out when I wander off to the woods in search of game.
Happy hunting!
