DIY: Building your 1st Fishing Bait Pen on a Budget
Eugene L. 05.13.22

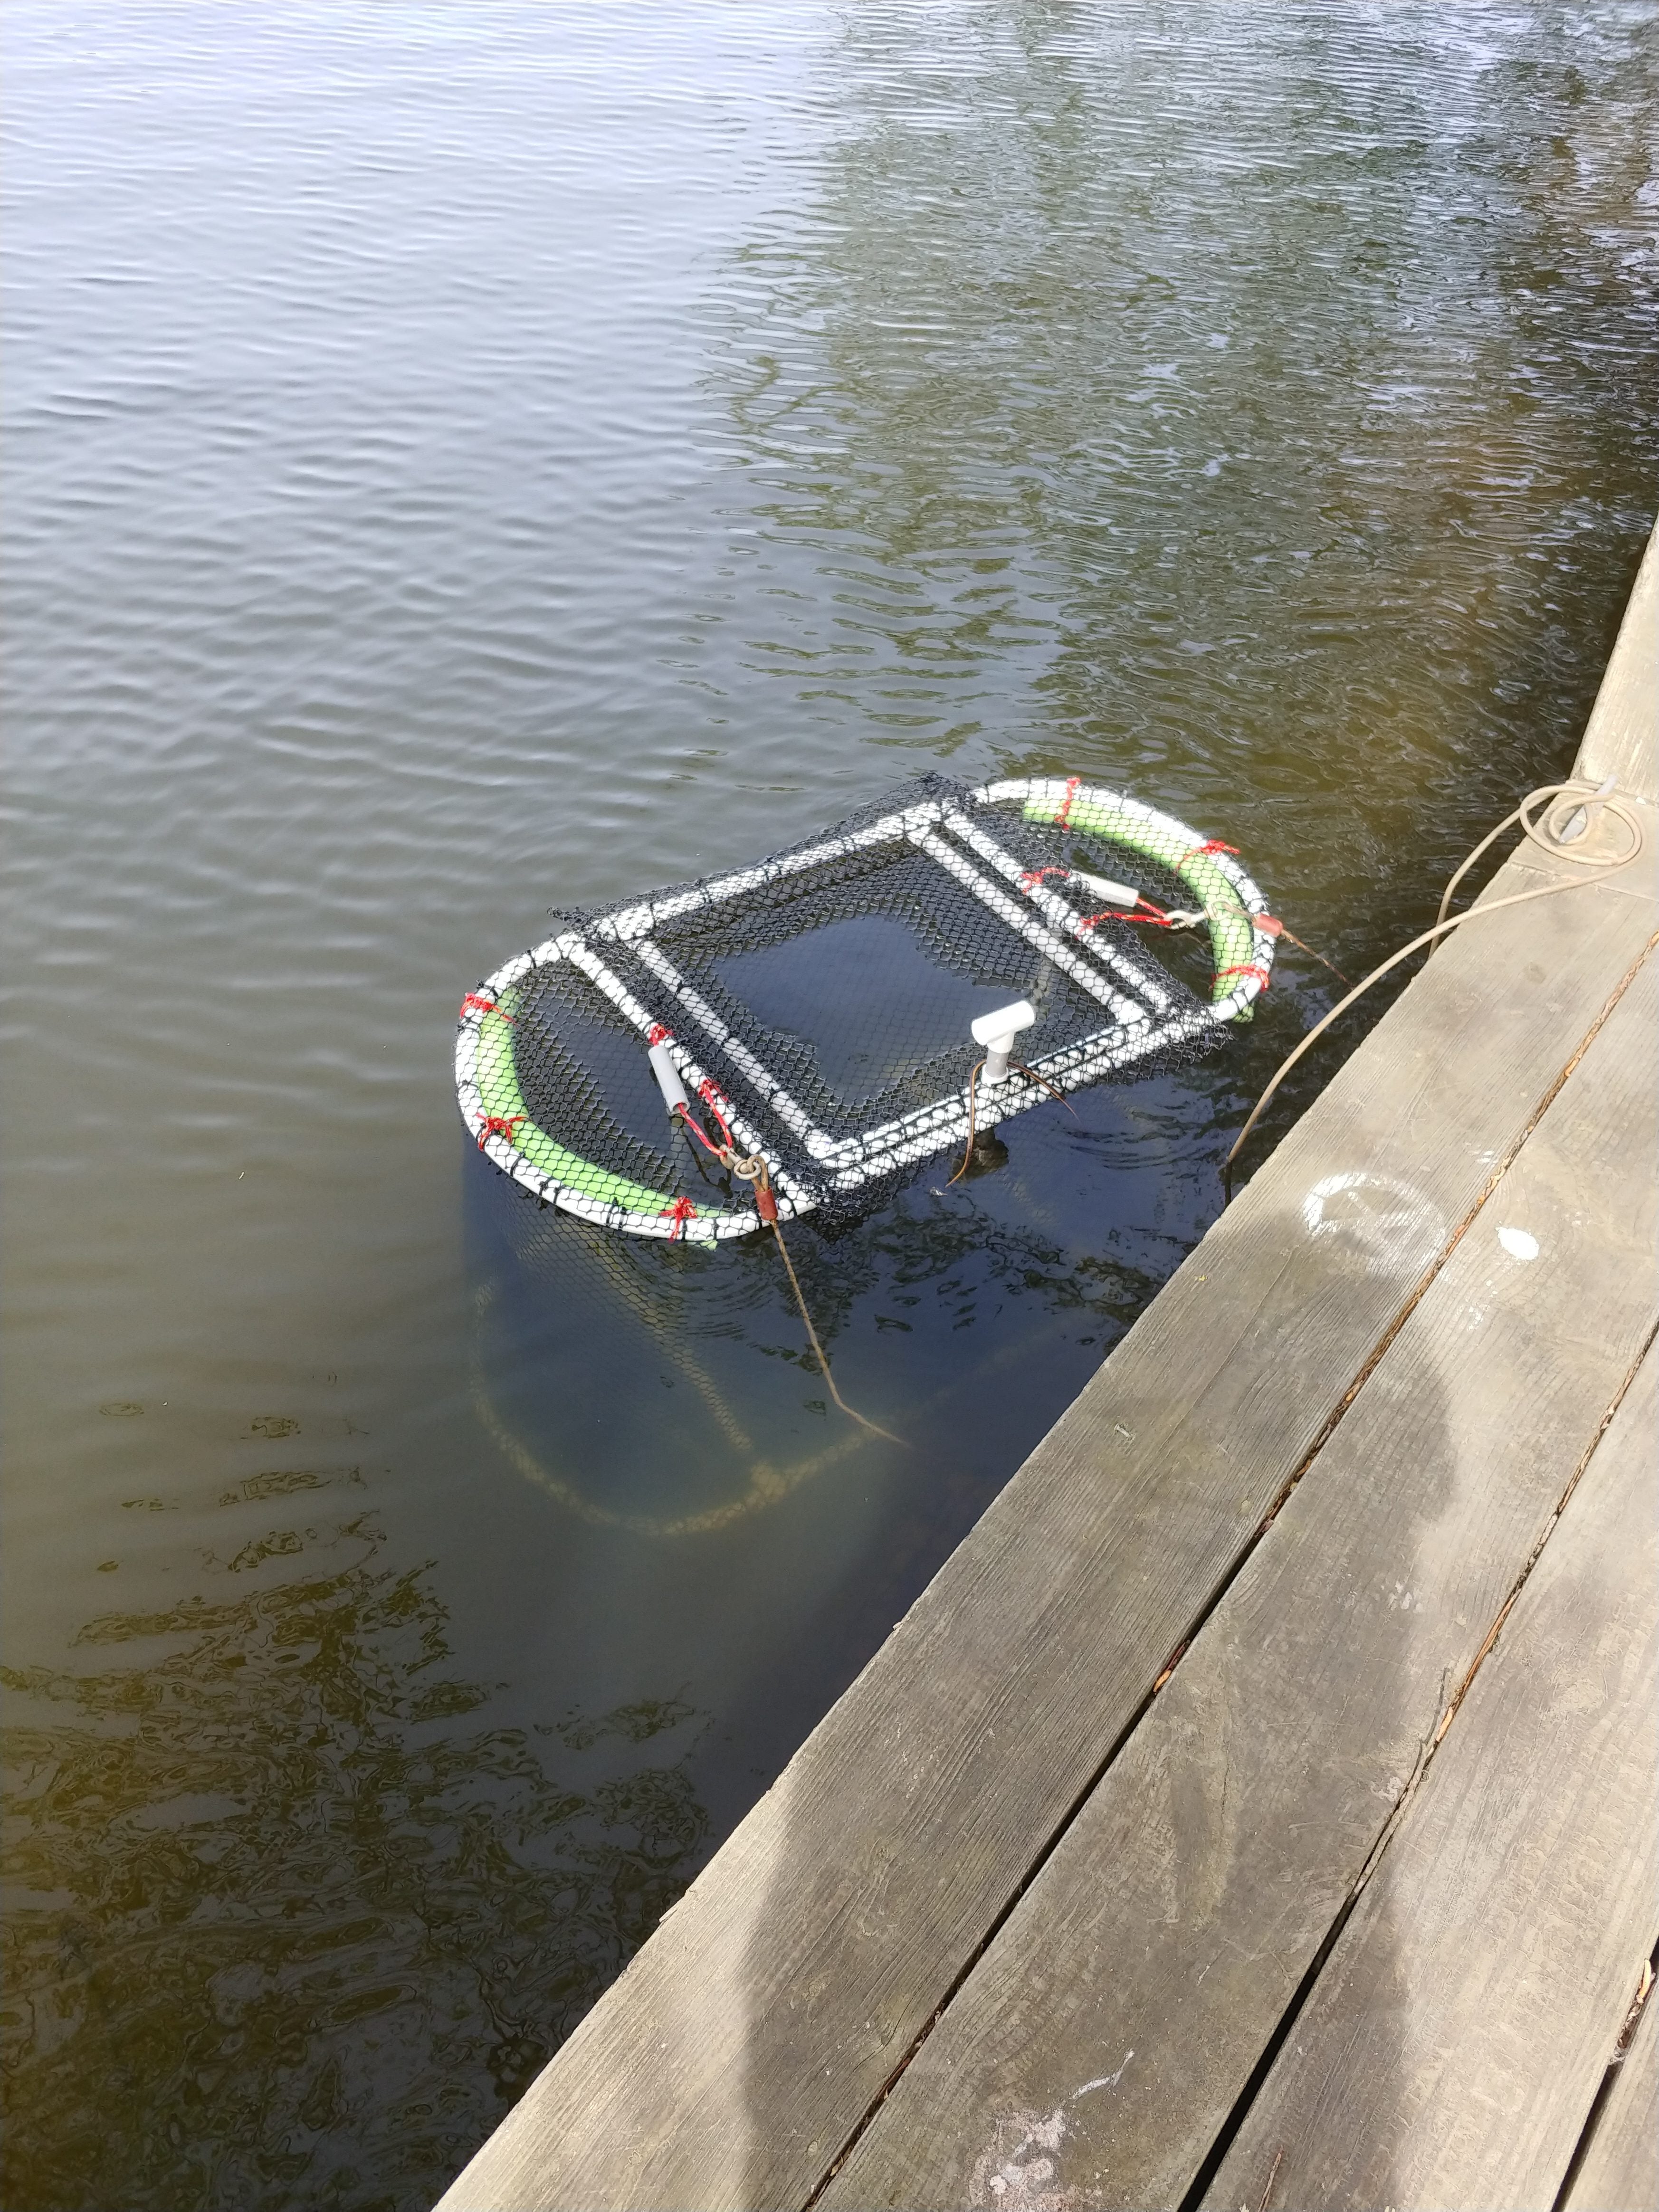
A bait pen and fish cage are a great tool to have when you have permanent access to a dock. Being able to catch then store bait ahead of time before a fishing trip can mean you’re the first boat on a spot utilizing the whole day to catch your target, but the thing about these pens is the ones they sell at the store are expensive. Large commercially available bait pens usually start at around $300.
You can make your own for much cheaper, the whole project should cost at least 2/3 less than buying one. It’ll take a little work, but this is an easy project for a bad weather day when you can’t go out on the water. This project requires no expensive power tools, just a heat gun, shears or snips, and a PVC pipe cutter. If you don’t have a PVC pipe cutter, a saw works, but it’ll be messier and more work. The materials you need for this exact configuration
- 4 – 10ft long 3/4″ PVC pipes
- 14 – 3/4″ Tee Connectors
- 2 – 3/4″ 90″ Elbow Connectors
- 2 – 1″ to 3/4″ Reducing Tee Connectors
- 3ft x 25ft 3/4″mesh plastic poultry mesh
- minimum 50 zip ties
- synthetic rope cordage
- 1 pool noodle
For the PVC pipe, you want to cut it into these lengths
- 6pc – 2ft
- 4pc – 3.5ft
- 10pc – 1ft
- 2pc – 2ft 10in
- 3pc – 6in
Once you have all these pieces cut out you can start the assembly of the frame. Start with the center square of the frame, 2 – 2ft PVC pieces, 4 – 1ft PVC pieces, and 6 – 3/4″ Tee- Connectors.
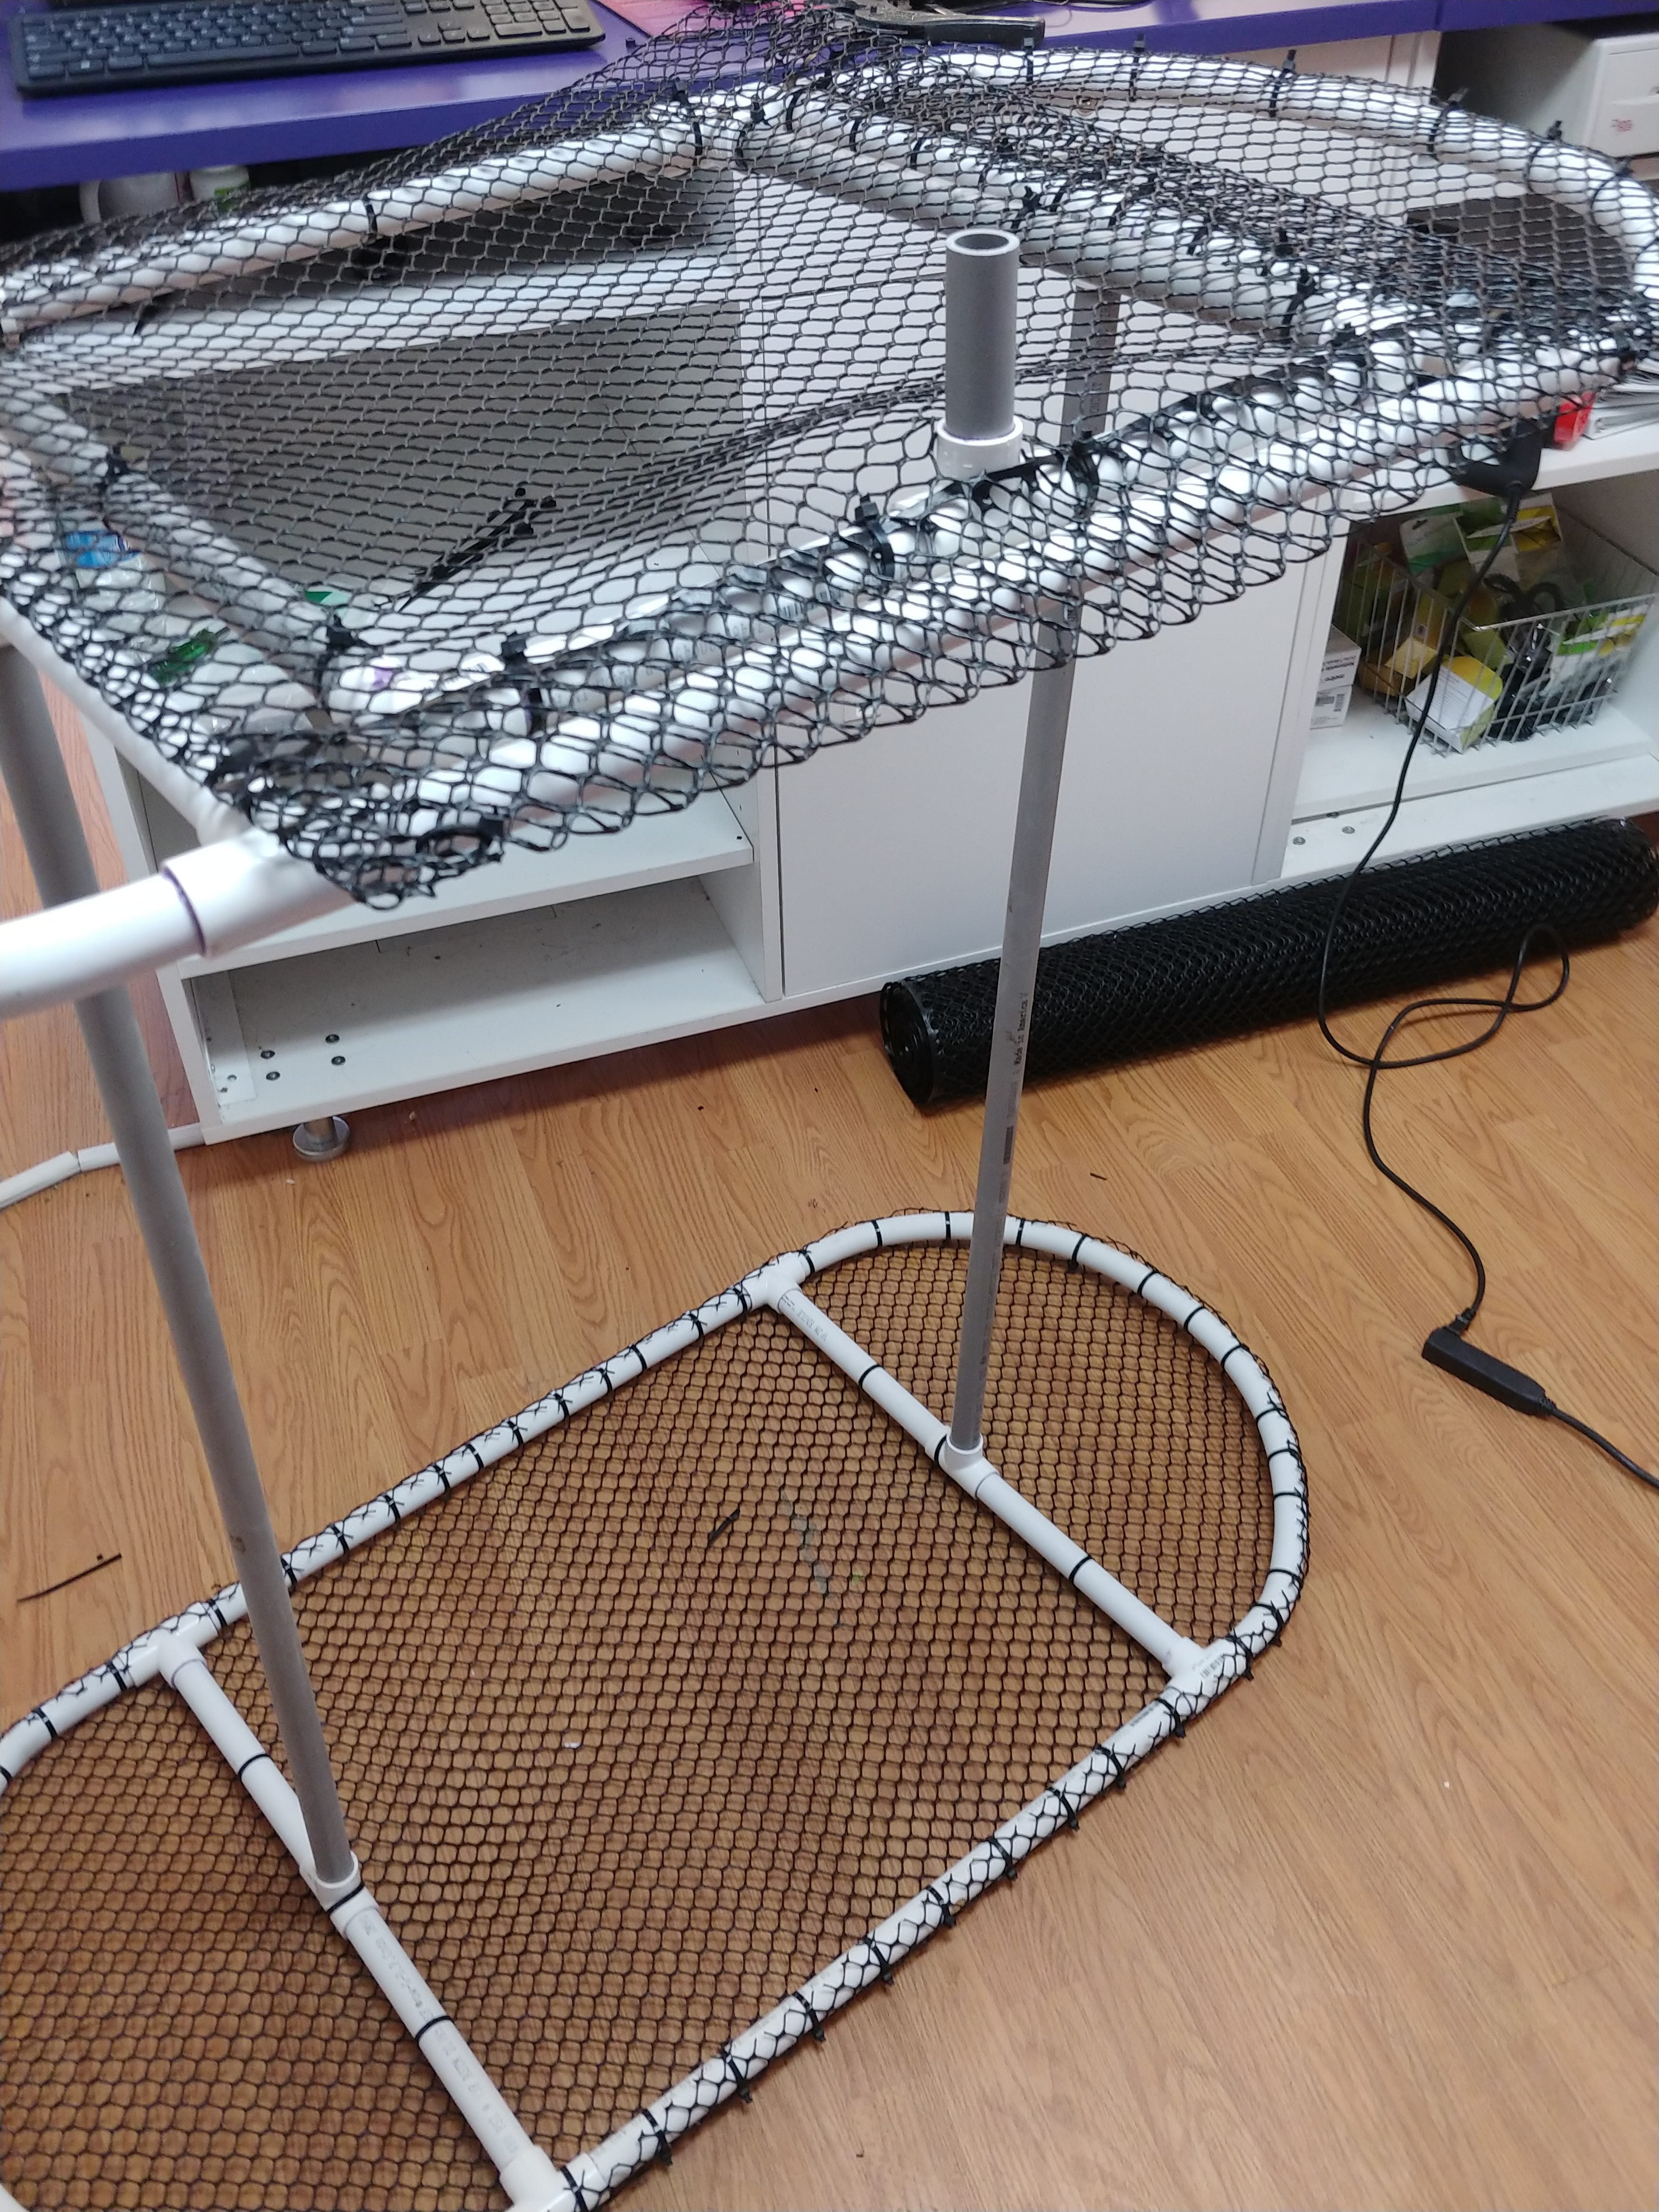
For the lid side, there will be a slight adjustment when assembling. You will need an additional 2 – 2ft PVC pieces, 2 – 1ft PVC pieces, 1 – 6inch PVC pieces, 2 – 90 degree 3/4″ elbows. 2 – 3/4″ Tee-Connectors, and 2 – 1″ to 3/4″ Reducing Tee Connectors.
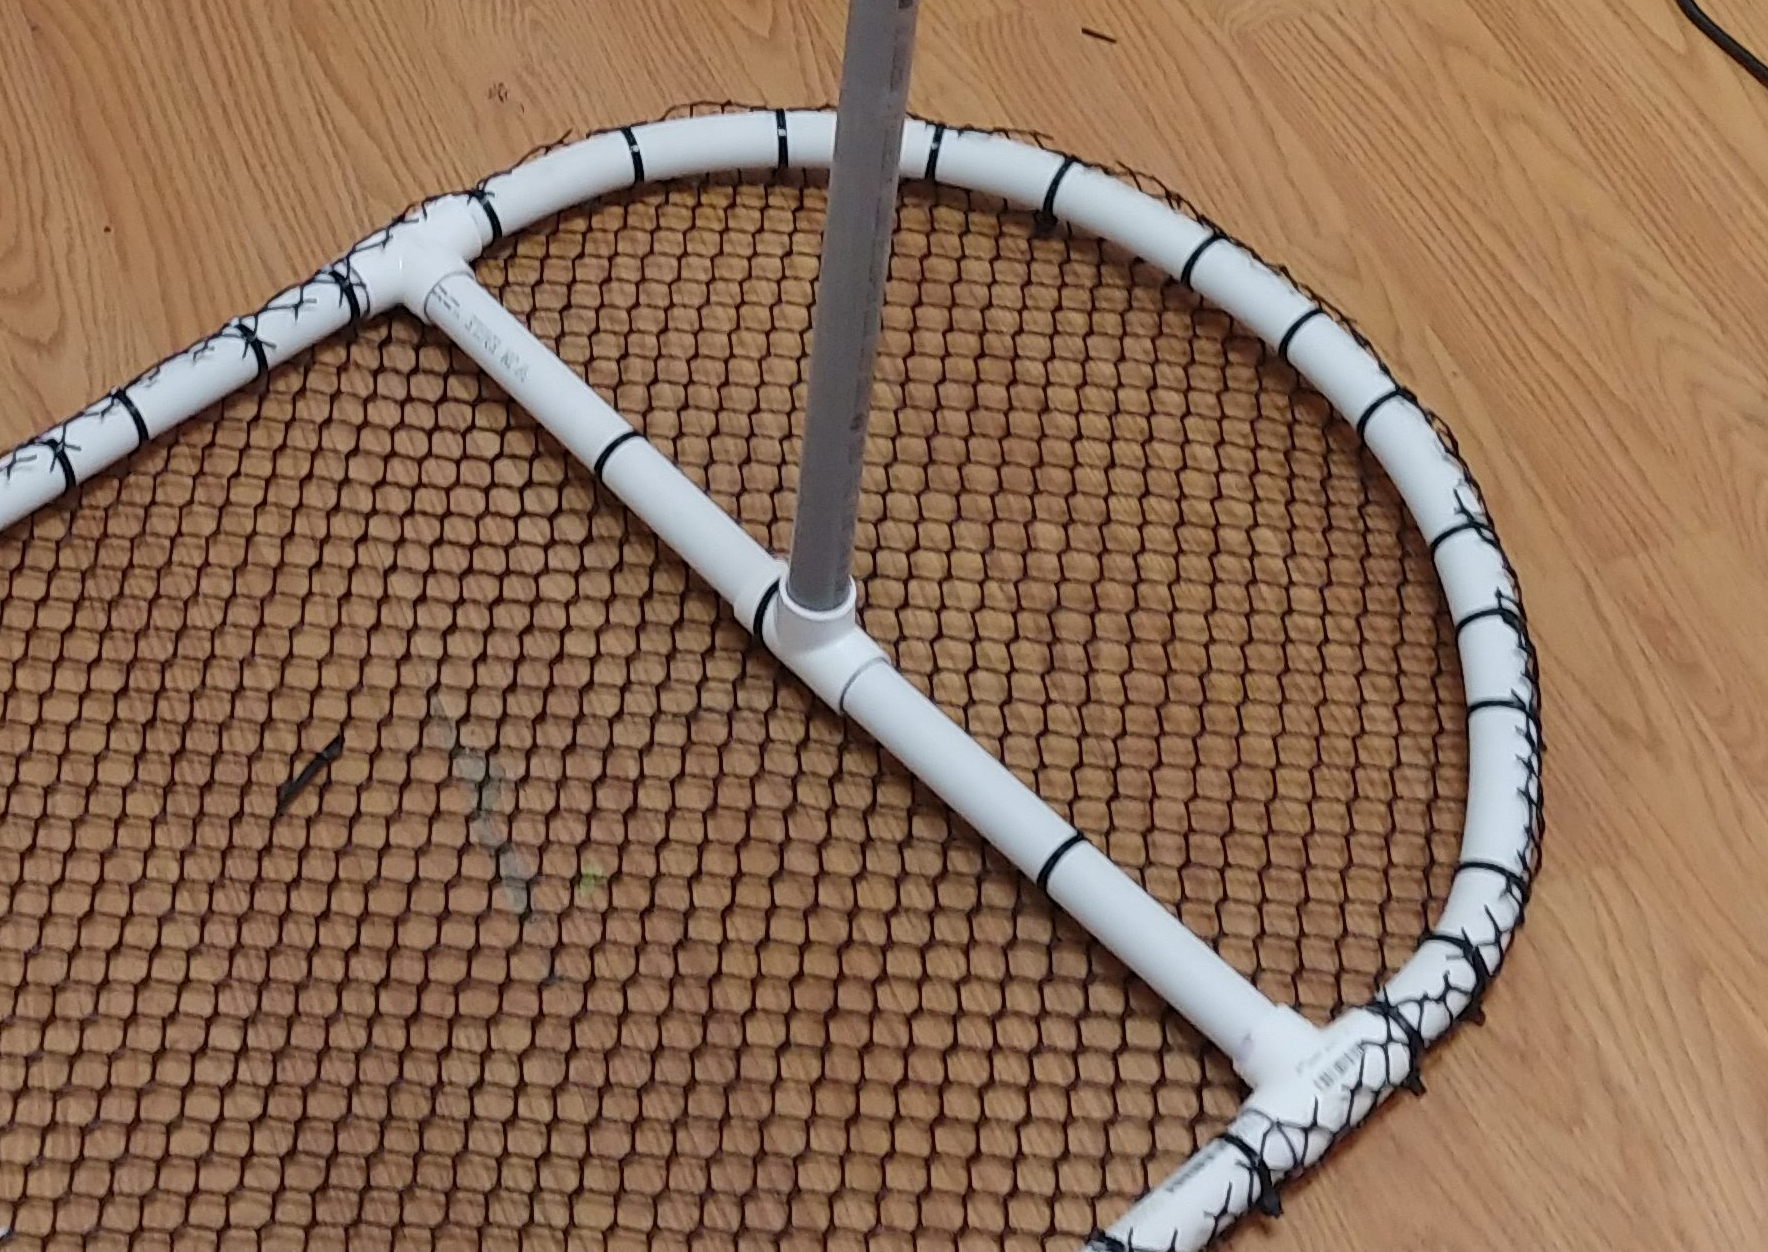
Start by connecting 2 of the 1ft piece together with a Tee connector in the center, and then attach a Tee connector to each end. Use the picture for reference
Then, attach both assemblies together on both sides with a 2ft PVC piece to make a big square of PVC pipe. Then, using the heat gun gently heat a 3.5ft piece of PVC pipe and curve it and attach it to the square of PVC. Once you do this for both sides of the square you now have the bottom side of the bait pen done.
The top side of the bait pen assembly is pretty much the same except for one thing, you need to add the lid to that side. So, assemble it the same as before except don’t connect one side of the center square till the end. Preassemble the bait pen lid, out of 2 pieces of 2ft PVC, 2 elbow connectors, 1 3/4″ tee connector, and the two 1″ to 3/4″ reducing Tee connectors. You are making a U shape with the two reducing Tee connectors are the ends, these two 1″ connectors can fit the 3/4″ pipe through them. This will act as your thing for the bait pen lid. The single 3/4″ tee connector will have your lid handle attached to it.
Now both sides of the frame are done attach them to each other with the two 2′ 10″ pieces of pipe using the center tee connectors in the squares. Once everything has been pressure fit together once, and all adjustments are made you can use PVC glue to permanently attach everything. Or not it’s a personal preference, but a glued bait pen will hold up longer than a pressure fit one.
The very final step for the frame is to put a couple of holes in it to let the air out so the pen sinks. You can use an electric drill or if you don’t have one available a nail heated up with a lighter or the heat gun works too. Doesn’t matter what you use to make them, just make sure the bait pen frame has a couple of holes on both sides.
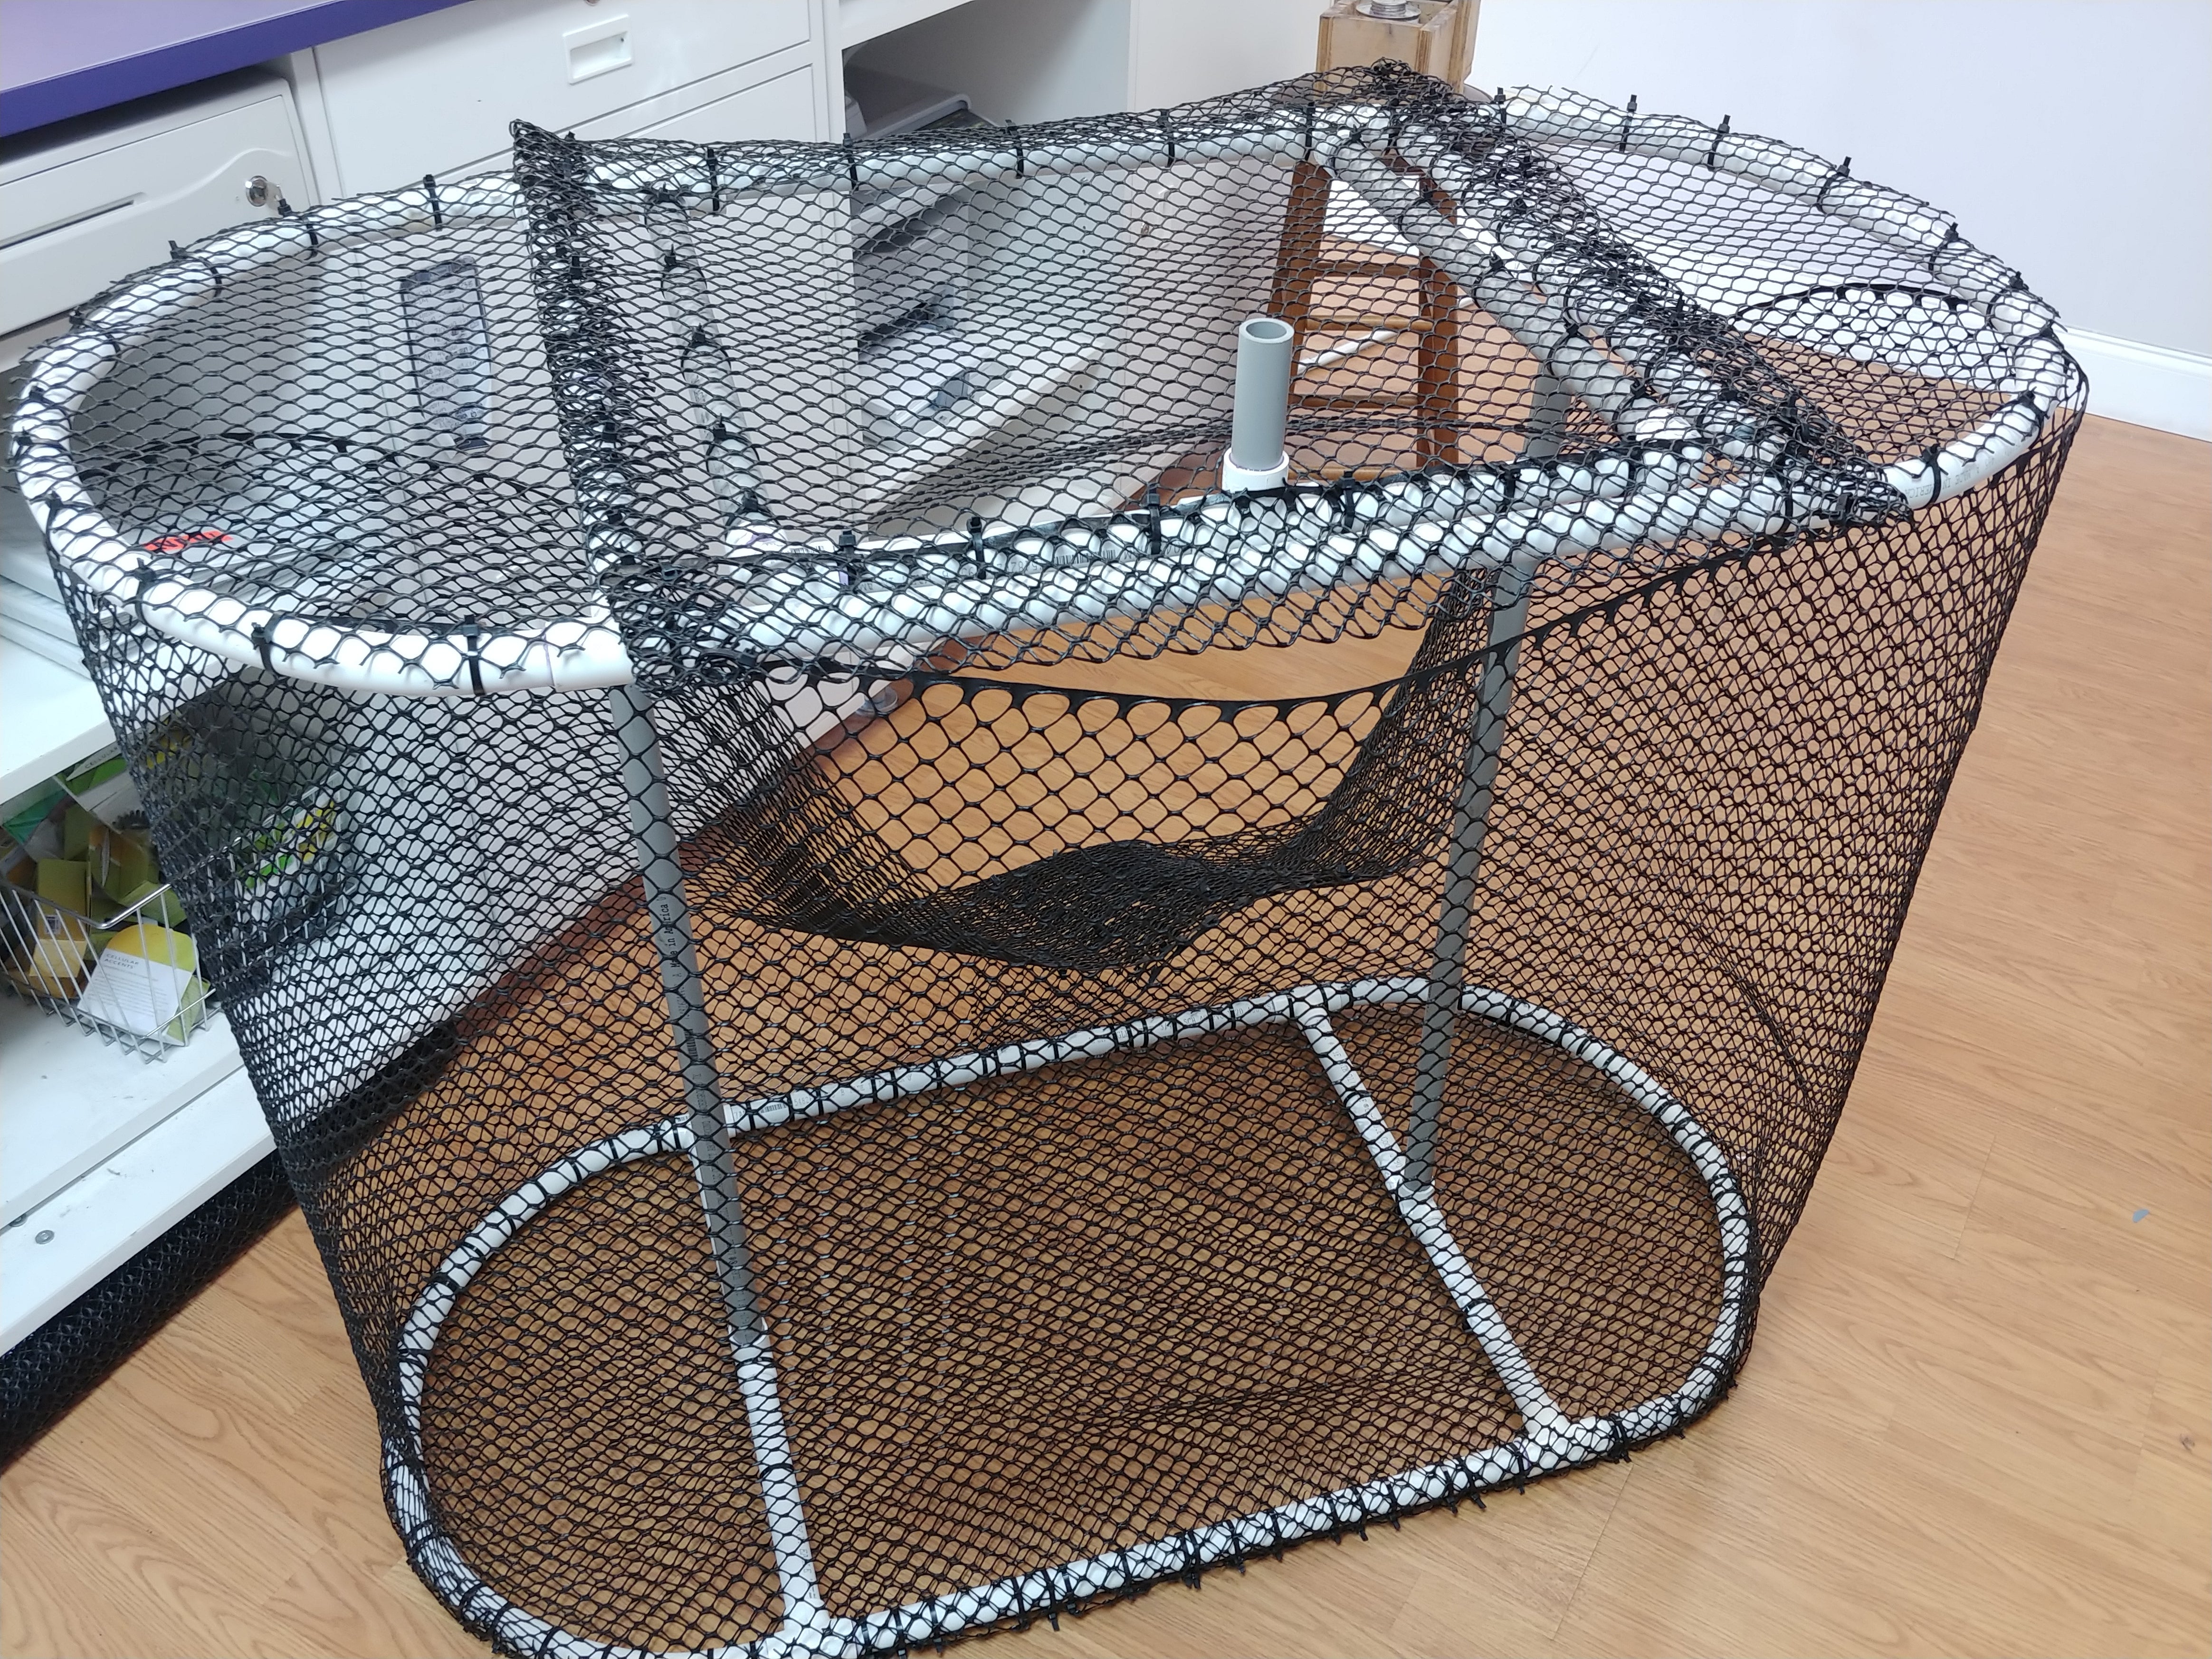
Now the frame is done it’s pretty simple, just use the zip ties and plastic mesh to skin the frame. The more zip ties the better, it’ll help with the longevity of the bait pen. Also keeping the mesh tight helps keep the pen rigid and reduces the chance of bait getting stuck in a corner and dying. Also make sure to keep the zip tie tabs outside the pen, better to keep sharp corners out of the bait pen.
The final step is to add the pool noodles as floatation material at the top of the pen. Cut one of the pool noodles in half and then tie it to the frame inside the top of the bait pen. While not necessary you can also attach a couple of carry-handles to the frame of the bait pen. I used some extra cordage and two 6″ pieces of the PVC pipe to make the handles.
I have to say though, don’t think you have to follow this design exactly. You can adjust to better suit your needs, and wants. I needed a big pen to hold culled largemouth bass at the lake, if you’re only keeping something like choffers or crabs you don’t need a pen this big. Or if you’re wanting to keep more fragile baits like sardines, you might just want to go for a big circle-shaped bait pen instead of this oval shape. Adjust the design to your needs.