Designing my ultimate survival sheath
billj 09.09.13

Every prepper has an “ultimate” this or a “if you could only have one” that for various categories of gear, and I’m no different. What your “ultimate” or “grail” SHTF item is in any one category — firearm, vehicle, knife, tent, pack, etc. — is and should be a personal choice that’s suited to the particulars of your geography, physical capabilities, skills and training, family situation, and other factors that govern how you respond to dire circumstances.
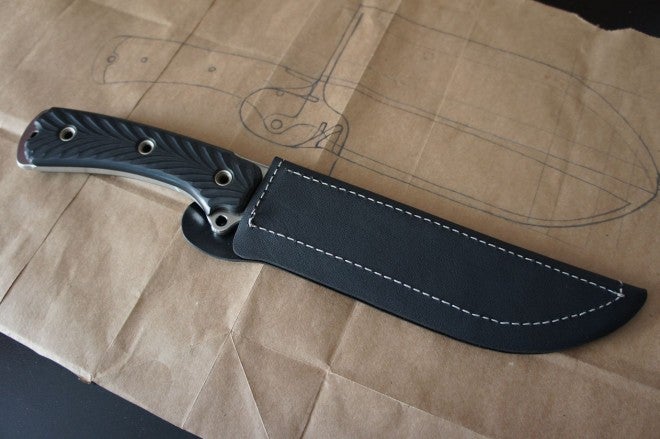
I was recently fortunate enough to acquire my “if you could only have one knife” knife, a Busse SARGE 7 LE Bowie variant with a black canvas micarta handle, made by Busse’s custom shop. (I’ve yet to snap a photo that does it justice, but just imagine this knife with a grayish handle.) It would take a separate post for me to defend my choice of SHTF blade, and maybe I’ll do that at a later date. But right now, I want to talk about the sheath that I had made for this knife, because some of the ideas and thought process that went into this design could be useful for you as you think about your own SHTF knife and sheath combo.
Note: The knife pictured above in the sheath is a regular SARGE 7 LE with a black paper micarta handle, which I also own and which inspired me to buy the Bowie variant as a SHTF knife. The dimensions are nearly identical, so the same sheath works perfectly for both knives.
Requirements and characteristics
I’ve seen a ton of really great survival sheaths online — take a look at the Hedgehog Leatherworks site, or Martin Sheaths, but be sure to wear a bib because you’ll probably drool all over yourself as you click through the galleries.
My only problem with these fine sheaths for a TEOTWAWKI situation is that they have a lot of parts — straps, buttons, attachments, screws — and I wanted to simplify. I also need someone that does full custom work, so that rules out Hedgehog. Martin Sheaths would be an option, but I didn’t want the hassle of shipping my knife overseas. Luckily for me, I found Dave Hauser at Dragonthorn Leatherworks, and I knew instantly from looking at his site that he and I would be a good match. Anyway, more about Dave’s fine work later; let’s get back to the requirements.
- Durable. This sheath would have to last me the rest of my life in a SHTF situation. This means it has to be tough, first and foremost. It should be stiff, water resistant, and able to take a beating.
- Lightweight. One reason I love the SARGE 7 design is that it’s a lot of knife packed into very few ounces, and the Bowie variant is even lighter than the regular SARGE 7. I’m really concerned about having to bug out on foot, and I don’t want to be carrying an ounce more of knife than I need to. Indeed, for all of my SHTF gear, weight is a major factor, and I tend to go as light as I can with everything.
- Simple. As I said above, I don’t want any extra features that could break, so I went for a very clean, minimalist design. I’m all about modularity, and I have other places besides my knife sheath to store that super-compact survival kit.
- Blade-friendly. Somewhat at odds with number one above, I don’t want the action of drawing and re-sheathing the blade to wear a bunch of streaks on my blade, or dull it. It’s also nice for noise discipline reasons if the draw is silent, and if the sheath in general isn’t likely to be clacking around in the brush.
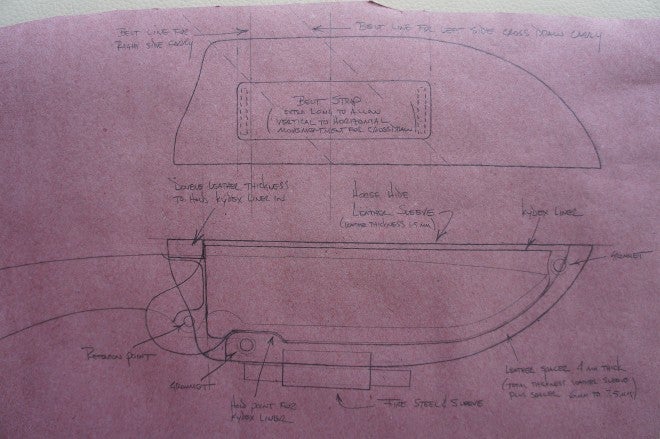
Version 1
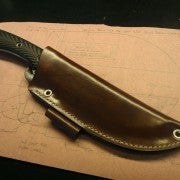
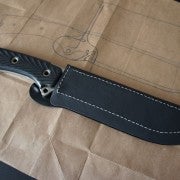
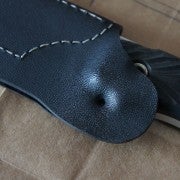
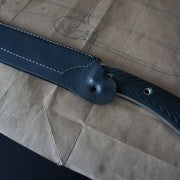
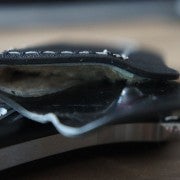
The design that I ended up with from all of those requirements is essentially a horsehide sheath with a Kydex liner, where the Kydex liner itself has a soft, Ren wax-infused inner layer of shearling. Or, you could think of it as a Kydex sheath with a horsehide wrapper and a shearling liner. Either way, the result is an extremely light sheath that’s stiff, tough, lightweight, and blade-friendly.
Here’s a bit more about the three layers.
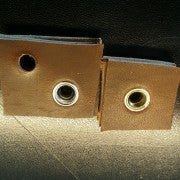
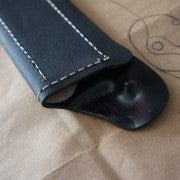
Dave and I selected horsehide for the leather part of the sheath because it’s extremely tough, ounce for ounce. The leather was dyed and then finished with an outer layer of Atom wax for waterproofing. There’s a leather firesteel loop on the outside, which fits a Swedish firesteel. There are also rigging holes, for lashing the sheath to a pack. Dave custom-made some special eye loops out of aluminum for those holes, because the leather was too thick for his normal stainless ones to fit. The aluminum is light and durable enough, and it seems to work great.
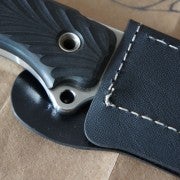
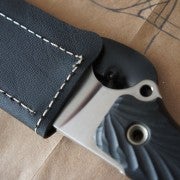
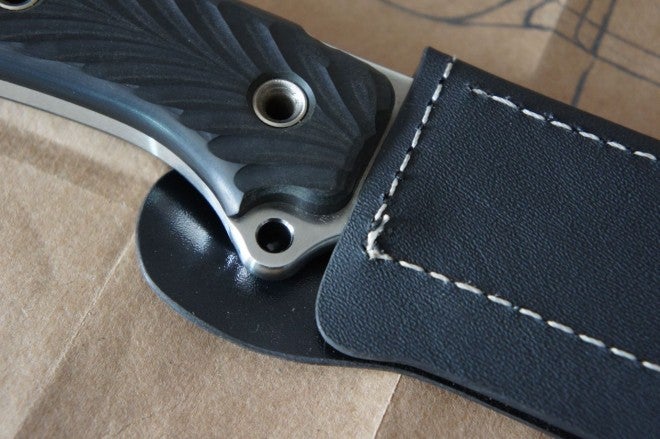
The Kydex layer has two features that are worth mentioning, the first of which is a small retention tab that clicks into the hole in the blade right above the choil. This tab locks the blade in so that it stays in nicely without the need of a strap, and it’s large enough that I can still manipulate it even with gloves on. Truth be told, though, I can still yank the blade out without working the tab — I wish the lock were a little tighter, but I know how to fix this easily in version 2.
The second feature of the Kydex layer is a drainage hole at the bottom, in case the sheath gets filled with water. There’s no drainage hole in the leather part, though, so any water would drain into the leather and be absorbed, then evaporate. In version 2, I may put a hole in the leather, as well.
The shearling layer is infused with Renaissance Wax, which is a fantastic, water-repellent preservative and helps keep the blade rust free. The wax also keeps moisture out of the shearling, so that the shearling doesn’t get damp and rust the blade. (The Ren Wax isn’t food grade, but it isn’t toxic either; so if you draw the knife and cut some food with it, you’re not poisoning yourself.) Finally, the shearling keeps the blade from scratching on the Kydex, which makes for a silent draw and a scuff-free blade.
There are some downsides to the wax-infused shearling, though. First and foremost, if the knife ever takes a dunk in a sandy lake bed, and sand and grit get down into that shearling, it’s going to be a pain to clean out. I’m not 100% sure how I’d even manage it — I guess I’d wait for the shearling to dry, then try to fish and scrape all the grit out with a stick or something. But I think I can fix this for version 2.
As for the weight, here’s some weight data on the two Busses and the sheath:
- SARGE 7 LE: 396g
- SARGE 7 Bowie: 338g
- Sheath: 199g
As you can see, the Bowie variant’s weight is just a little over that of the classic USMC KA-BAR, but the full flat ground blade is a lot wider so it makes for a much better chopper. (Both the KA-BAR and the Busse have 7 inch blades.) The stock SARGE 7 LE is noticeably heavier than the KA-BAR and the Bowie, but in my informal, backyard testing I’ve found that the Bowie doesn’t seem to lose much in chopping ability. It just goes to show that blade grind, edge geometry, and blade shape matter a great deal for chopping.
As for a sheath weight comparison, my guesstimate for a leather KA-BAR sheath, based on other leather sheaths I have for knives the same size, is about 120 grams. So the SARGE sheath is heavier due to the Kydex and shearling components, but that’s a lot of extra protection and durability for only about 80 grams of weight.
Ultimately, while I am planning another version of the sheath with some different design elements, I’m supremely happy with version 1. Dave’s workmanship is out-freaking-standing, and if the balloon went up tomorrow and I had to grab this knife + sheath and head for the hills, I’d do it with the utmost confidence. Seriously, it’s every bit as perfect as the pictures suggest. Dave spared no effort in putting this thing together, and his attention to detail shows in every aspect of the finished product.
Version 2
As I mentioned above in a note, I actually have two knives that fit this sheath: a Busse SARGE 7 LE with a black paper micarta handle (pictured here), and the Bowie variant. I’m going to hit Dave up for a second sheath, this time in black, so I’ve been thinking about improvements to the design. Here are a few options, I’m considering, listed from the outside in.
I like sharkskin, and am thinking of having it laminated onto the outside of the horsehide. Sharkskin is mega-tough and scuff resistant, so it’ll make a great outer layer.
I’m going to go ahead and put a pouch on the outside of this next one, because I’ve assembled a great, credit-card-sized survival kit for a “lost in the woods for 72 hours” scenario.
The retention tab for version 2 will use one of the handle holes for retention, instead of the smaller hole above the choil. This will make for a much more robust lock, both because the hole is bigger and because it’s better positioned to hold the knife in.
I like the high carry of version 1, but want to try a lower carry for version 2. So version 2 will ride a lot lower, and will be laid out more like a Ka-Bar sheath.
Finally, I hope that the next version will have the ability to be broken down for cleaning and/or repair. This will mainly involve splitting the Kydex liner into two halves, and having it so that the liner can be removed and then disassembled. Dave and I will need to think through exactly how this would work, but I imagine that there will be some kind of screw or clamp that holds the liner inside the sheath, but where I can unfasten it and remove the liner from the sheath.
Hopefully somewhere in this article you’ve gotten some ideas for your own survival sheath. And if you already have a survival sheath that you’re super happy with, I’d love to hear about it in the comments, because it might give me some more ideas for version 2.