How to Make Your Own Custom Knife Handle Scales
Tony Sculimbrene 02.04.14

The quality of production gear, knives, and flashlights has never been higher. But there is something so nice about a truly unique piece. Even if the gap between custom and production is narrowing, often the reason to buy a custom is to get something made just the way you want. There is also a bit of exclusively that is hard to ignore. Lots of folks have a Spyderco Dragonfly, but with a custom, it’s likely a one-off made just for you. On the other hand, customs are expensive and really most of the time you don’t get to actually do anything other than say what you want. That urge to tinker is strong, and so a few months ago I decided to take a production knife and make it my own.
It’s important to start out at the shallow end of the knife modifying and customizing pool. You’re not going to do be doing a Ron Lake interframe inlay right out of the gate (or ever, quite frankly. That is a skill set fewer and fewer people possess.). Choose something you can handle, like a knife to rehandle.
I had a Kershaw Skyline Fixed Blade that I could tackle. It is an excellent fixed blade with two flaws: a thin handle and an awful sheath. The plan was to remove the filthy orange handle scales (that’s the mildest damage a fixed blade sees during review testing), put new ones on, and then get a replacement for the sheath. The sheath that came with the knife was a laughably bad contraption of a thing. It was loose and floppy on your person and way, way, way too snug on the knife. It was also positively ginormous for what it was. I don’t have a KYDEX press, so that part of the modification would have to be farmed out.
Handle scales are pretty straightforward and make a good starting point. They are easy to remove, and once off, they act as a template for your new scales. Just drop them on a piece of material and trace around them. That’s it. Choosing the handle material is a bit more difficult. G10, Micarta, and Carbon Fiber are all readily available from knife supply stores, but they have one major drawback: dust. Cutting into these resin-impregnated materials leaves a fine cloud of lung-harming dust. Wood, on the other hand, is less dangerous (still wear breathing protection though).
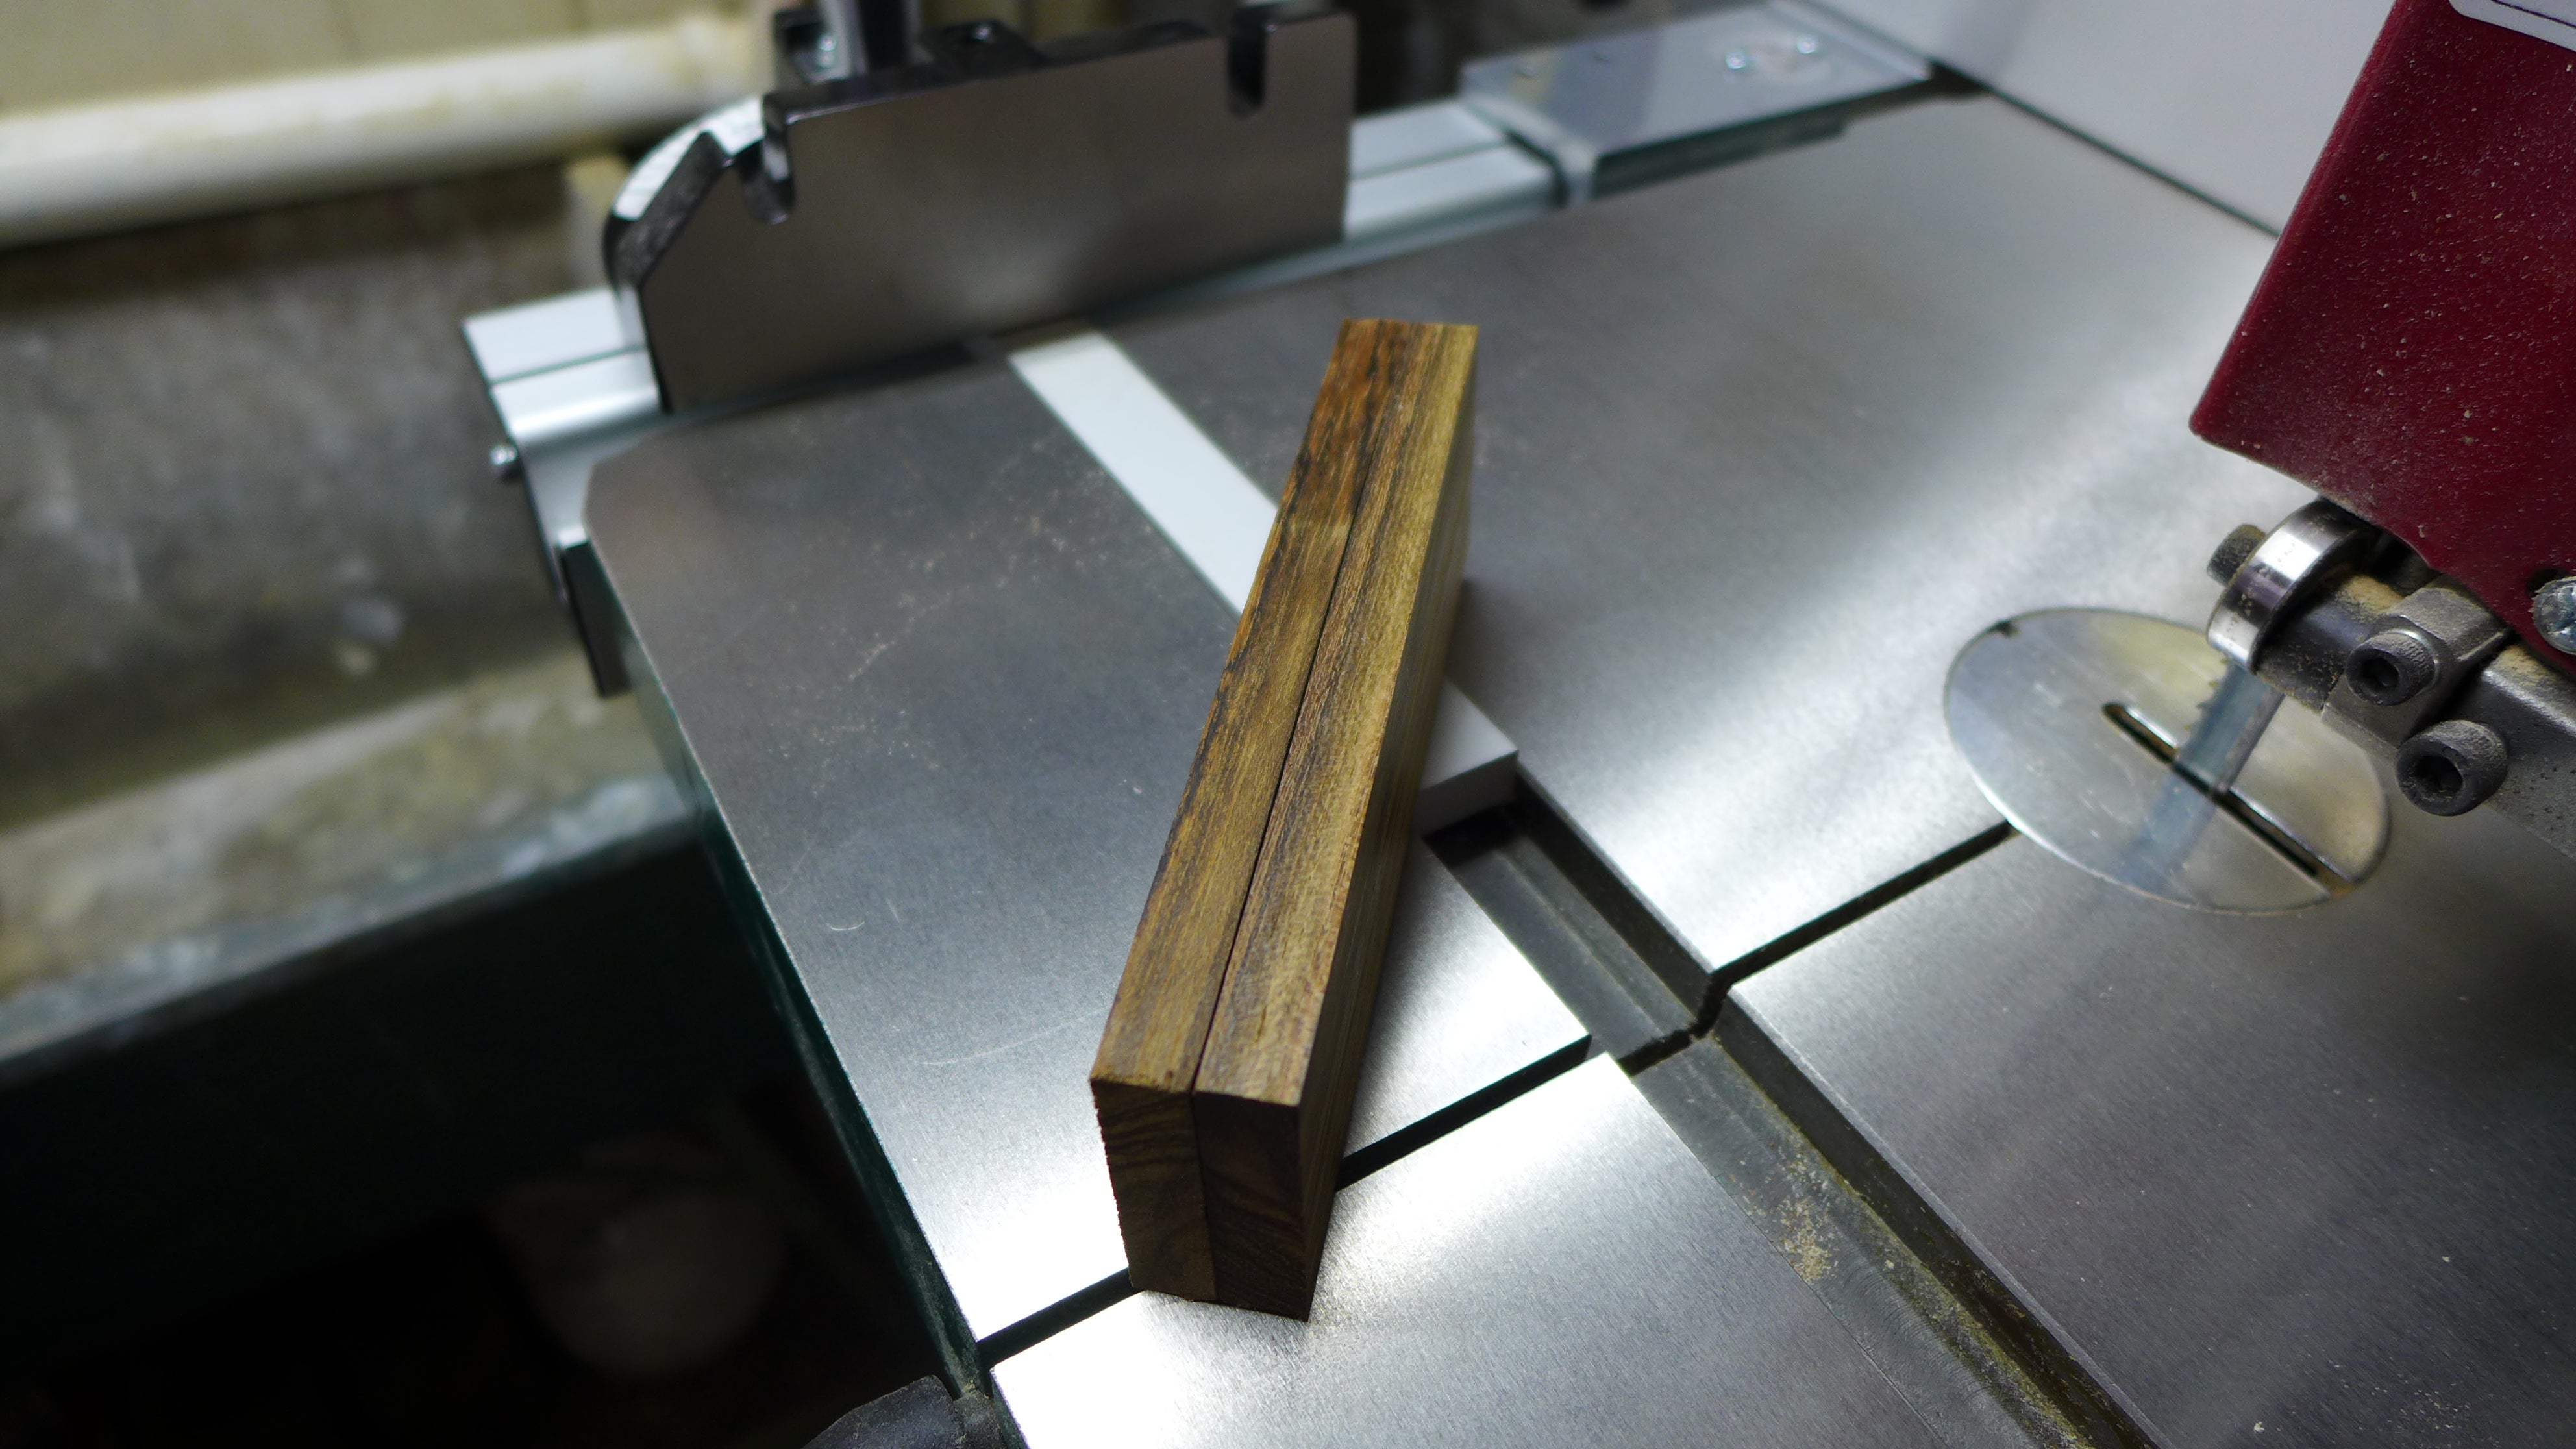
It’s best to use a very tight grain, very hard wood that is less likely to move or expand. If you can, get some stabilized wood or opt for a species that doesn’t need stabilization. Very hard and oily woods like desert ironwood and cocobolo make ideal handles. Holly also works well, as would olive wood, osage orange, fiddleback, or curly maple. All provide a very stable platform and have impressive grain structures that look good in small batches (a table top of desert ironwood would make me crazy). I bought two “turning blanks,” one of each of cocobolo and desert ironwood. I decided to use the cocobolo on the fixed blade as ironwood tends to lose its pattern and darken over time, a process that is accelerated by hand oils and sweat.
I am lucky that my other hobby, other than writing and obsessing about gear, is woodworking, so I had all of the tools I needed: a band saw, some sanders, and a drill press, but none of these tools are required. You could, in theory, do everything you need with a Dremel, some sandpaper, and a drill. If you don’t have a band saw or access to one, buy knife scales instead of turning blanks, as they are already sliced down to size. It is more expensive per unit weight, but they have already band sawed it for you. You can find knife scales or turning blanks at any woodworking store, like Woodcraft or Rockler.
Step 1: If you bought knife scale blanks, you can skip the first step. If not, then you need to slice the turning blank into two exactly equally thick slices. You’ll be surprised at just how thin G10 is on most knives. I left the pieces a bit thicker so I could contour them more. Here are the scales as they are about to be introduced to their weight loss program, a.k.a. the band saw.

Step 2: After you have two thin slices of wood, tape them together with very strong double sided tape. You want them to feel and move like a single unit. This is the most important part of the process; they must be really stuck together.
Step 3: With as thin a marking device as you can find (I prefer an extra fine Sharpie), trace out the original handle slabs on the double stacked wood. You only need to do one side, and don’t worry about the pen marks, you’ll sand them away later.
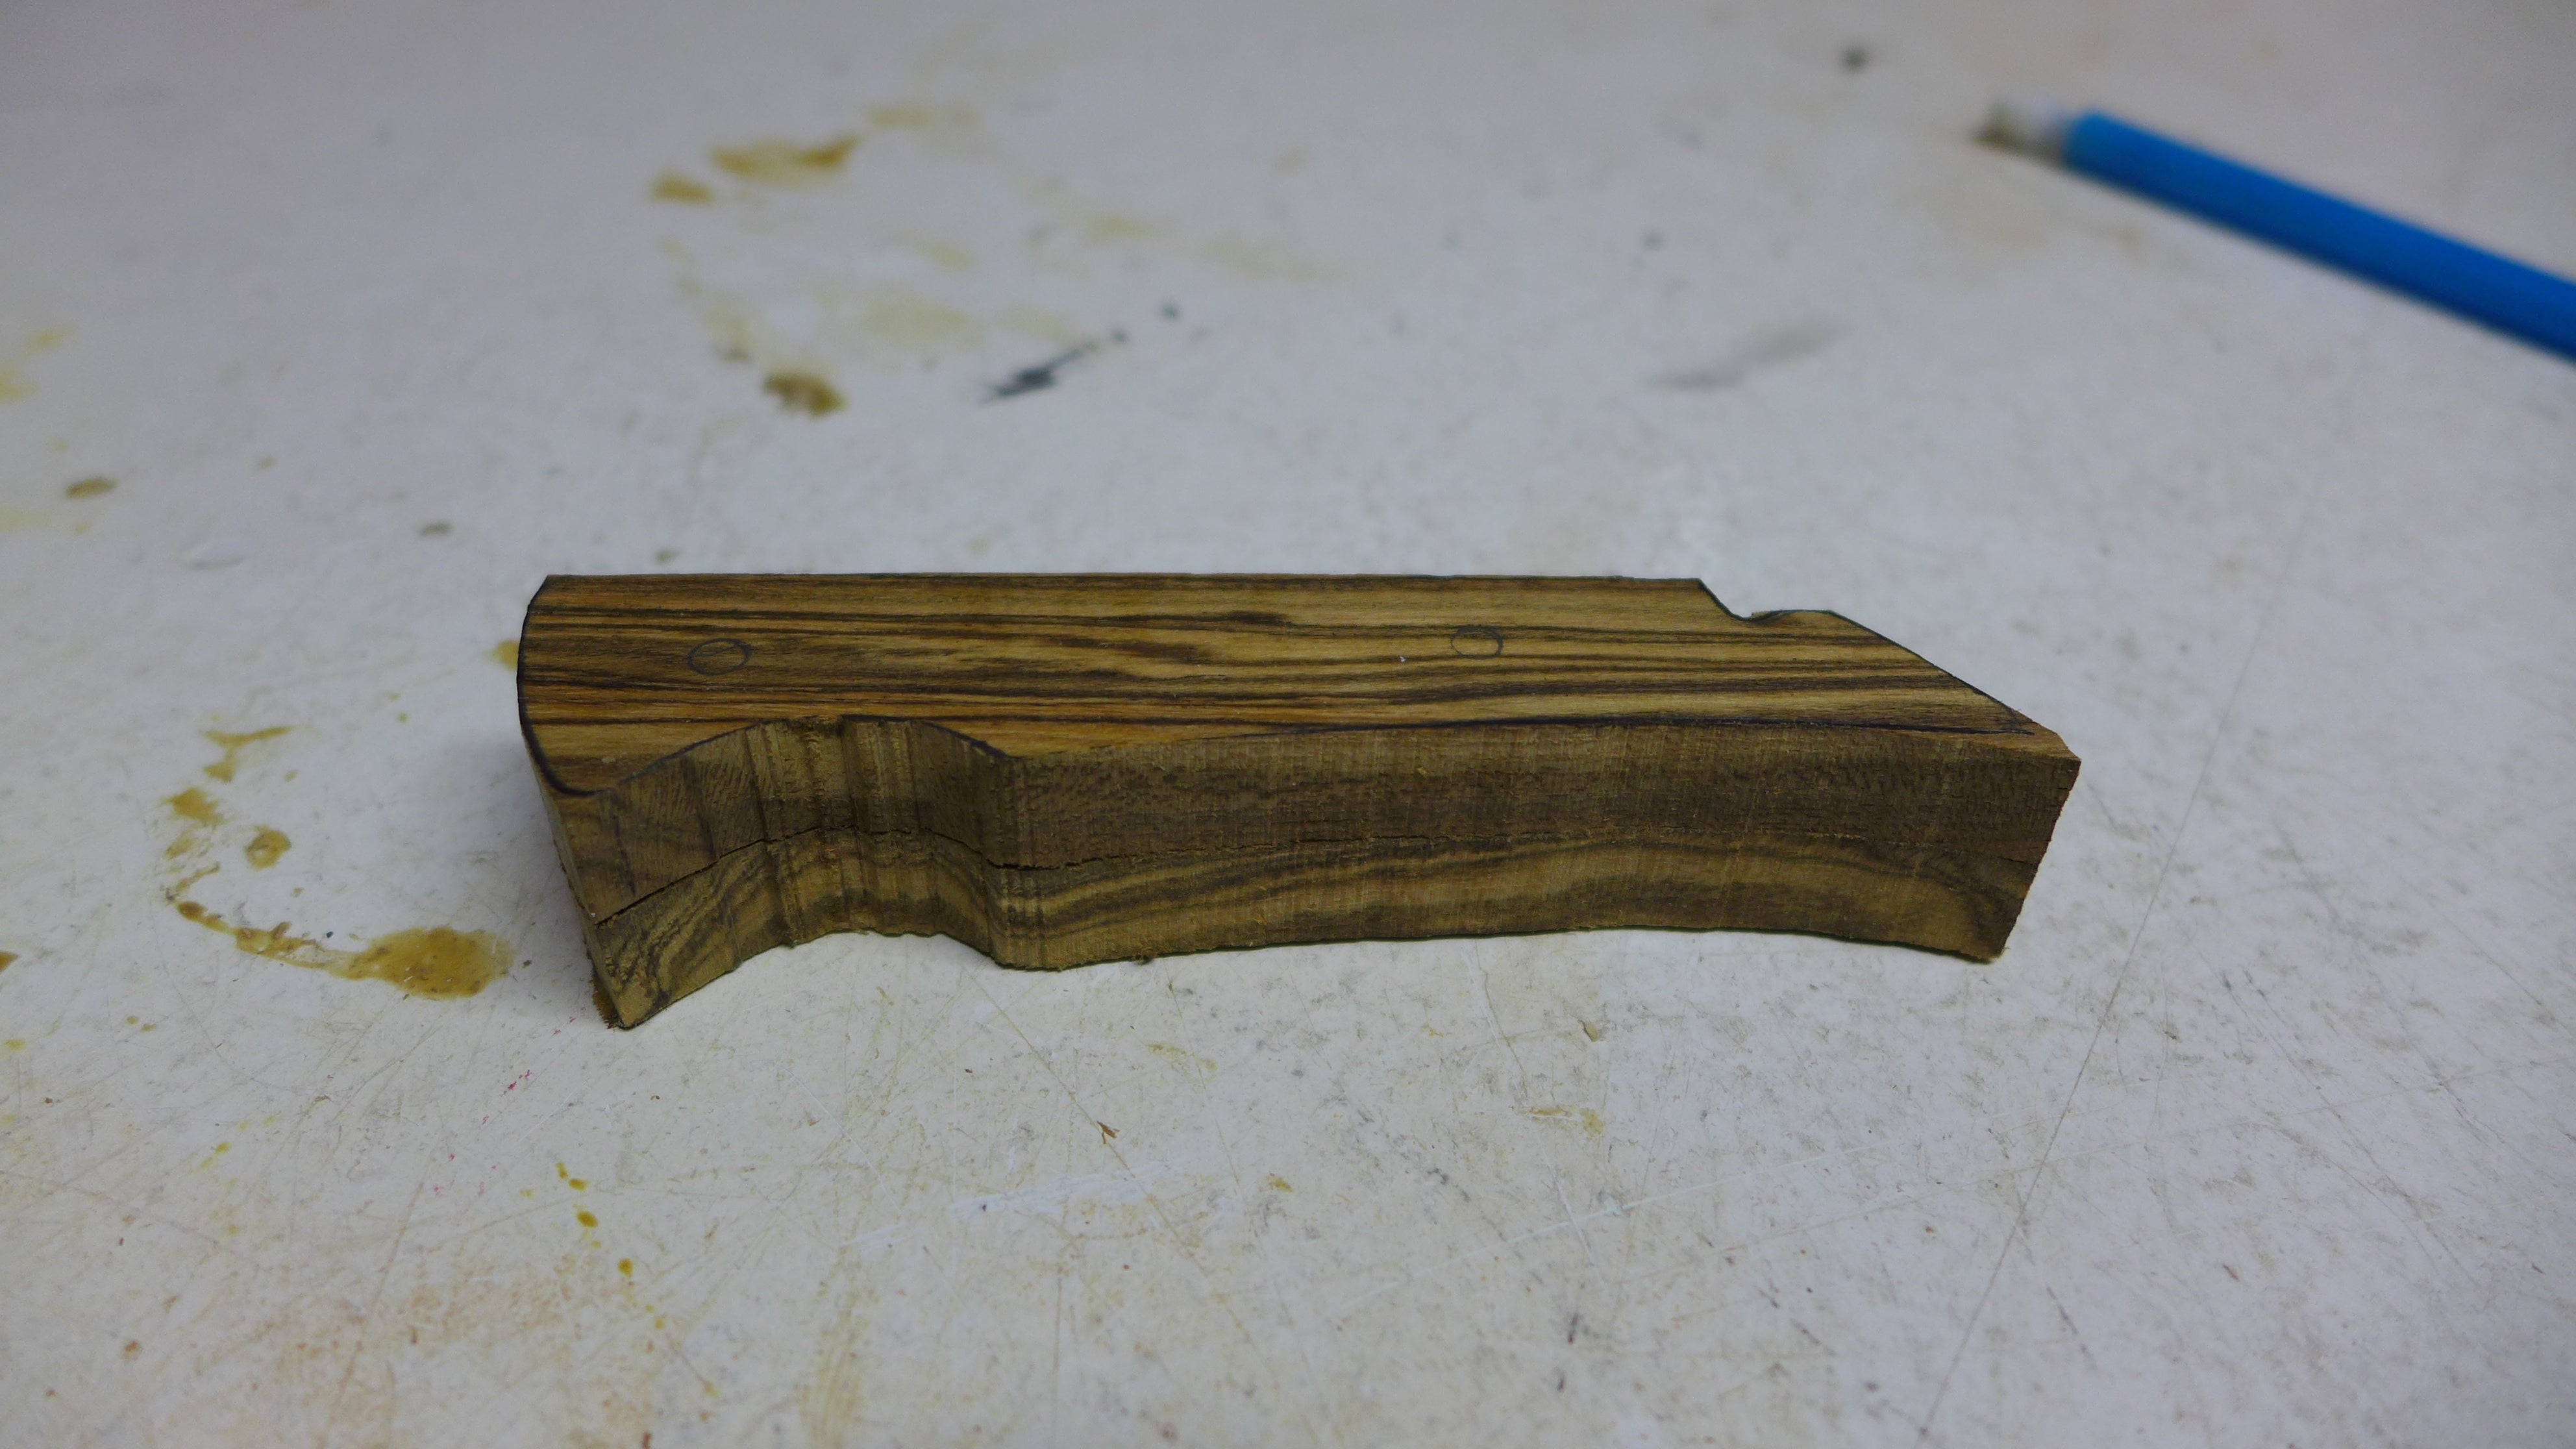
Step 4: With your template traced out, hog away material either with a band saw, a hand saw, or the wood cutting wheel on a Dremel. A hack saw works find here, but it’s slow and tedious work. Remember to cut to the line, not on or under the line. You will put the finishing touches on the edge later, you just need to get a roughed out shape here.
By the way, if you are into woodworking and debating if a band saw is a good purchase, buy one now. I held out for a decade, thinking my table saw was good enough. The band saw could be my only wood cutting tool, quite easily, and it is many times safer than the table saw.
Step 5: Once you have the general shape, smooth it out by sanding exactly to the trace line. Take your time here, especially if you are using a power tool. I used a belt sander turned upside down in a homemade jig and a drum head attachment on my drill press. If you are using a Dremel, be careful. One movement of your hand and it could all be for naught.
Step 6: Once you have the basic shape smoothed out, then mark, drill, and countersink the holes for the bolts. I found that brad point (or lip and spur) drill bits are almost required for this step. In woods as hard and oily as desert ironwood, regular drill bits are laughed off like they are made of foam. Most fixed blade handles that are of the “slab” variety are attached with a little bit of glue and some bolts. Save the bolts and countersink the holes to allow the bolts to accommodate the new, thicker handles.
Step 7: Contour the handle slabs. You can use a sander here, but I found it was more precise and therapeutic to use sandpaper. Start with 60 grit then move up to 120, then 320, and finally 600. If you are using ironwood or holly or another species that can take a polished shine, prepare to go higher than 600. Desert ironwood is so hard and so oily it can basically only be polished up, as varnishes and oils get rejected by the wood.
Step 8: CRITICAL STEP: Very, very carefully separate the two slices of wood. Do not pry if you can help it, as the wood is probably pretty thin. Try twisting them off if you can.
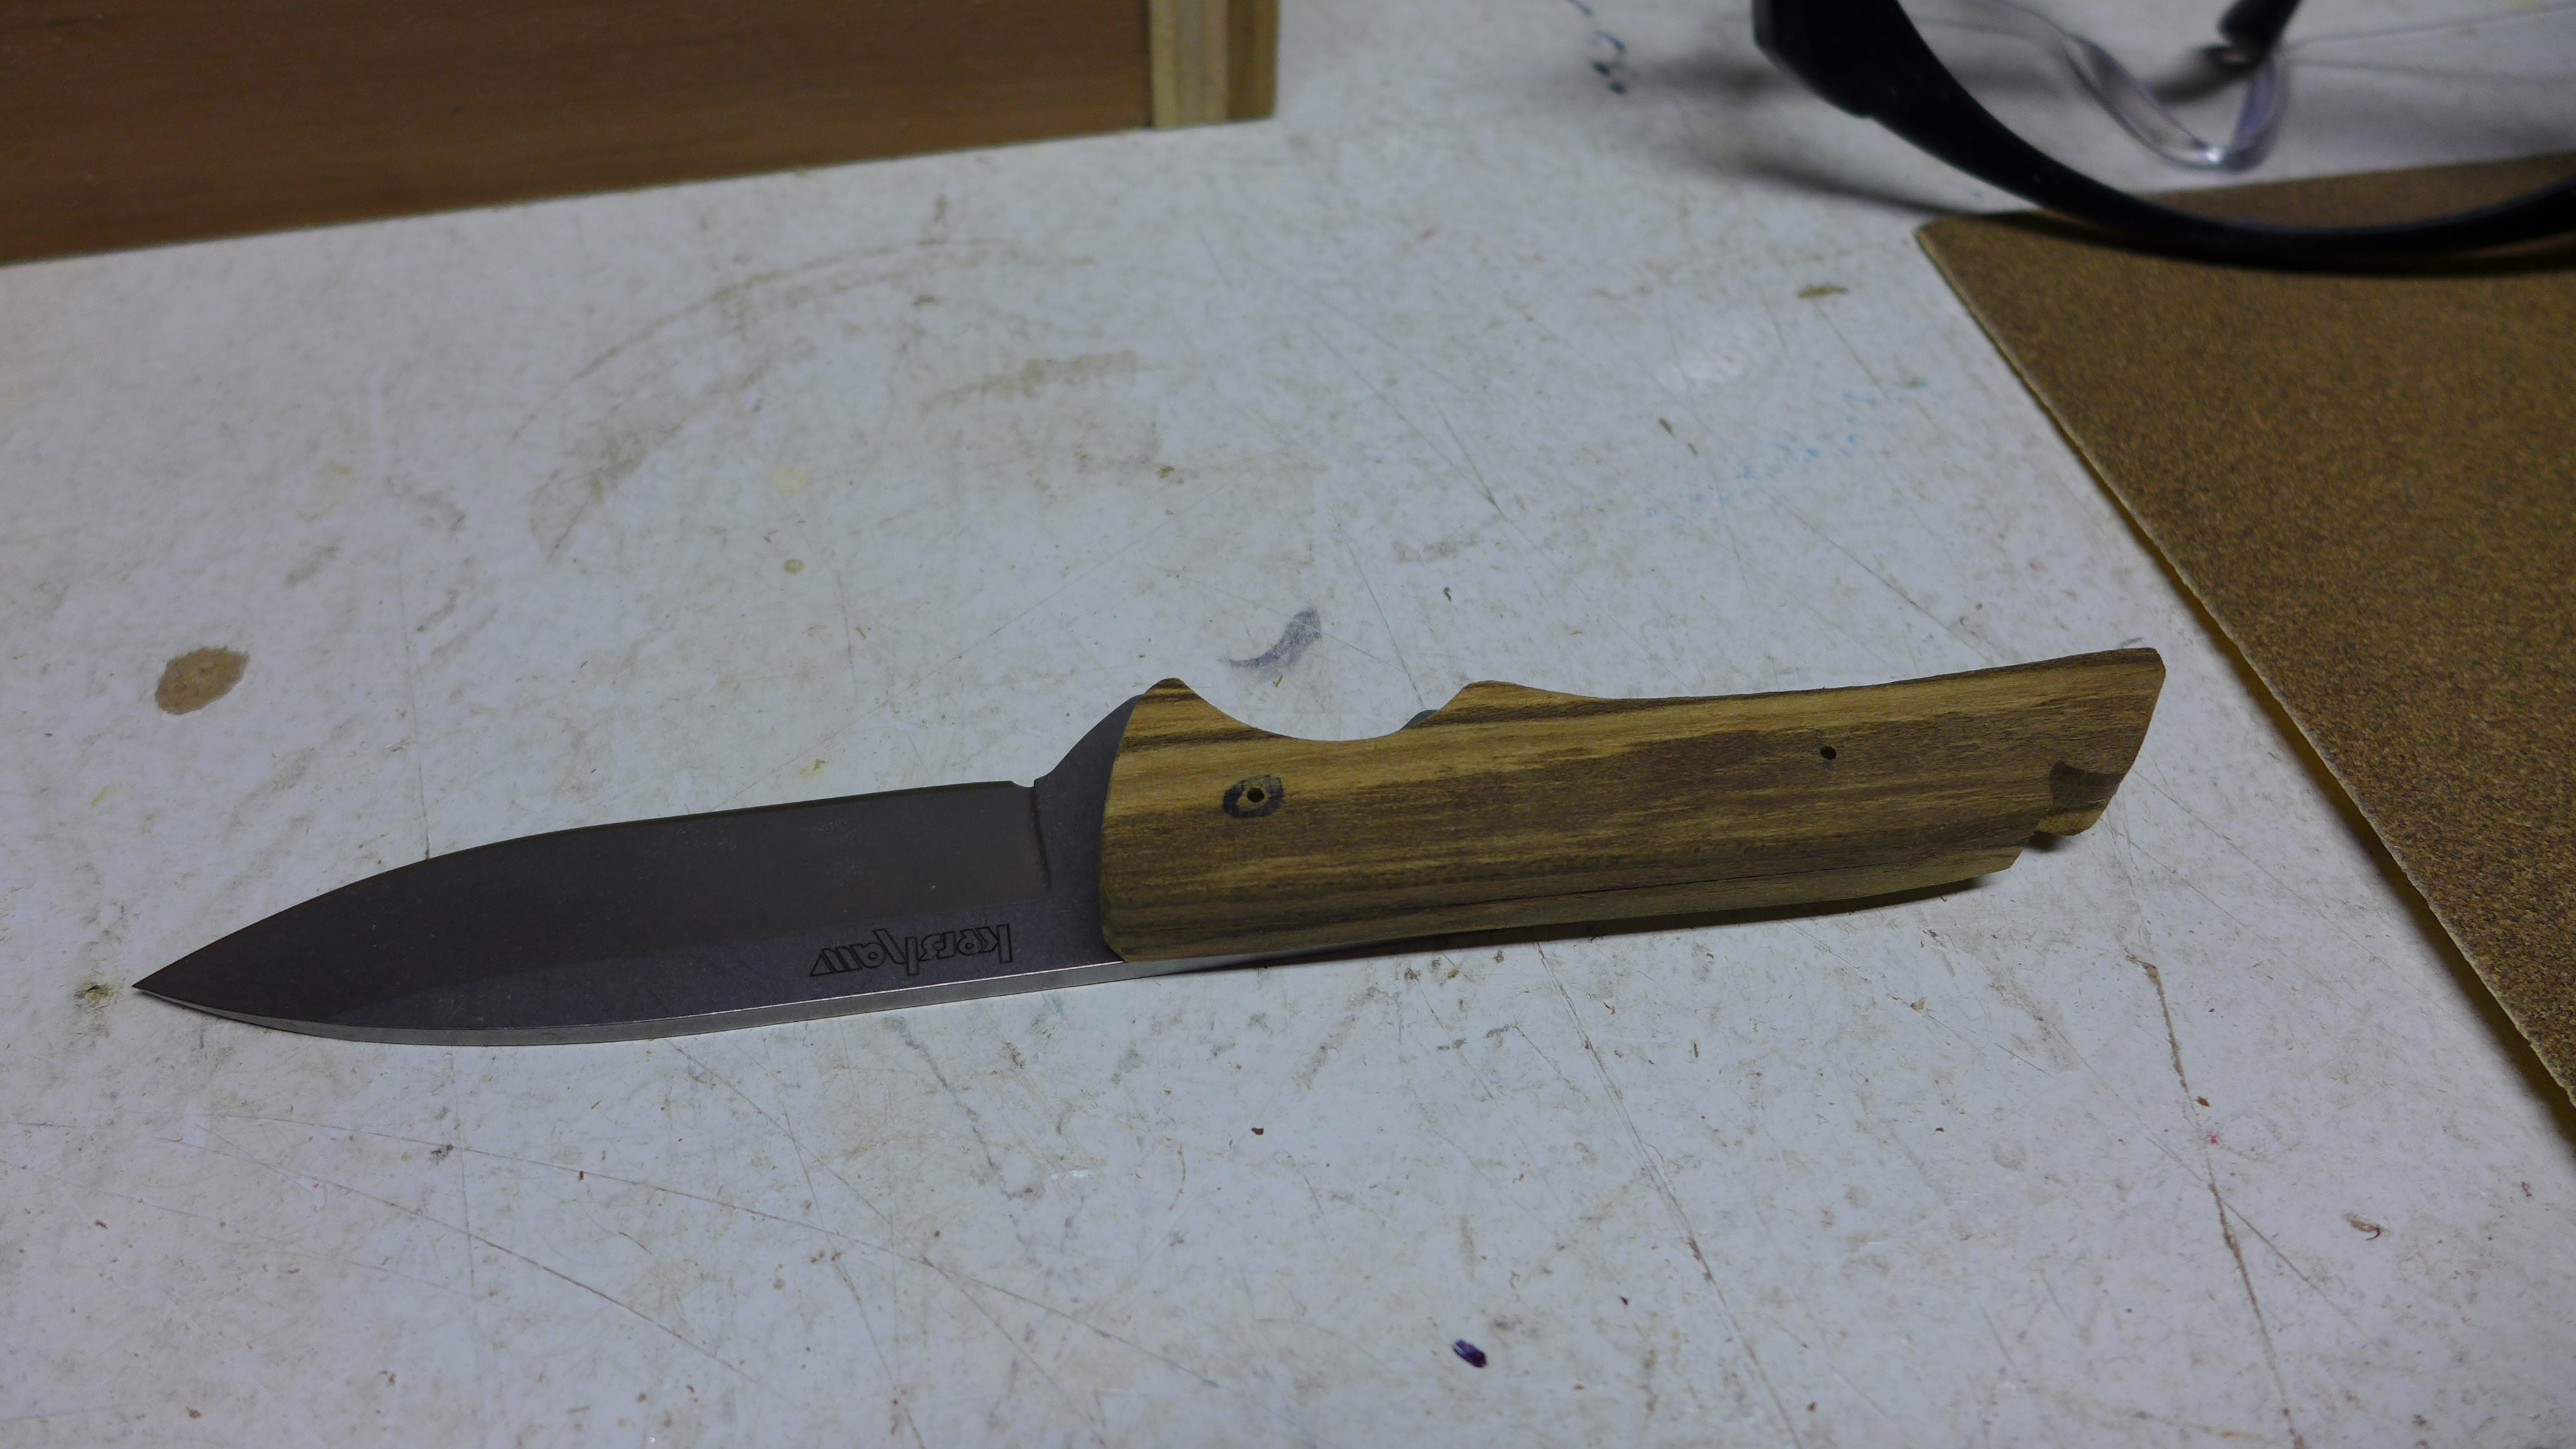
Step 9: With a little (very little) bit of wood/metal glue on the back of the handles, set them in place. Using a clamp to hold them there, use the original bolts to connect the new scales to the handle.
Step 10: Wipe down the handle with paste wax or other finishing product if the wood will accept it. If not, then polish it up and admire.
One thing I would do differently is that I would not try to letterbox the handle scales like on the production Skyline. It made the entire process more difficult and time consuming, and with the ability to contour thicker slabs, it was unnecessary. Usually letterboxing is a cheap way to make a handle feel more three dimensional. I can do that for real now, so why bother?
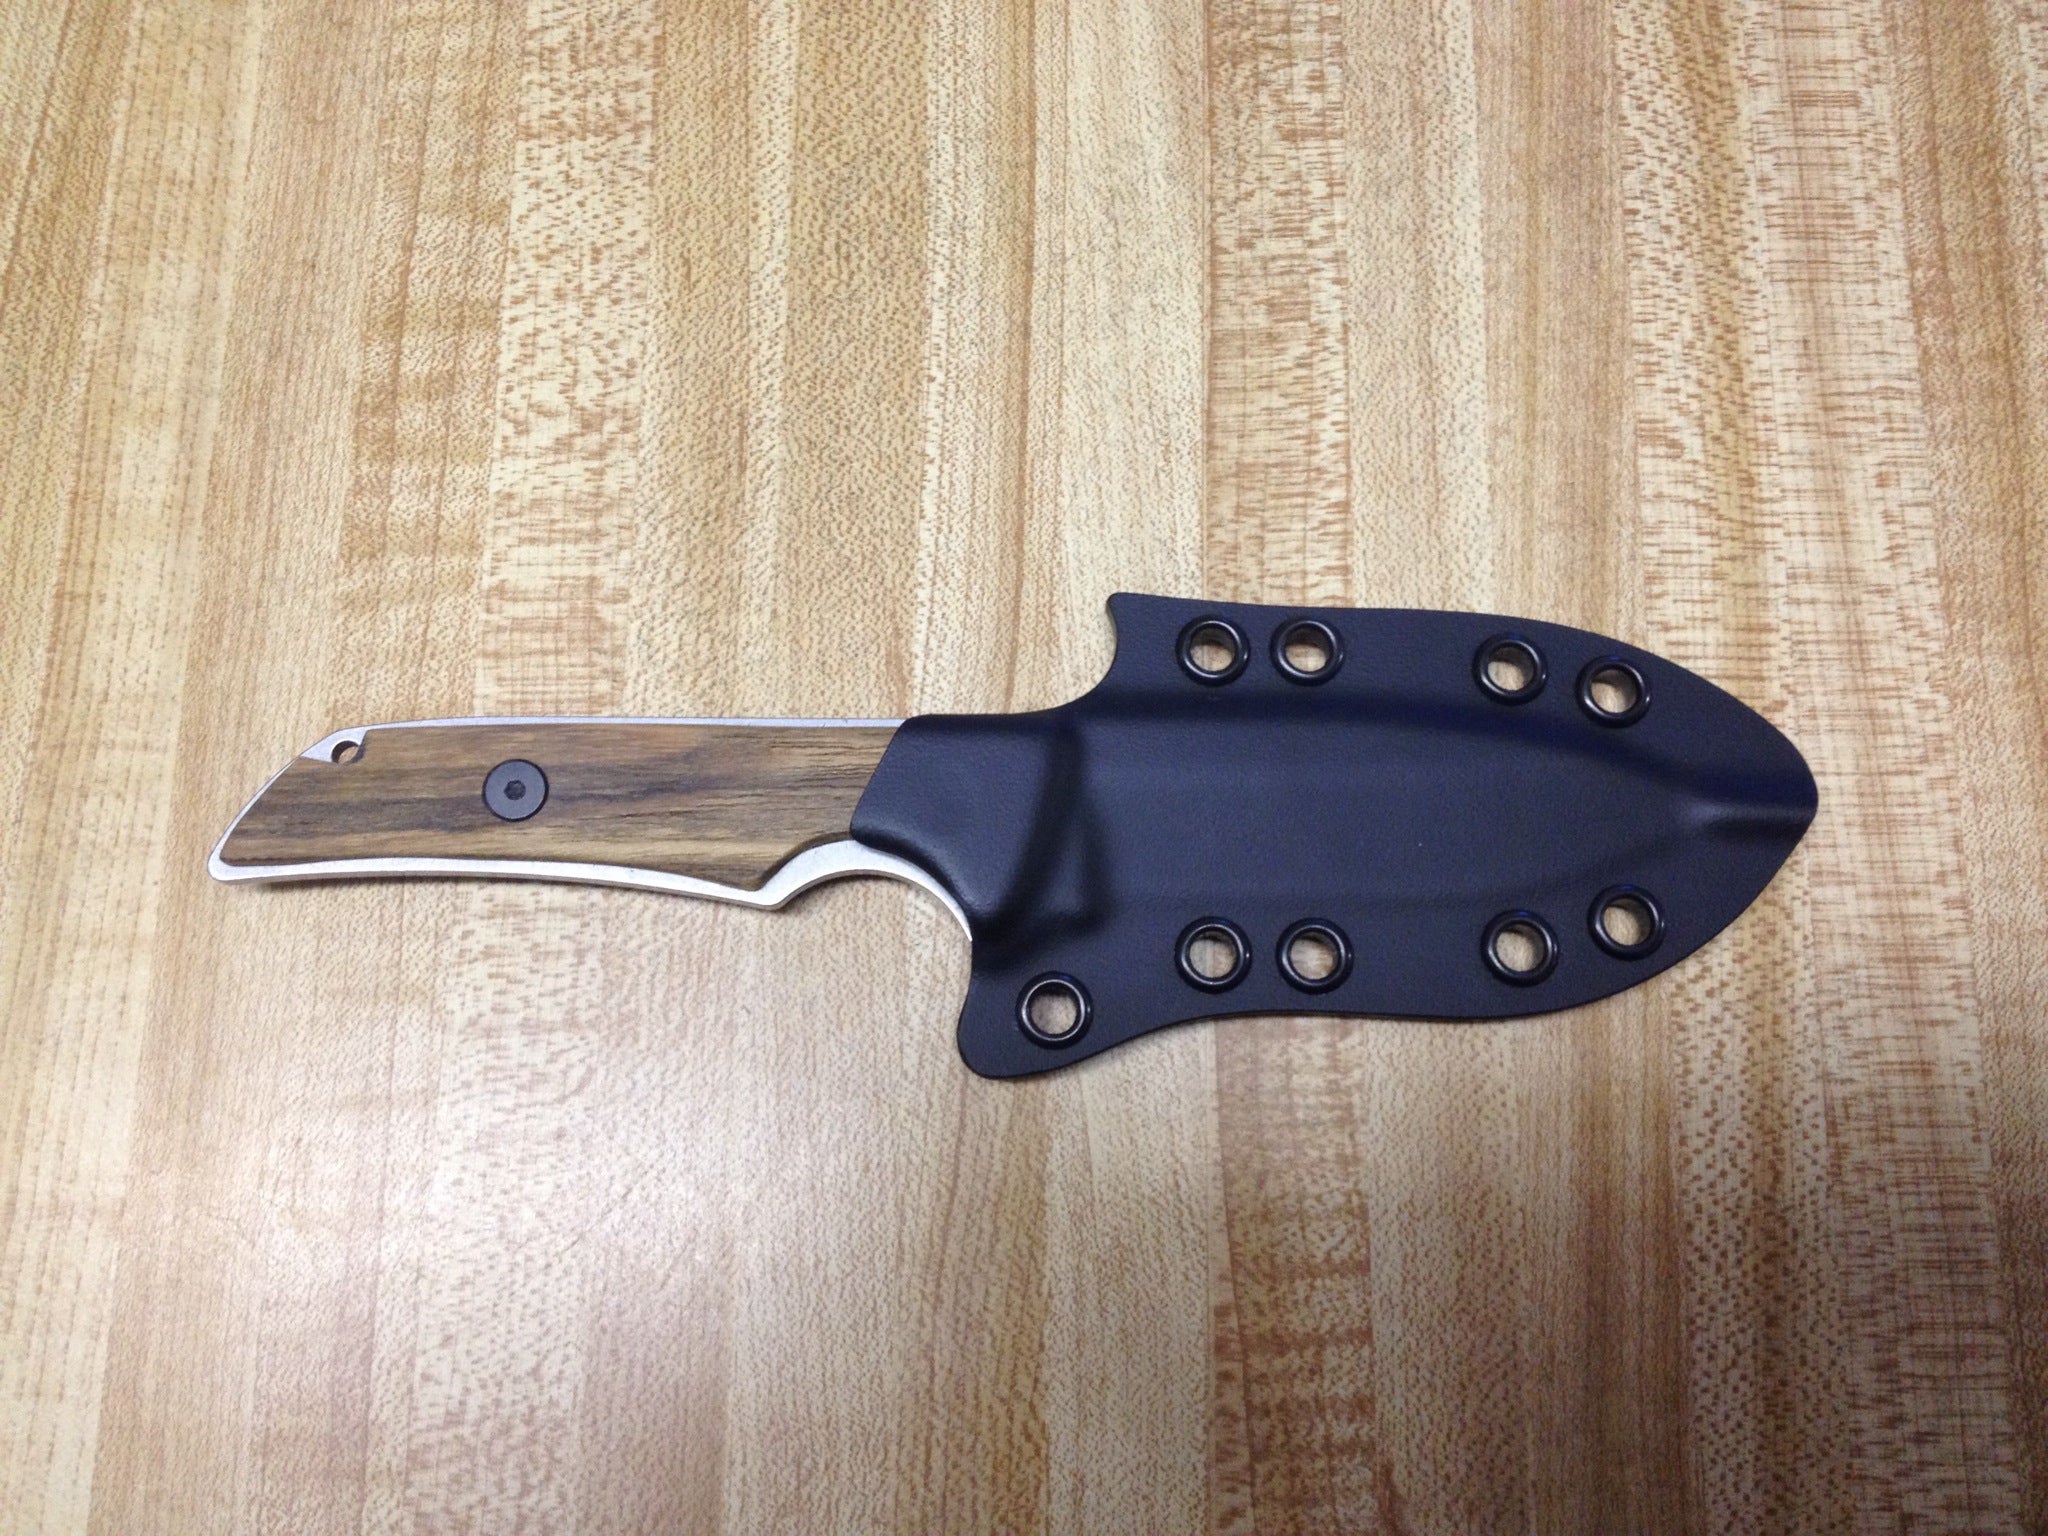
Here is the end product in its custom made KYDEX sheath.