How to build an AR-15 without a parts kit
Major Pandemic 07.30.13

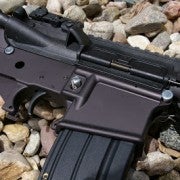
As of the writing of this article, AR-15 rifle and accessories shoppers are starting to see a little relief in the market. Everything from ammo to charging handles are starting to trickle in, but it often still seems the part you need to complete your AR lower is out of stock. In my case, my naked stripped Anderson Manufacturing Lower receiver had sat far too long in the Liberty Safe waiting for me to find all the right parts to get it into action. Instead of chasing parts, I decided to place an order for a lower parts kit with Barnes Precision and patiently wait. But then I had an idea: could I salvage enough equivalent parts from a hardware store to get a minimally featured AR lower up and running? What parts would I absolutely need, and what could be omitted?
Optional AR parts
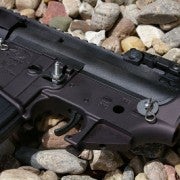
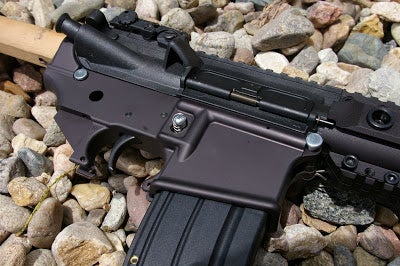
Because the AR platform has parts that require other parts that require other parts, the idea was to pair down the AR function list for the lower to what was really required to feed and cycle rounds. This means the bolt latch could be omitted, and that alone translates into four less parts (latch, bolt latch detent, spring, and pin) that I need to scrounge for during a time of desolate parts availability. Same goes for the safety selector. By going to an old “the trigger is the safety” design, I drop three more parts plus the need to have a grip and grip screw to hold in the detent required for the safety selector switch.
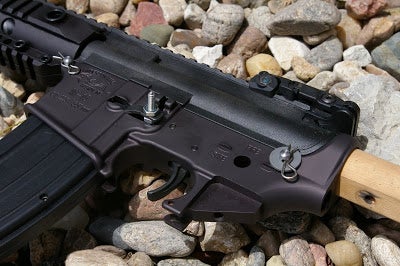
With that, I even nixed the grip because I didn’t have one, but the right machine screw and a dowel rod would have worked for a makeshift grip. The recoil of even the .223 round is so minimal that you can take the full recoil at the shoulder via the buttstock and the back of the receiver gives you enough grip to pull the trigger effectively.
Required parts
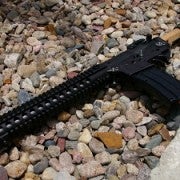
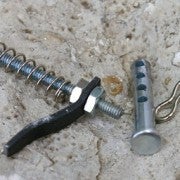
Obviously the trigger group is required, and I had a complete JP Rifles trigger unit to drop in. You do need two .245” takedown pins, which I have found damn near freaking impossible to find. In this case, two modified ¼”x2” Clevis pins and spring pins from the hardware store worked for a sum total of $3.
The Clevis pints are the perfect diameter, and the only thing that keeps them from fitting is the deformation caused by the holes in the pin. A little minor file-work and a spin in the drill with some very fine sandpaper makes them drop-in replacements for the front and rear takedown pins. I also chopped mine and cut them down to the right length with my Proxxon Mini-Lathe, but that’s optional extra credit type work and not required.

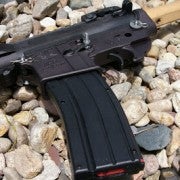
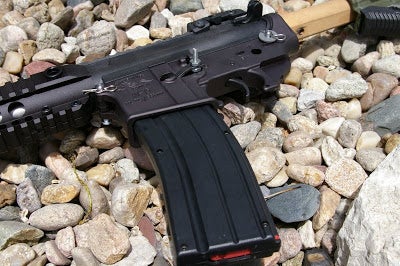
Although duct taping a magazine in place would have certainly worked, I took a bit more elegant approach that required only a touch of fabrication. I used a 3/16”x1.5” bolt with two nuts to hold a latch I made from 1/8” aluminum scrap I had in the shop. You could screw it down as a permanent fixed magazine, or loosen it up and add a 1.25”Lx1/4”w wide spring to provide full functional capabilities that work just like the real deal. I was actually pretty proud of this little part when I was done, as it worked perfectly on both the .22LR Black Dog and .223 Troy mags tested.
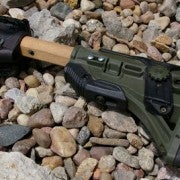
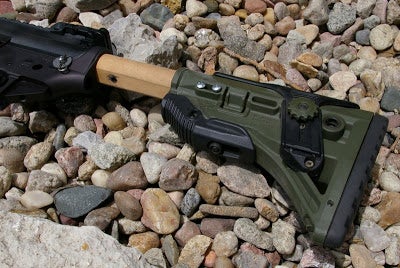
Although all the above omissions will still support .223 round cycling, I decided to go one step further with a .22LR ATI upper which does not even require a buffer tube, buffer, spring, castle nut, and stock. Instead, I found a wood Charbroil grill handle (dowel rod) in my shop that I was able to thread into the receiver and attach a broken Mako buttstock with two wood screws.
Function testing
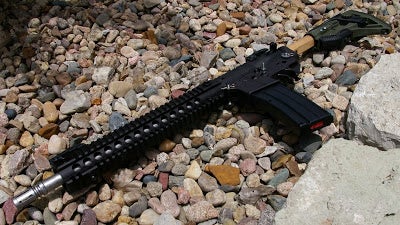
It’s a testament to the AR design that after 300-rounds downrange of .22LR and I did not have one issue aside from a few issues with the ATI upper I have come to expect. Even after a swapping out the dowel rod stock for a real buffer tube assembly, I had no issues at all, with the exception that the bolt does not hold back after the last shot, a little hot gas pops out of the bolt latch void, and you need to be darn sure that “safe” means properly clearing the weapon. Amazingly, only a couple of bucks of hardware parts can put an AR into commission as a reliable and operable AR, but it will not win any beauty awards. In the end you only have to have a complete buffer tube and trigger assembly to make an AR work with only parts from the hardware store.
Final thoughts
This was a fun experiment that demonstrated how versatile, durable, and field serviceable the AR-15 can be. With the exception of the cost of the JP Trigger, buffer assembly, and broken Mako buttstock, the lower parts cost from the hardware store was less than $5 to deliver a .223-capable AR. If you can find a dedicated .22LR upper or a drop in .22LR conversion kit, a complete buffer tube assembly is not even needed.
The kicker to this entire story was that I found my AR lower parts kit shipment on my front doorstep the day after I tested this hacked together AR. I guess I didn’t have to wait that long after all.
Disclaimer
This experiment was for my personally use and education. Obviously this is for informational purposes only and is not recommended by… well anyone. An AR-15 is designed to operate with the proper parts with the safety and other properly specced parts attached. Use this information strictly at your own risk.
Sources
- Anderson Manufacturing
- Barnes Precision Machine (BPM)
- Random Parts – Local Hardware store