How to Make a Hiking Stick
Tony Sculimbrene 10.03.13

Being a Gear Geek, it’s not unusual for me to take a few things with me on a hike. The most useful and important thing that I take on every hike (other than my phone) happens to be totally free: a hiking stick.
You can buy a hiking stick, even a ruggedly unprocessed one. You can buy an aluminum trekking poll and be that guy or gal on the mountain (and cause some damage to the scenery). You can even buy a broom handle or curtain rod and fix it up, but there is nothing quite like a handmade stick from a real live tree.
Hiking sticks have a ton of benefits. They help with balance and crossing over streams, they are good on steep ascents and descents, they can ward of unfriendly animals of the human and non-human variety, they help with pacing, and they take pressure off your joints.
Selecting a Species
Generally you’re looking for a few things in a piece of wood that will be good for use as a hiking stick. You want a hardwood and not a softwood. Softwoods will check and warp in the drying process, and they’re not very strong. Even larger softwood pieces aren’t as strong as you’d think. Of the hardwoods, you should look for something that has a closed grain (for example, maple has a closed grain while oak has an open grain). Finally, you want something that is as close to straight as possible. Hickory, a common wood used in hiking sticks in the Midwest and South, is an excellent choice, but finding it in straight segments that are long enough to use is difficult. I really like maple as it is a hardwood with straight closed grains. It’s also not obnoxiously heavy for a hardwood.
Once you’ve figured out what species of wood you want (and how to identify it), you need to find the right piece to make into a hiking stick. Most people prefer one of two sizes, either head height (like…um…Gandalf) or elbow height. I have found through lots of experimenting that I want something that puts my arm at a perfect 90 degree angle. I also like to try to incorporate some part of the tree into the hand rest/handle area. My current stick, which has about a 1,000 miles on it, has a nice branch crotch that I use as the handle:
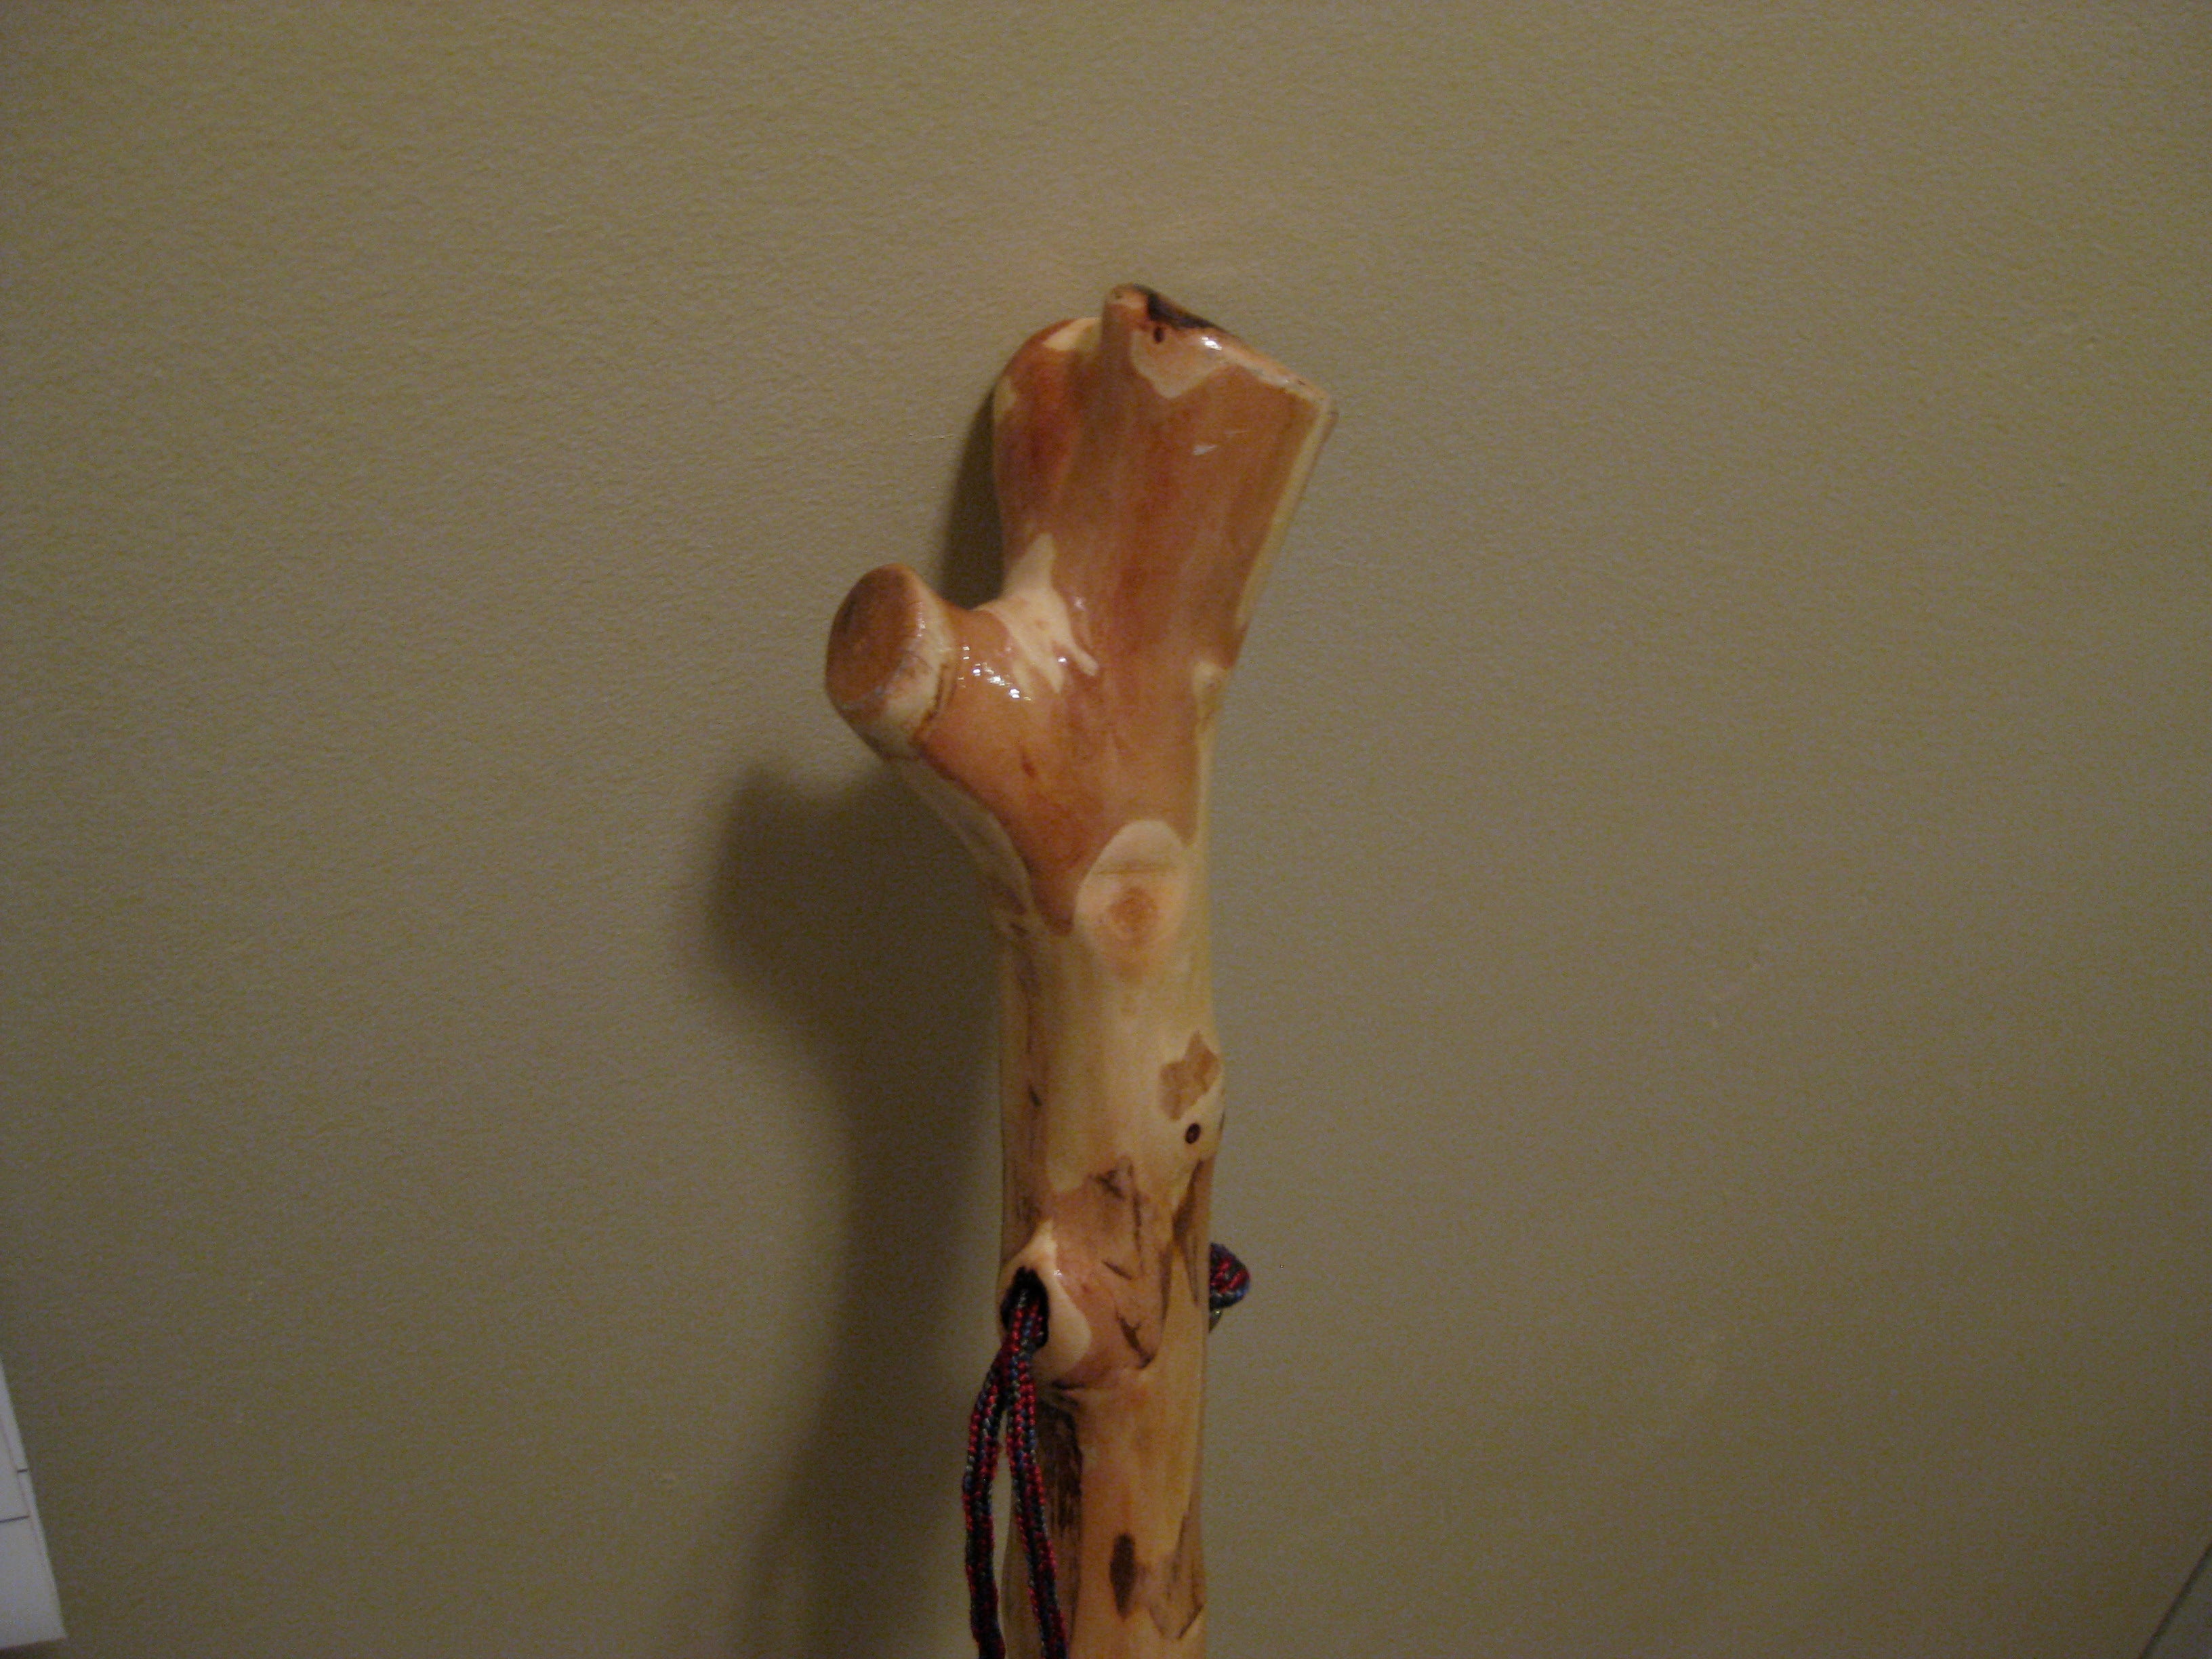
The overall shape is very comfortable in the hand and has an excellent grip. Once you have found that just-right piece of wood, its time to process it.
Processing the Stick
First, you cut the piece into a manageable size. I have a stand of saplings near my house; it used to be an old growth forest before the train line came through and cut down all of the big trees, but now it is about a full square mile of nothing but stumps and saplings. These saplings make great sticks. I usually use a hand saw to cut down a particularly nice piece. Always cut something about a foot larger than you need. You will probably cut some off to size the stick to fit and to eliminate checked ends. If the trees aren’t on your property, then take the appropriate steps to make sure it’s okay to go on the land and cut down the trees. Also, be careful; all trees, even saplings, are top heavy and can be very unwieldy once cut.
Now that you have the piece cut, you have to figure out how you want to finish the stick. I’ve found that leaving the bark on when using maple is not a good idea. With other species it’s different. Some species, like willow or hickory, can be varnished with the bark on and be fine. Maple’s bark wants to fall off once the stick is dry, so it is probably best to remove it before varnishing. Either way, it is best to dry the stick out. Green lumber as a lot of water in it, and as it dries it will warp and check and potentially ruin the structural integrity of the stick. I usually use a piece of PVC tubing (to prevent lots of warping) and dry the stick out over a period of six months or so.
Once the stick is dry, I remove another layer of bark with sandpaper, and then I get the surface nice and smooth with progressively higher grits of sandpaper (starting with 60 going through 120 and stopping at 320). Then I generally round off the top, or I shape the handle a little to accentuate the natural features. Though not necessary, a Dremel is really helpful here.
After the basic shape of the stick is finalized and the surface is smooth, I varnish the stick. You can use a lot of different varnishes, but my experience has proven that Spar Varnish or Marine Varnish works best. I have made close to two dozen hiking sticks (and given many away as gifts), and Spar Varnish works the best. It is very thick, waterproof, and extremely durable. It’s not as glossy, even in the high gloss version, as regular varnish but the durability upgrade is worth it. I usually do something like six to ten coats with wet sanding in between.
Finishing Touches
Once the varnish is dry, I size the stick and add an end cap. I don’t think you have to do this, but it will improve the grip and durability of your hiking stick.
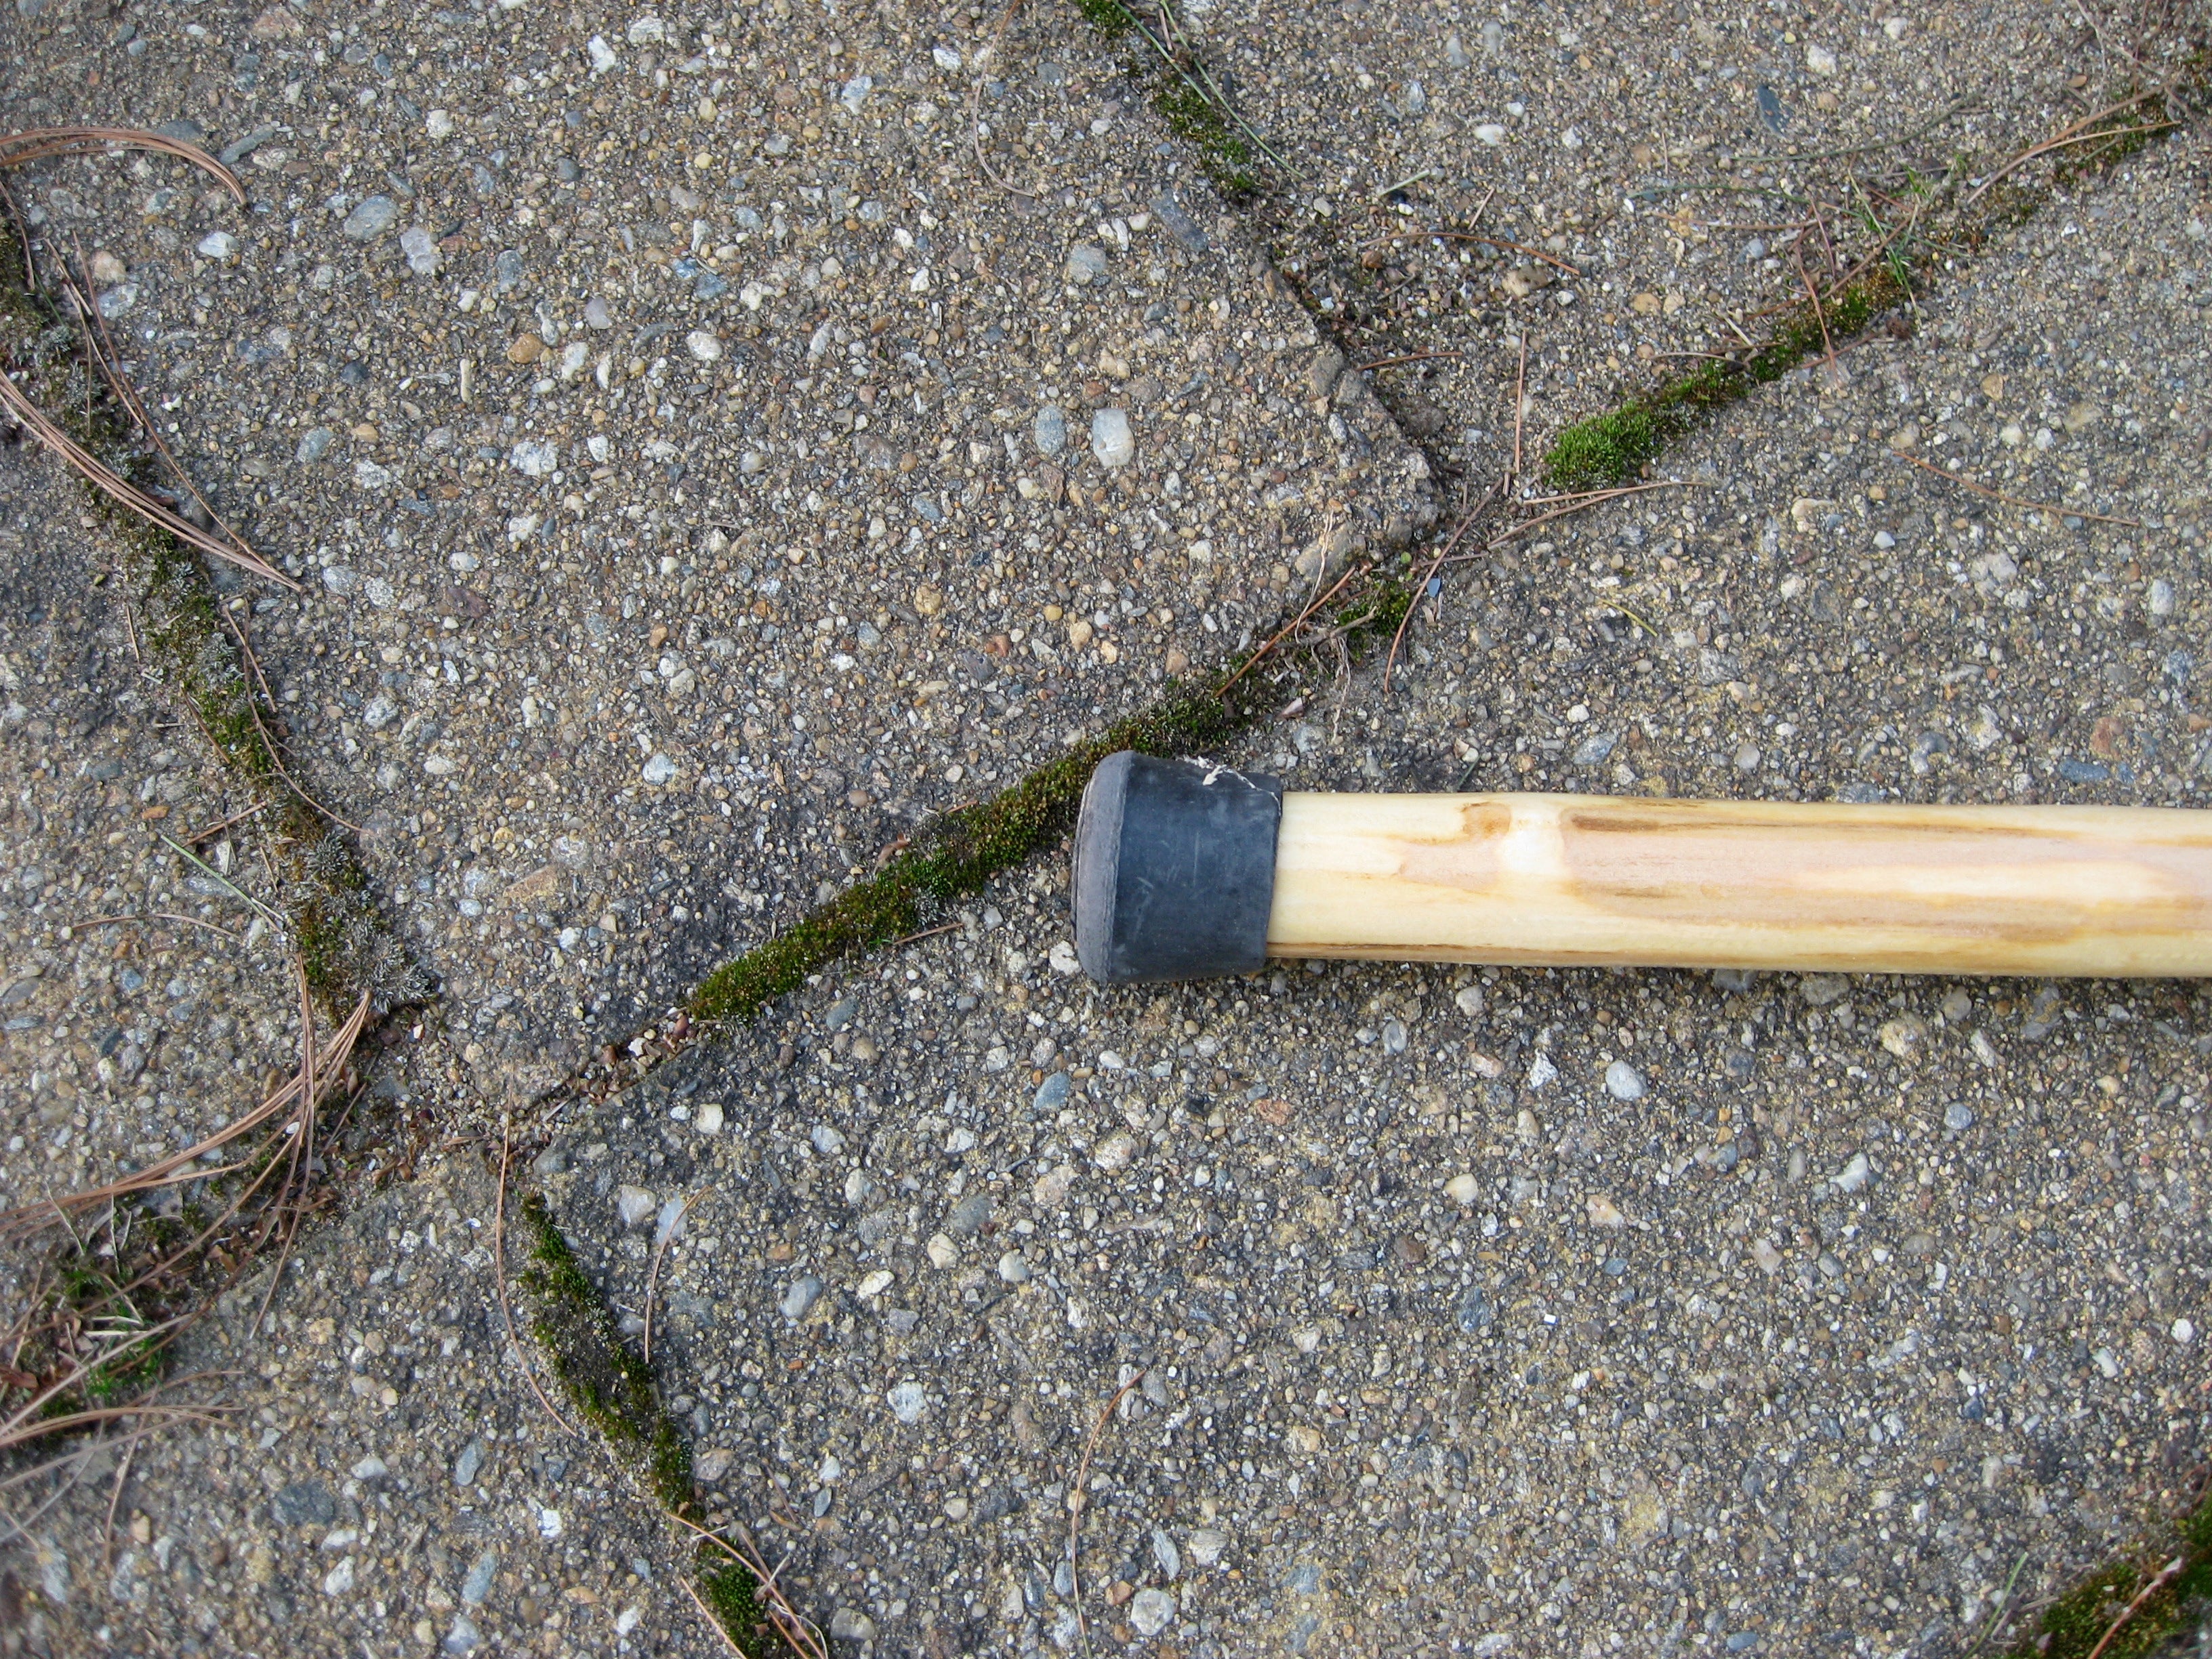
A simple rubber chair tip or ferrule works best, but I also like this ferrule from Lee Valley Hardware. I included one on a stick which was given to a good friend, and she really likes it. Finally, I like to drop a lanyard on my sticks. 550 Paracord works very well.
I generally don’t stain my sticks. I don’t like the look of stain, and the unevenness of the rough lumber causes serious splotching. From cut to carry, the process takes about 6 months of drying time and a week of actually working on it. You can get really fancy if you want, but I love the look of the simple, clean stick. In the hiking we have done, I’ve gotten great feedback on the stick in Acadia and locally. I can’t remember the last hike where we saw people and someone didn’t comment on the stick. Best of all, it’s free.
