The Flashlight UI Compendium, Part III
Tony Sculimbrene 10.22.13

This last part of my flashlight UI series (see part 1 and part 2) covers some of the newer and/or more exotic UIs, all of which originated in the custom or high end flashlight world. Most of them function in similar ways–you rotate a portion of the light to increase output and/or switch modes.
One reason to consider all of the “twist” based UIs listed here is that they offer a high degree of variable brightness. That is, you aren’t forced to choose between a preset low, medium, and high. Instead, you have the ability to select many different output levels, and in some cases you get true “infinite variable brightness.” Infinite variable brightness can be a real benefit, as it allows you to choose any amount of lumens between the minimum and maximum outputs. This allows you to precisely tailor light output to a given task.
The difference between these UIs, despite their similar function, comes in their mechanical implementation. Some use magnets, some use methods from 1950s electronics, and others use high tech materials.
Some of the UIs are relatively common, while a few are very hard to find in production lights and one, the Clock Face UI, is found on a single company’s lights. Quite a few of these UIs have now shown up in production lights, but most, if not all, have their origins in the custom world.
Selector Ring
A selector ring light uses a magnet and a ring to change output levels and modes. Here is a good example of a Selector Ring UI light, the wonderful Sunwayman Mr. Elfin M11R (one of my top five lights):
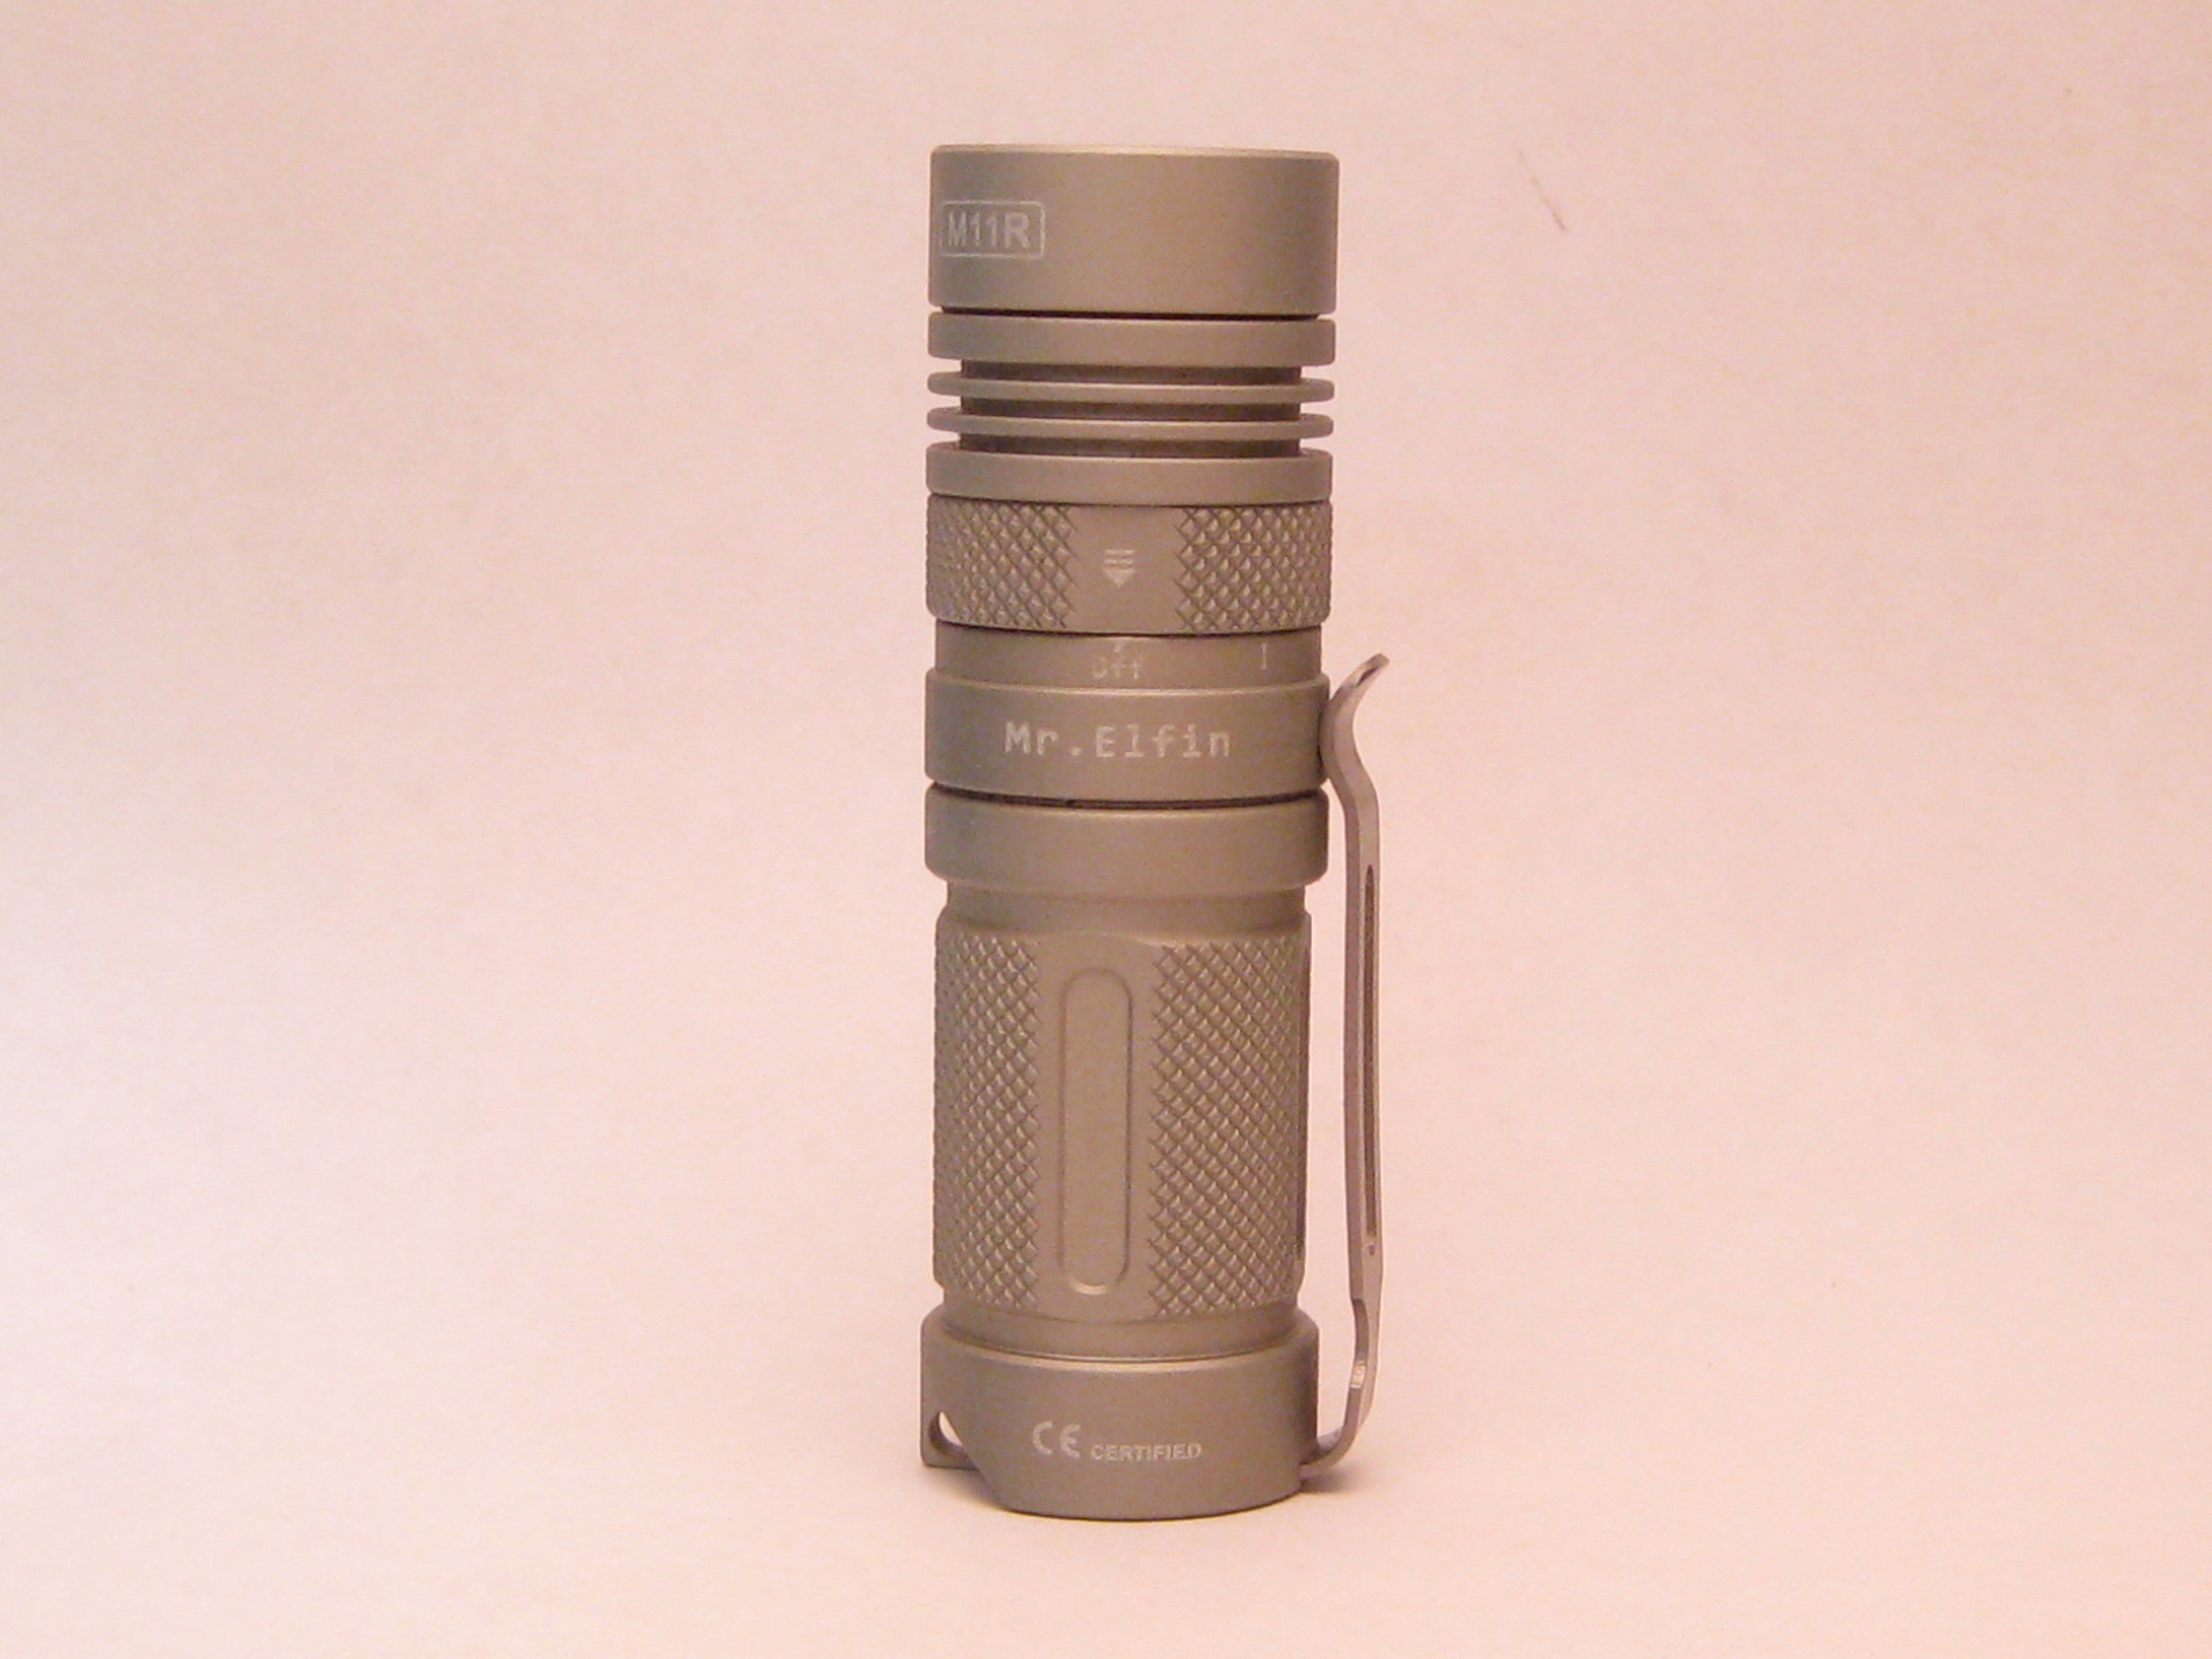
As you twist the ring the magnet travels around a band in the light’s head and changes the switch in the light, which causes a change in the output level. While they may be billed as “infinite variable brightness”, selector rings generally have a very high number of closely spaced settings that lead the eye to believe they are infinitely variable (at high lumens counts your eye cannot perceive small differences in brightness).
One of the selector ring’s big potential benefits is that can be a sealed system. As a fun trick, you can take a regular magnet and run the light through the modes without turning the selector ring. The Selector Ring UI is relatively new, but I have seen very little in the way of problems. Some selector rings are looser than others, so if you can, try them out and see which you prefer. I have never used one so loose that it would accidentally activate or switch levels.
The magnetic switching device originated on high end mil-spec lights, but production light companies like Sunwayman and others adapted it to the consumer market.
Pros:
- Easy to use, easy to explain
- Adds very little to overall length
- Can be used one handed
- Allows for very precise increases or decreases in output
Cons:
- Relatively expensive
- Hidden modes can be extra hard to find
- Not true infinite variable brightness
Ideal Applications: EDC lights, lights used by non-flashaholics; “kitchen drawer” lights
Selector Ring/Clicky Hybrid
This is the original selector ring interface. The click switch turns the light on and the selector ring selects the output mode. Eventually, someone realized that you didn’t need a switch here and that the whole thing could be run from the selector ring alone. Lots of lights still use this setup, especially those from Sunwayman, JetBeam’s Raptor series, and a few Nitecore lights.
Pros:
- Easy to use, easy to explain
- Allows for very precise increases or decreases in output
Cons:
- Adds length over the selector ring only UI
- Extra switches and parts
Ideal Applications: EDC lights, lights used by non-flashaholics; “kitchen drawer” lights
Potentiometer/Multiposition Rotaries
A potentiometer is a three-terminal resistor that allows for adjustability. You can find potentiometers in things like a stereo volume knob.
A mutliposition rotary works differently — it’s is a bit more “old tech”, but it’s a reliable as the Sun and remarkably durable. The multiposition rotary wasn’t phased out of modern electronics because it didn’t work — it was phased out because it was expensive.
Both solutions work the same way and are similar to the selector ring: twist to turn on and twist more for more light.
Depending on implementation a potentiometer can be true infinite variable brightness, but a multiposition rotary cannot. Both the potentiometer and the multiposition rotary are incredibly expensive and thus are seen only on the most exotic of lights. The HDS Rotary and the Spy 005, 007, and Tri V all run a multiposition rotary. The Surefire T1A Titan uses a potentiometer. Like I said, rarified air.
Pros:
- Extremely durable
- Extremely precise
- Easy to use, easy to explain
- High end feel and feedback
- True infinite variability with a potentiometer
Cons:
- Expensive
- Parts intensive
- Lots of labor
QTC
If the potentiometer/multiposition rotary is the high end throwback UI, the flashlight equivalent of a tube amp, the QTC (or quantum tunneling composite) is the cutting edge. The Peak Eiger (also a Top Five light) is an excellent QTC light:

While the twist action is the same for all of these UIs, the QTC seems to be the direction of the future. It allows for true infinite variability. It is very robust and inexpensive to implement and it seems possible to retrofit lights with QTC pills.
The QTC UI operates exactly the same as a potentiometer/multistage rotary or a selector ring, but how it works is totally different and totally cool. QTC lights all have a “pill” inside them, which is placed in the circuit path that powers the flashlight. As pressure is placed on the pill it compresses, and as it’s compressed the material goes from a perfect insulator to a perfect conductor. With no pressure your light is off. With lots of pressure the light is on and receiving maximum current from the battery, resulting in the highest output. With a moderate amount of pressure you get a moderate amount of light. It is simple, intuitive, and has many fewer moving parts than either the selector ring or the potentiometer/multiposition rotary. The pill will wear out over time, but the maximum lifespan is very long.
Pros:
- Very simple, no moving parts
- Very inexpensive, pills come cheap
- Very space efficient, no bigger than the smallest twisty
- True infinite variability (as opposed to other sources that use 50-200 “microstep” outputs)
- Can be retrofitted to old twisties in some instances
- Can be used with a twisty or button press interface, or both
Cons:
- Older gen QTC pills can be finnicky, jumping levels or not holding a level well
- Wears out over time
Ideal Application: EDC lights, lights where a momentary on and infinite variability are needed
Piston Drive
This UI was designed by Don McLeish, who also happened to design the preferred clicky, the McClicky. Here is a production light equipped with the Piston Drive, the Nitecore EX10:
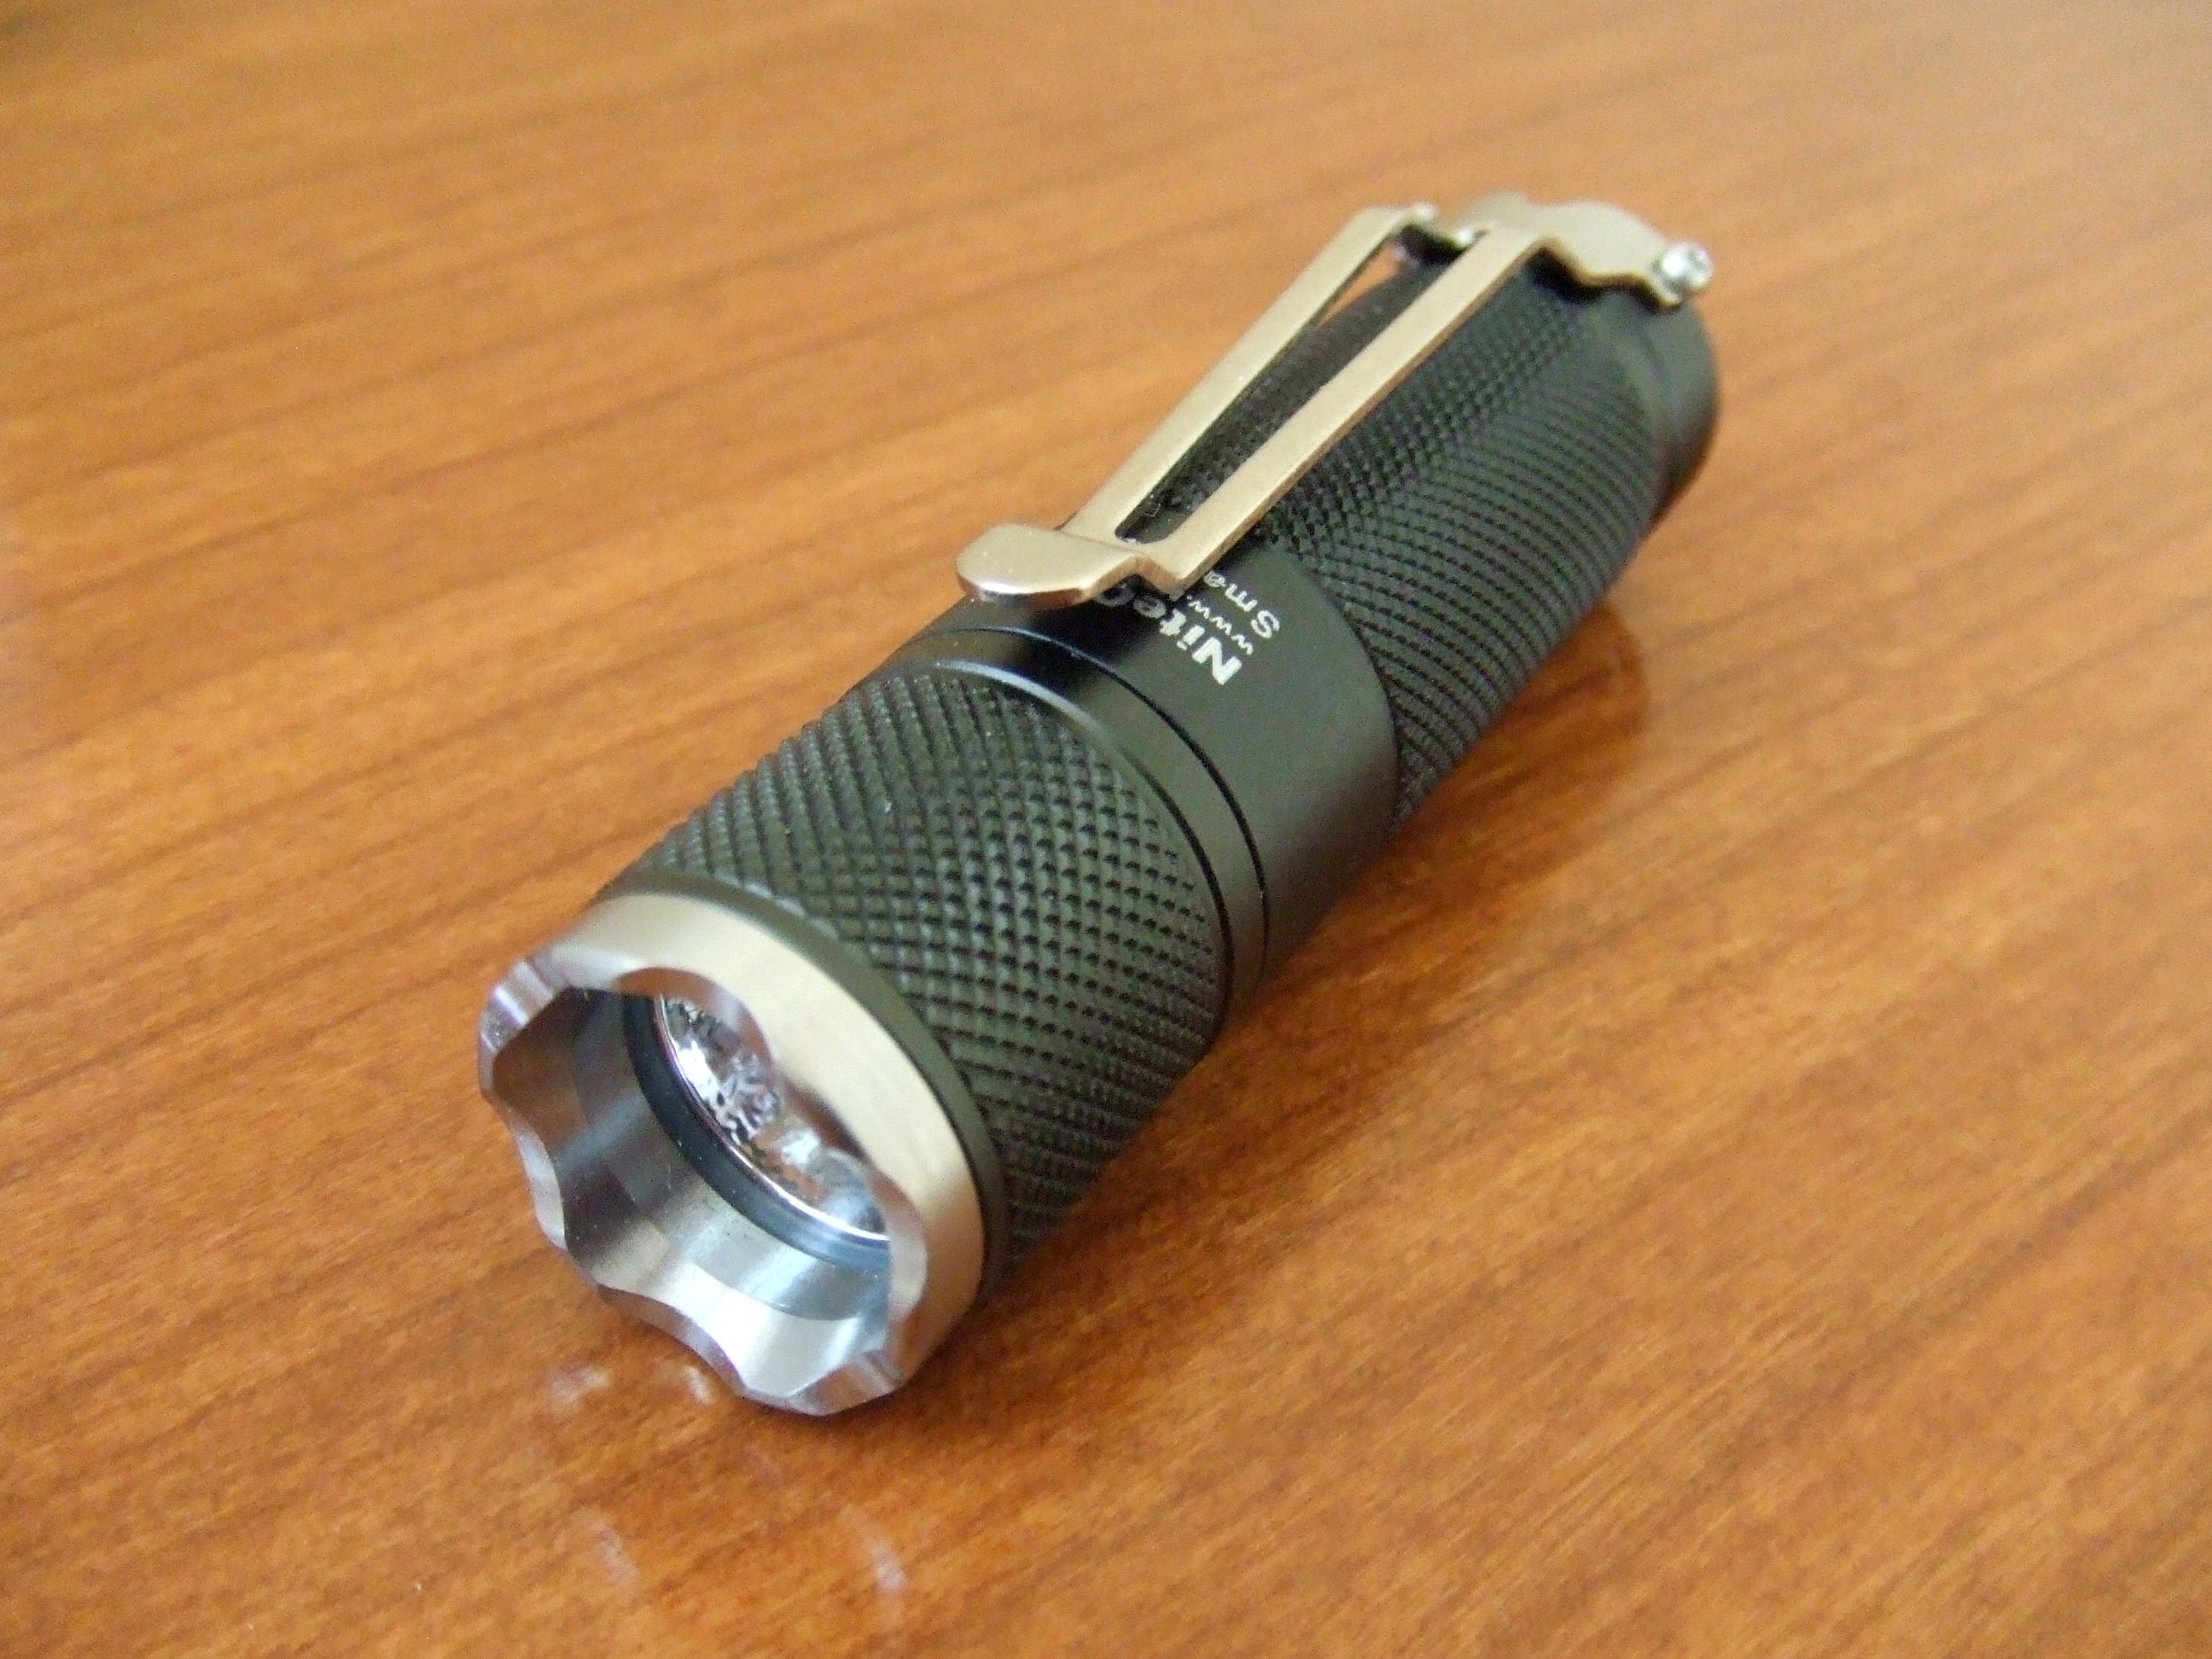
The piston drive fundamentally changes how a flashlight works. Instead of using the body of the light or a wire inside to complete the circuit and power the light, the Piston Drive has an internal “sleeve” that houses the battery and the button. Pressing the button completes the circuit using the sleeve instead of the flashlight body itself.
The original Piston Drives functioned like a twisty with a momentary on. The Nitecore rendition of the Piston Drive, the so-called “Smart PD”, operated like a clicky, but used the Piston Drive sleeve to complete the circuit. The Smart PD, like the selector ring UI, has something that is very close to infinite variable brightness. As you activate the Piston Drive, you can hold it down and the light will ramp up and down the various output levels. Again these are the “microstep” output levels and to the eye it appears to be something like infinite variable output. There are no current lights made with a Piston Drive, though custom Piston Drive lights, including the grailiest of grails, the Lunasol 20, has a Piston Drive UI.
Pros:
- Relatively space efficient
- Allows for multiple methods of activation
- Isolated circuit for simpler action and better reliability
- Smart PD has high variable output
Cons:
- Expensive
- Hard to find
- Somewhat unintuitive
Ideal Application: Hardcore flashaholics only, this can be confusing to use and explain
“Clock Face” UI
There are few things that came across my review desk this year that were as exciting as the MBI HF series (another Top Five light, as you can see I really like these lights) of lights. In large part it is because of the Clock Face UI. Here is the MBI HF-R Ti with the Clock Face UI:

The Clock Face UI does not have infinite variability, but it does solve a lot of problems that other UIs haven’t fixed. Before I get to that, here is how it works.
Think of the rear of the flashlight (the part oppose the lens) as a clock face. When the clock is at the 12 position, the light is off. Turn it to the 3 position and it goes to low. Turn it to the 6 position and it goes to medium. Turn it to the 9 position and it goes to high. The rear of the light can turn either clockwise or counterclock wise. That’s it, that is the whole UI.
You can rotate the tail of the light (the “clock face”) clockwise and pass through all of the output modes going from low to medium to high, or you can go counterclockwise and pass through all of the output modes in the opposite order. You can also do a quarter turn either clockwise or counterclockwise from the off position to access low or high directly. You cannot, however, access medium directly, as you have to pass through either high or low to get to medium.
Once explained, the conceptual model (thanks Donald Norman) sticks in your head and the light is a cinch to operate. But that is only part of the why it is so awesome. This is the first UI that allows you to access both low and high from the start position without having to pass through another mode first or without having to manipulate two different parts of the light. Unlike the Selector Ring/Clicky Hybrid or the Twisty/Clicky hybrid, with the Clock Face UI you can get to low or high from start by doing just one thing. This is genius and is probably the best UI on the market right now. The Clock Face UI does not have infinite variable brightness, its one drawback compared to these other exotic UIs.
Pros:
- Relatively easy to use and explain
- Space efficient
- Allows for access to low and high from start with one action
- Not terribly expensive
Cons:
- No infinite variable brightness
Ideal Application: EDC lights, task lights, anything that needs to provide illumination
Conclusion
You have reached the end. Hopefully you now have an idea of the options out there. I really like the staged twisty, the QTC, the selector ring, and the Clock Face UI. I go back and forth on which I prefer, but all are good.
I am not sure of the value of infinite variable brightness, though manufacturers like to tout it as a feature. There is no practical difference between true infinite variable brightness and the microstep systems used on the selector ring and multiposition rotaries. I am also not sure if infinite variable brightness falls in the same design category as positionable bookshelf shelves. If the positions are well chosen, the variability seems unnecessary. I really like the output levels preset on the MBI HF-R, so really I don’t know how much you gain by going the high variability route. I do know, however, that it gives you options and options are always a good thing. Why limit yourself if you don’t have too?
There are some decent clickies out there, but they seem decidedly last-gen after using some of the newer UIs. If you want even more info on lights, not just UIs, take a peek at Carrot’s Guide to High End Flashlights.
