Tighten a Fishing Knot Correctly
Bob McNally 10.21.15

How fishermen tie and tighten knots is vital to the effectiveness of that connection. And unless it’s done correctly, the knot will slip, fail, and the line parts and a good fish are gone.
It happens all the time. Daily, in fact. Even to good fishermen. Yet it need not if anglers follow these simple steps to tying all fishing knots.
First, be sure you’re very familiar with the knot you’re preparing to tie. If it’s a new knot for you, tie it a few times for practice, using heavy line for learning-ease of tying. Do that carefully, and test it under heavy line load as you watch it perform. Never fish with a knot you’re not completely confident in tying.
1) Begin tying any knot by allowing for plenty of line to properly form the knot. Often having only a few inches of line to tie a knot forces an angler to make less wraps than he knows should go into the knot, or the knot can’t be properly tightened and tested once completed.
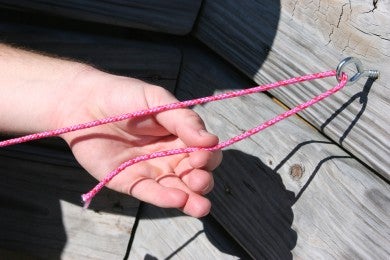
2) Form the knot carefully, following guidelines precisely. This is a 3.5-turn Clinch Knot, a good one for very heavy line, and in this case bright poly cord and a ring eye have been used for illustration. Note how the wraps are uniformly made, with ample line allowed for the tag end during tightening.

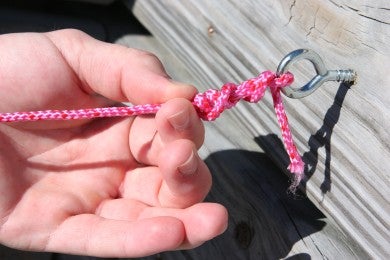
3) Begin tightening the knot by pulling slowly and firmly on the standing part of the line, while thumbnail and forefinger push or slide knot wraps together toward the hook eye. When doing this with a lure or plug, secure the hook to an immovable object, like a boat ring or strap on a tackle bag or box. Note that moistening an entire knot with water or saliva can greatly aid in the knot slipping and jamming quickly into position for final tightening.
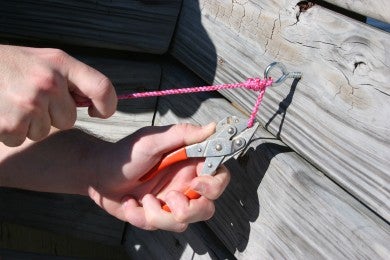
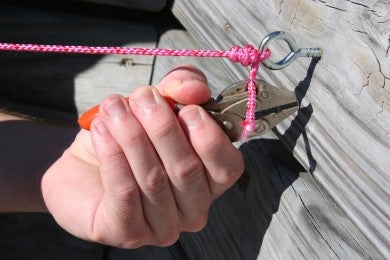
4) As knot wraps snug and jam, and while increasing tension on the standing line, pull slowly and firmly on the tag end line to uniformly lock in the knot. In this case, fishing pliers are used with the heavy poly cord, but with lighter fishing line finger pressure is usually adequate.
5) After proper forming and tightening, properly tied knots will not slip. So cut the tag end close using clippers.
6) Give the knot a final check, making sure wraps and coils look solid and tight, and give the knot a last firm pull for security. If it fails, you want it to fail now, in your hands and not when there is a fish on the line. Even if it holds under load, if it doesn’t “look good,” cut it off and re-tie. It’s not worth using a bad knot on a good fish.

