From 30-06 to 338-06 in 23 Photos
Russ Chastain 11.15.17

Back in 2005 when the 338 Federal hit the market, I thought it was the best thing ever. Since I don’t have a bunch of dough to spend on rifles and ammo, however, I never did get my hands on one of my own. I’ve never been one to jump on the bandwagon of new cartridges “just because,” but I like heavy bullets and fast bullets, and the 338 Fed put both into a short-action package. Me likey!
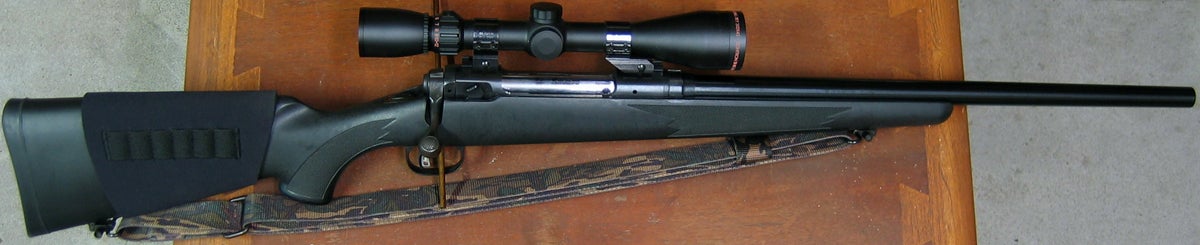
I never did end up with a short-action rifle I was willing to rebarrel, but I eventually did find myself in possession of a Savage 110 in 30-06 at a time when I was in between projects. What to do with it? My fantasy 338 Fed came to mind, but that doesn’t make sense in a long action rifle, and after 5 years it was already fading from popularity anyhow. So why not go bigger and better? I decided on the 338-06, and from there the decision-making was plumb easy.
This was my first foray into changing out a rifle barrel, so it’s natural I started with a Savage. Their locknut system of headspacing makes barrel swaps relatively simple.
For the barrel I turned to Brownells, and found an E.R. Shaw barrel kit which included a heavy magnum-contour 24″ barrel, a locknut wrench, a tube of Uncle Ed’s Bore Paste, a plastic bottle of Uncle Ed’s Premium Gun Oil, a go gauge, and a no-go gauge.
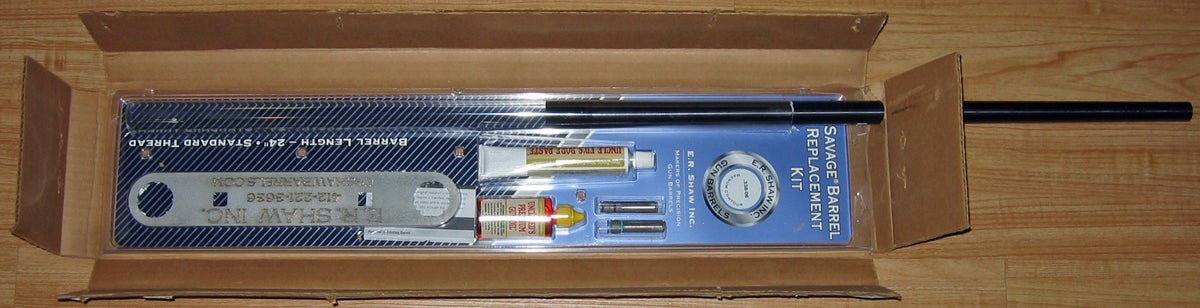
When the package from Brownell’s arrived, the barrel was sticking out of the box. Fortunately, this box was inside another box, which the barrel didn’t penetrate. My first impression of the barrel was, “Man, this thing is heavy!”
My kit, which was ordered and received in 2010, had most of the stuff required for swapping a Savage barrel, but the locknut wrench had knife-sharp edges which would have surely cut anyone trying to use it without gloves. This required some time with a file to remedy.
The barrel itself looked great. I was thoroughly impressed with the blue, the bore, the crown, and the chamber. It had a one-year warranty, which I probably voided when I chopped off the end of the barrel.
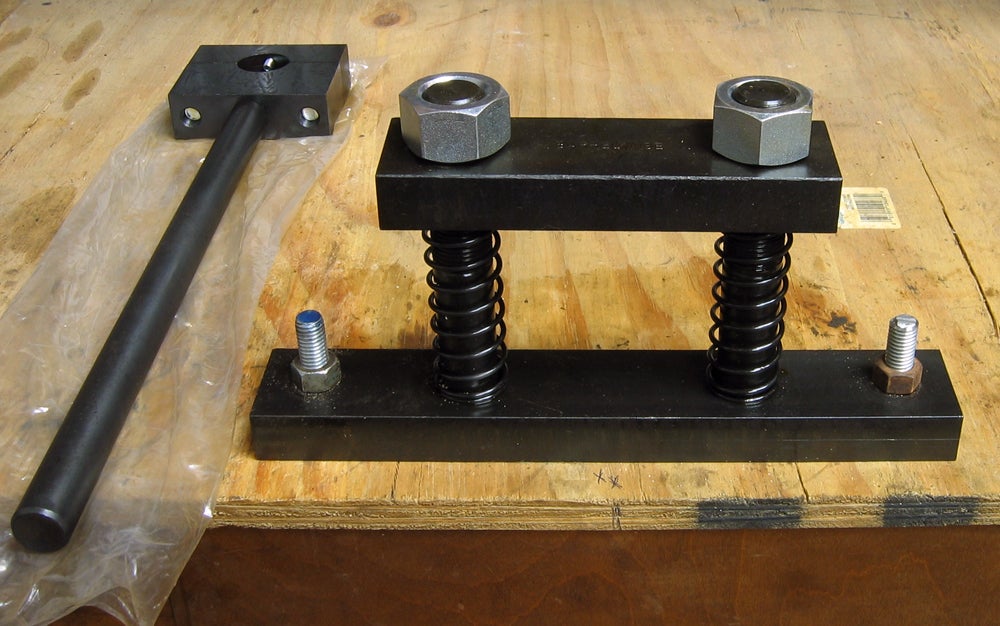
I ordered a Wheeler Engineering barrel vise and action wrench elsewhere… but if I had it to do again, I wouldn’t order the action wrench. I didn’t need mine, and it wasn’t a good fit with my receiver anyhow.
I used 1/2″ bolts to mount the vise to my workbench. This vise is not fancy, but it is pretty beefy.
The action wrench (left) said it would fit Remington 700s and Savage 110s, but it didn’t fit my Accutrigger-equipped Savage and I didn’t use it. But judging by my experience, you DO need a barrel vise for a project like this.
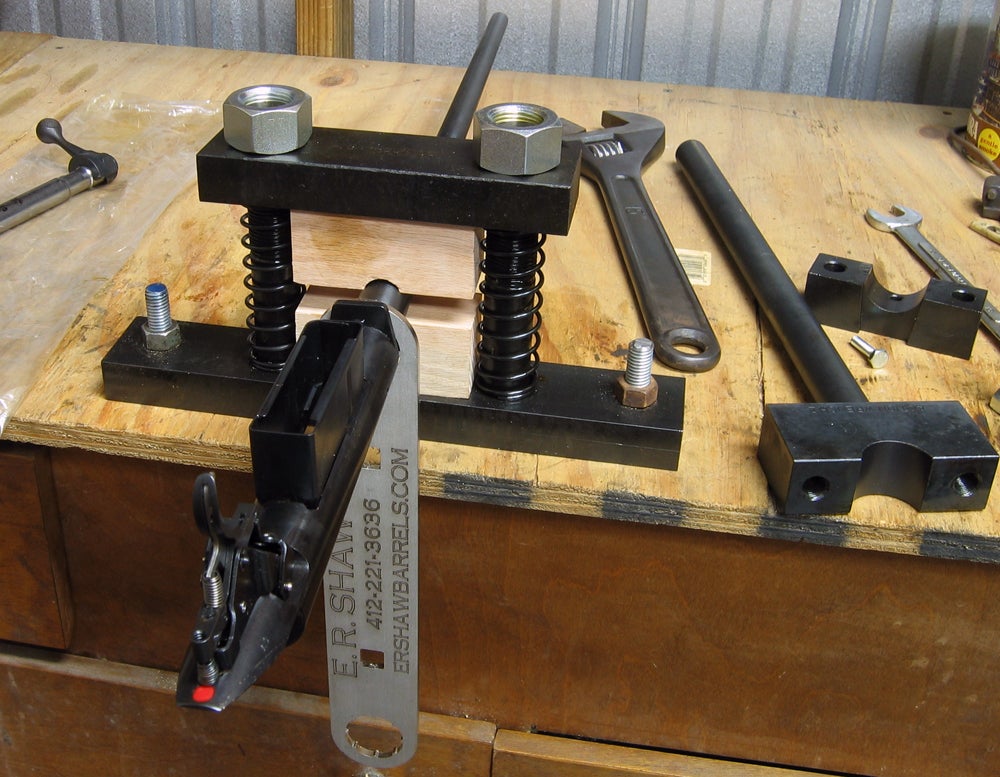
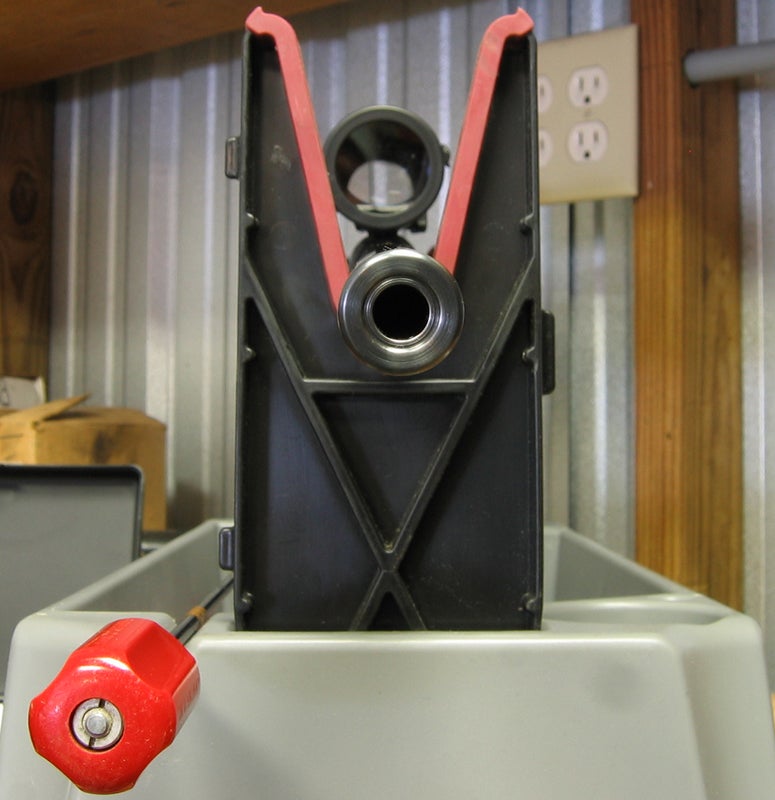
Before you chomp down on the barrel with the vise, carefully slip the locknut wrench over the barrel and onto the nut — and make sure you are using the correct end of the wrench. Some locknuts have rounded grooves and some (like mine) have square grooves for the wrench to engage.
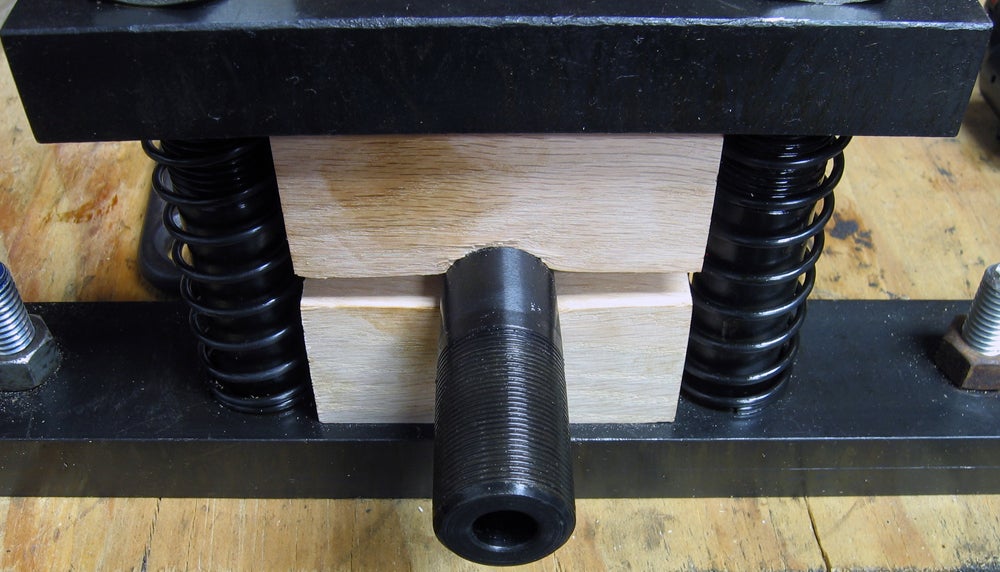
I hadn’t yet tightened up the barrel vise. When I did, I tightened those large nuts a little at a time, alternating from right to left, using that big adjustable wrench.

The wrench has a square hole for a 1/2″ ratchet or breaker bar, so I tried that at first. This didn’t give me enough leverage to break the nut free, but it did make the barrel spin in the wood bushings of the barrel vise.
After trying repeatedly and tightening up the vise a lot more, I finally removed the ratchet and hit the wrench with a wood mallet. This sudden shock was enough to break the nut free so I could thread it forward on the barrel. Then all I had to do was unscrew the receiver off the barrel.

Receiver lying on the bench, right after I removed it. After I took this photo I removed the recoil lug from the barrel, unscrewed the locknut from it, and removed the wrench.
After I removed the other stuff, I took this pic. it took a lot of pressure to conform those oak bushings to the shape of this barrel.
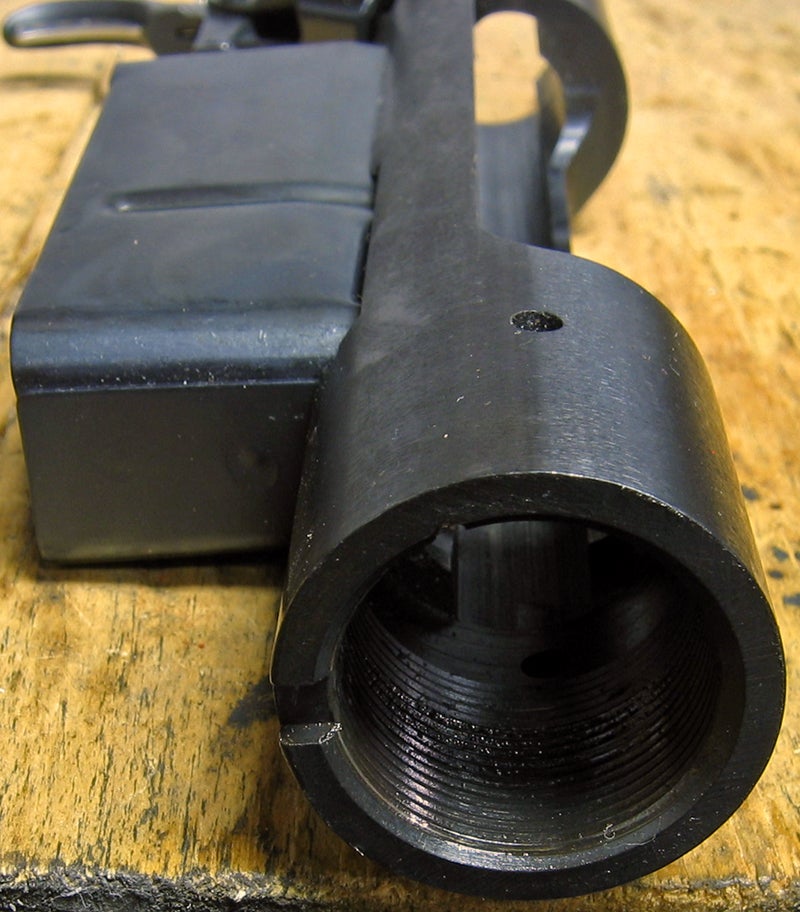
Face of receiver after removing the barrel. The threads on both barrel and receiver were rather oily.
That notch on the bottom (left in the photo) is for indexing the recoil lug. And that hole on the side (top in the photo) is there to vent gases sideways instead of into the shooter’s face in the event of a case head rupture.
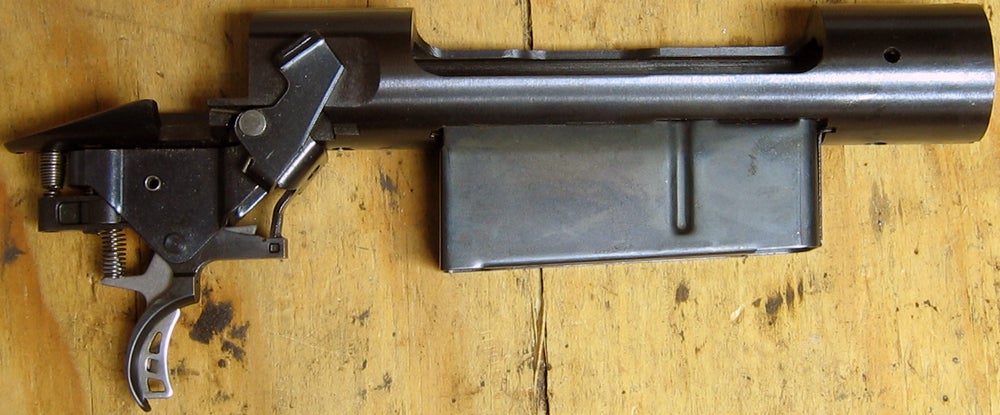
Here we see the receiver, AccuTrigger and all. Someone before me had adjusted this trigger to about 2.5 pounds, which is far too light for most practical use — especially hunting, which was my intended purpose. For that, I like a pull between 4 and 4.5 pounds.
This receiver left the Savage factory with many sharp edges inside, and it really needed some work. There was evidence that these snags had caused ammo feed problems in the past, so I got rid of the burrs and sharp edges before moving on to the barrel.
I’d been toting a 20″-barrel 308 Savage for years, and I loved how handy it is. So I definitely wanted to lose some length off the 24″ barrel — especially because it is such a heavy barrel. This saves both weight and length.
To chuck it in my lathe, I followed some advice found in a book by John Stranahan called “Precision Rifle Rebarreling and Case Preparation on a Home Shop Lathe.” He used the same machine as mine, which is one reason I’d purchased the book a few years earlier.
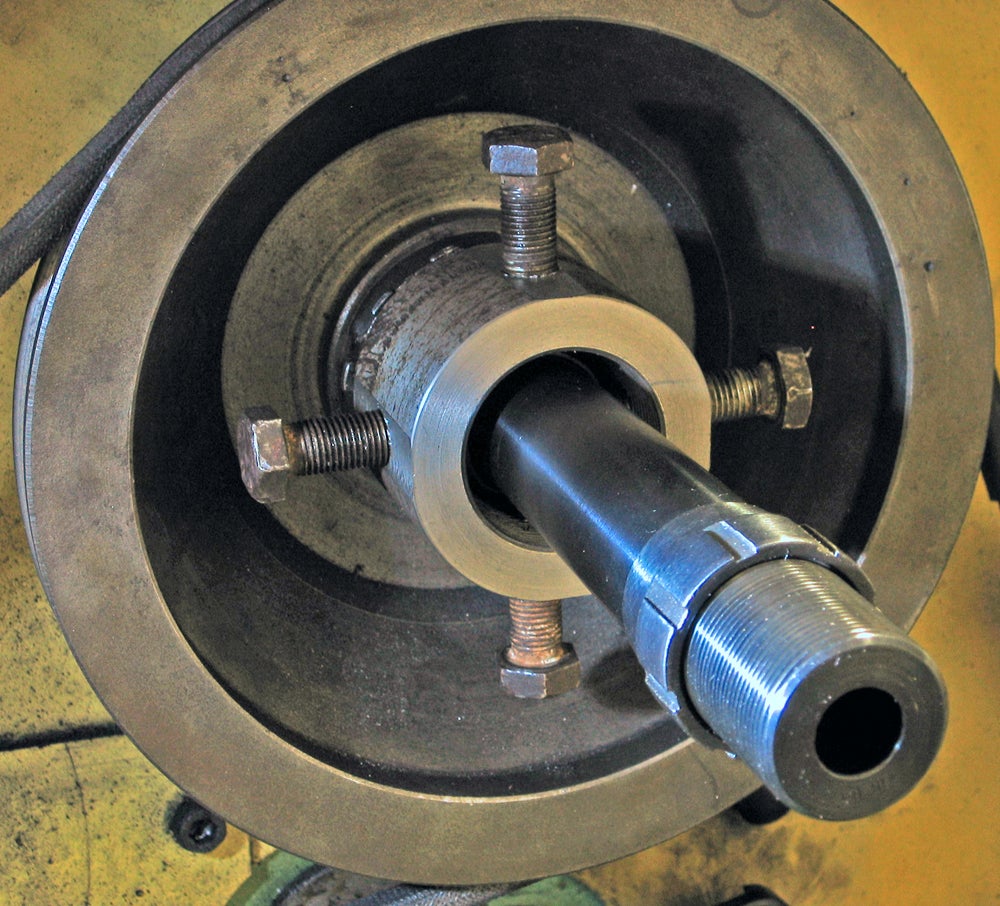
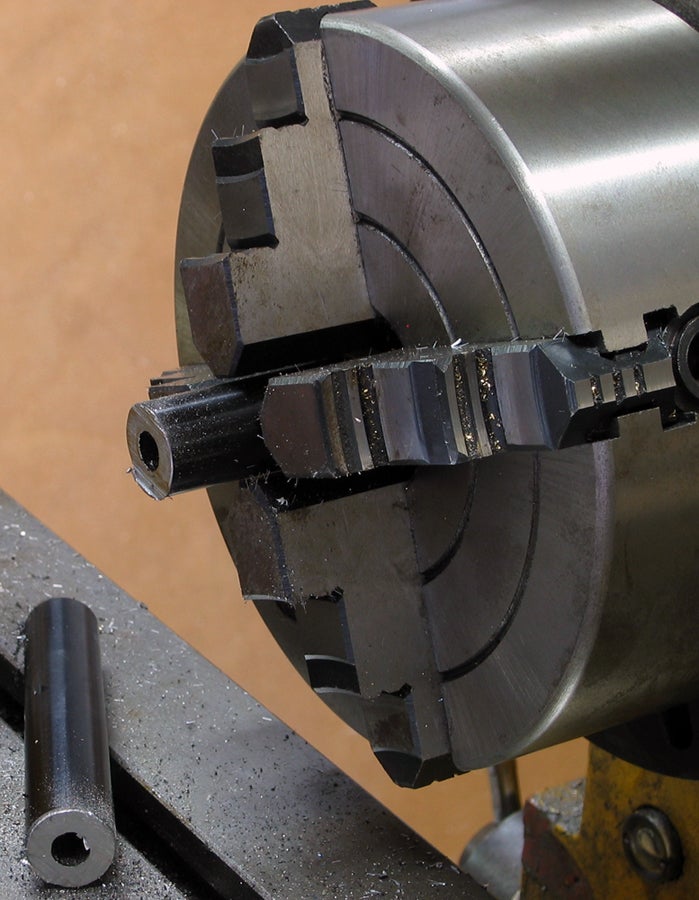
The photo above shows the “spider” I made based on his advice. This doubles as the nut which holds the drive pulley on the lathe, and a crude approximation of a 4-jaw chuck. I placed a thin strip of brass (tough to see in the pic) between the ends of the bolts and the barrel’s blued surface, to prevent damaging the barrel.
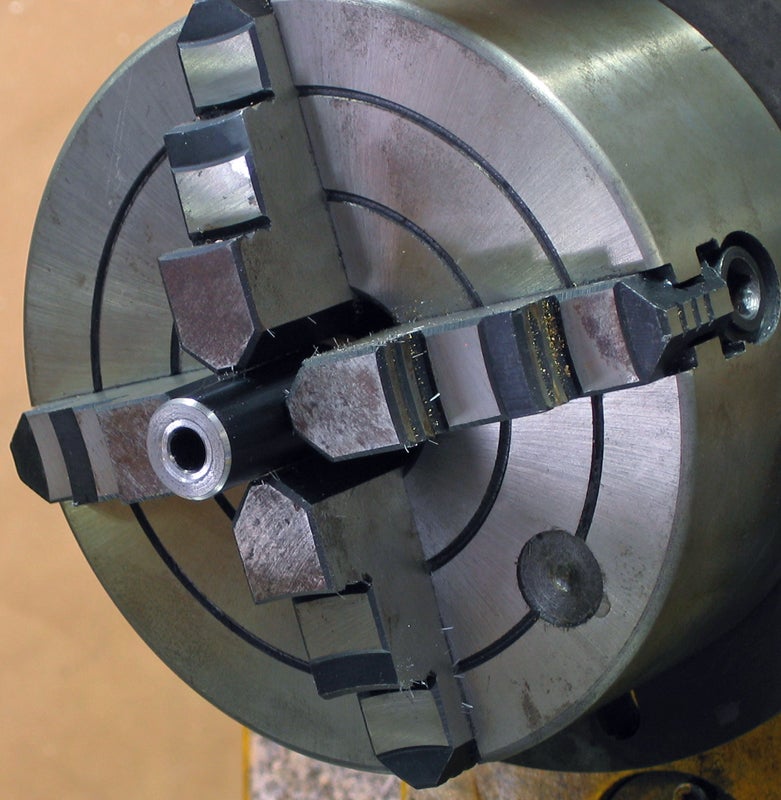
I’d turned a steel rod to the same diameter as the barrel’s bore, and I used this and a dial indicator to adjust the spider bolts on this end, and a 4-jaw lathe chuck on the other end, to true the barrel in the lathe.
I trued it to the bore rather than the outside surface of the barrel because a barrel’s bore isn’t always centered in the barrel itself.
After a false start with a parting tool, I grabbed a Sawzall and chopped four inches off the barrel.
I faced the end of the barrel and roughed in the new crown. I chamfered the outside edge, turned a recess in the muzzle to protect the crown (the forward end of the rifling), and chamfered the crown itself using a center drill in the lathe’s tail stock.

To clean up the muzzle while the barrel was spinning in the lathe, I used a file to remove sharp edges and worked out some coarse lines using fine emery cloth.
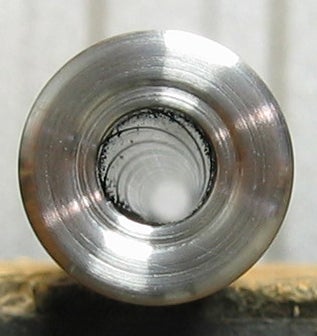
I should have left the barrel in the lathe a little longer; this is what it looked like when I first removed it. Not terrible, but certainly a bit rough.
Another view of the rough crown, right out of the lathe. I took a close look with a jeweler’s eye loupe and found steel burrs remaining in the rifling. I removed them using the loupe and a fine steel pick, then fine-tuned it using Matz rubberized abrasive bullet-shaped tips in a Dremel rotary tool (coarse, then fine, then extra-fine.
Some tiny bits of steel remained, which I left for the bore lapping process.
I didn’t take any pics of the barrel install — after all, it’s pretty straightforward:
- Turn the locknut onto the barrel threads as far as it will go.
- Slip recoil lug onto barrel, making sure the indexing protrusion is facing the receiver.
- Put a “go” gauge in the rifle chamber.
- Install the rifle bolt into the receiver.
- Thread the receiver onto the barrel until the go gauge stops you. Do not overtighten!
- Tighten locknut by hand, making sure the recoil lug engages cut in receiver.
- Open the bolt to make sure the go-gauge is properly seated in the bolt face. It should be held in the bolt just like a cartridge would be.
- Reinstall the go gauge and bolt.
- Slide locknut wrench on barrel, clamp barrel in barrel vice, and tighten the locknut (torque specs 75-100 ft-lbs)
- Open bolt, remove go gauge.
- Insert no-go gauge into chamber and attempt to close the bolt normally (don’t be aggressive with it).
If you can close the bolt on a no-go gauge, it’s time to loosen the nut and start over.
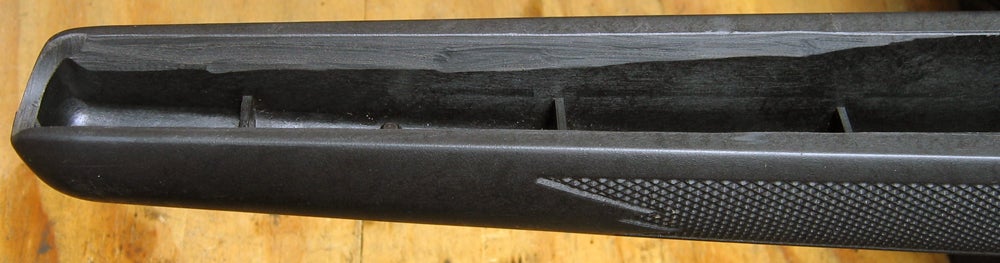
Because my new barrel was such a fatty, it didn’t fit the stock. So I laid the barreled action on the stock and drew pencil lines alongside the barrel, to use as guides. Then I went to work with a Dremel and sanding drum.
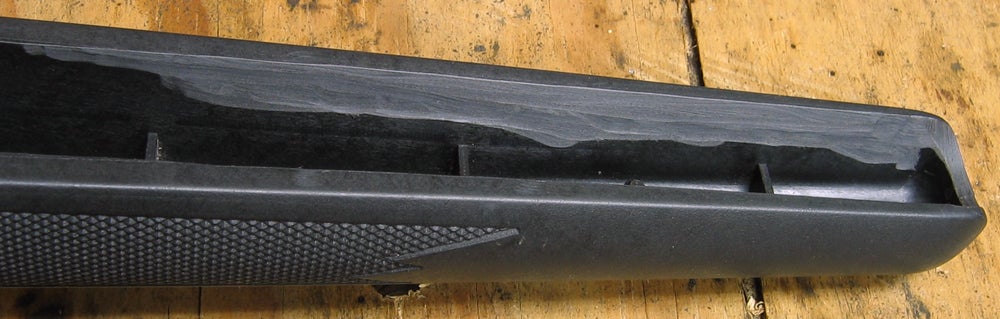
It looks a bit crude — because it is — but it looks pretty good when it’s all assembled.
As with anything of this nature, just remove a little bit of material at a time. You can always cut off more later, but it’s tough to cut some back ON.
Aside from taking material off the sides of the channel, I had to deepen this part of the forearm. I used the Dremel with sanding drum freehand, which was a “seat-of-the-pants” approach but it did the job.
The end result is a free-floating barrel, which is how they did it at the factory.
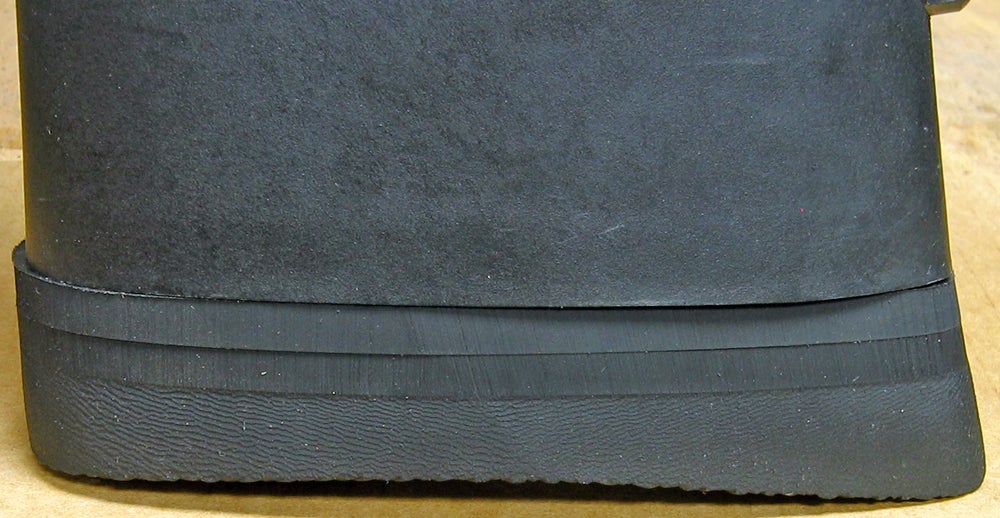
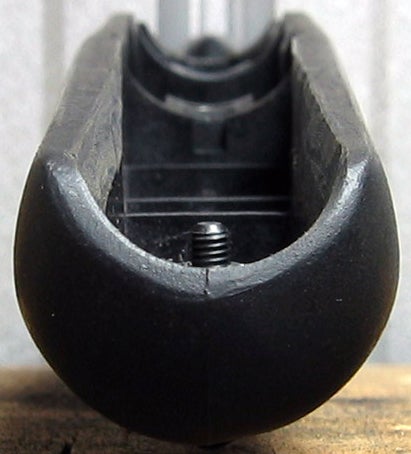
I figured a heavy-hitting round like the 338-06 deserved a good recoil pad, so I ordered a Pachmayr Decelerator (PN 01725) that was supposed to fit right on. Wrong!
The fit is awful as you can see, but on top of that the design forces you to use a 1/4″-thick plastic plate, which adds length to a rifle I’m trying to shorten up. Besides, a close look told me even that wouldn’t work.
So yeah — don’t get one of these. I just put the factory pad back on, and have been using it for years now without any trouble.
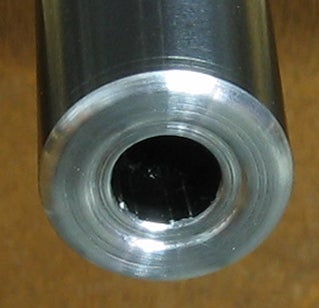
The final crown, which I cold-blued with “Gunsmith Quality Oxpho-Blue Creme Formula” from Brownells, turned out pretty well.
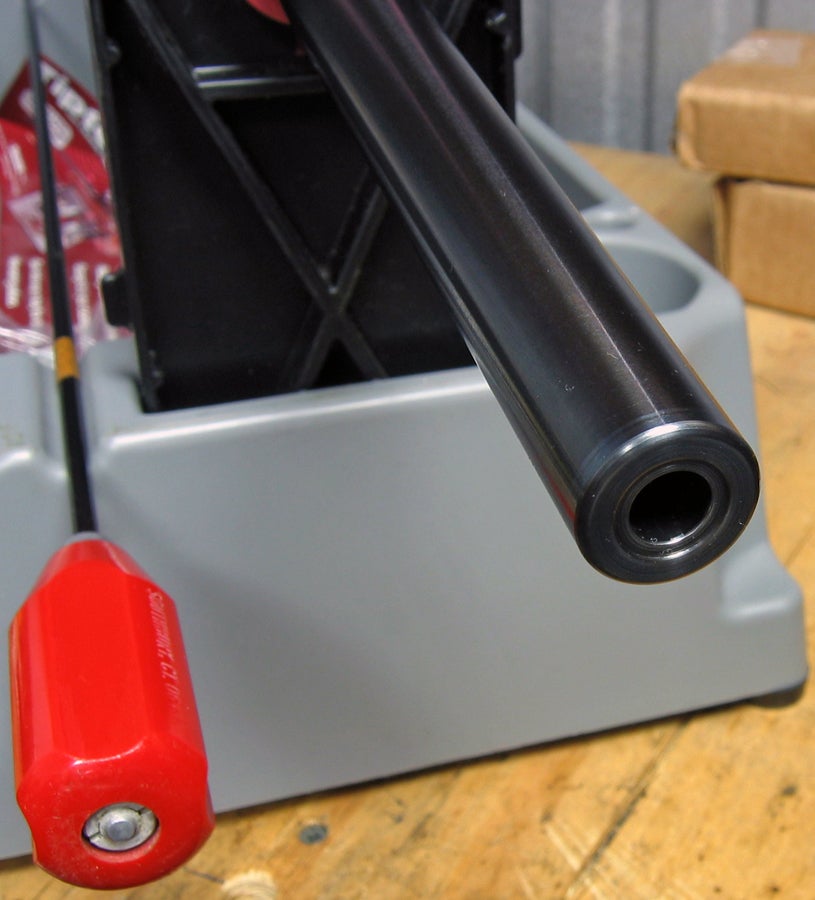
Another view of the finished barrel crown.
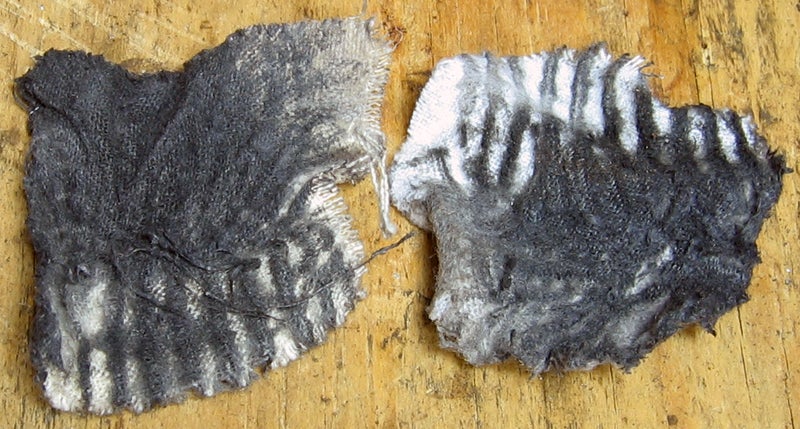
Next, I went to work cleaning the brand-new rifle bore. I followed instructions using the Uncle Ed’s Bore Paste and Premium Gun Oil that came with the barrel kit, and it took many patches to do the job. These patches are indicative of the process, which is mildly abrasive, thus removes tiny bits of steel from the rifling.
You may recall the little steel burrs that remained on my rifle’s crown after I shaped and polished it. Well, this lapping process cleaned those right up.
I don’t expect to use this paste on anything other than a brand-new barrel, though, due to its abrasiveness.
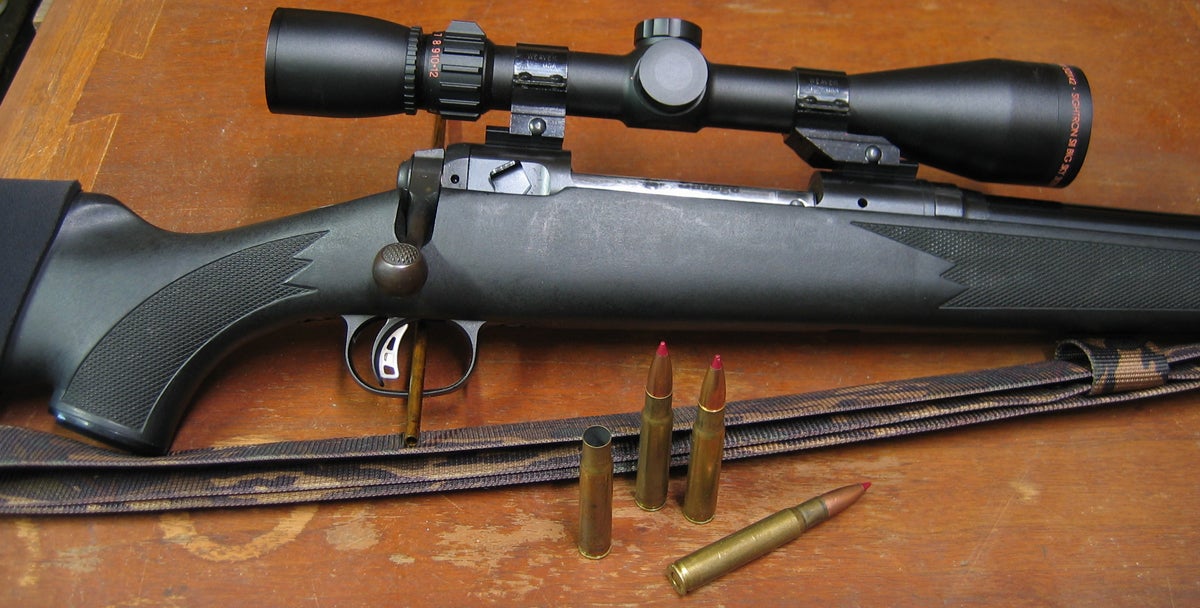
I love Little Lotta, which is the moniker I bestowed upon this popper, although I more-or-less failed to attain my dream of owning a hard-hitting .338 rifle that was also light and handy. The big, heavy barrel can be a chore to carry — but I will never regret chopping those four inches off the end to make it handier. Besides making it shorter, that short hunk of barrel lightened the gun by almost a half-pound.
In the end, here are some specs:
- Overall length: 41 3/16″
- Barrel length: 20″
- Weight (unloaded, with scope): 8.7 lbs
This rifle shoots well within “minute of whitetail” with every load I conjured up. In the end I settled on 52.5 grains of IMR4895 in Winchester 30-06 brass necked up in Lee 338-06 dies pushing a 200-grain ballistic tip bullet using a Winchester Large Rifle primer & overall length of 3.37 inches. CAUTION! Use at your own risk!
In this rifle, I got an average muzzle velocity of 2436 FPS on a frosty 24-degree morning when I placed four shots into a 0.527-inch 100-yard group.
Final Thoughts
I love my self-customized rifle, and I love the cartridge. I sometimes wish I’d opted for a lighter barrel, but I just didn’t find one readily available when I was looking.
In the end, Little Lotta is one heck of a fine DIY knocker-downer that isn’t too big or bulky. Not bad, if I do say so myself.
