Zastava M57/Tokarev Pistol Trigger Job
Russ Chastain 05.28.20

It’s about time for an update on the Zastava M57, that Serbian copy of the Russian Tokarev 7.62x25mm pistol that I’ve been “playing with” lately. Its trigger pull was heavy, creepy, and somewhat gritty, so I decided to sweeten it up.
Disclaimer: This article is simply stating what I did, and is in no way a recommendation that you should do the same. I’m simply telling a story here.
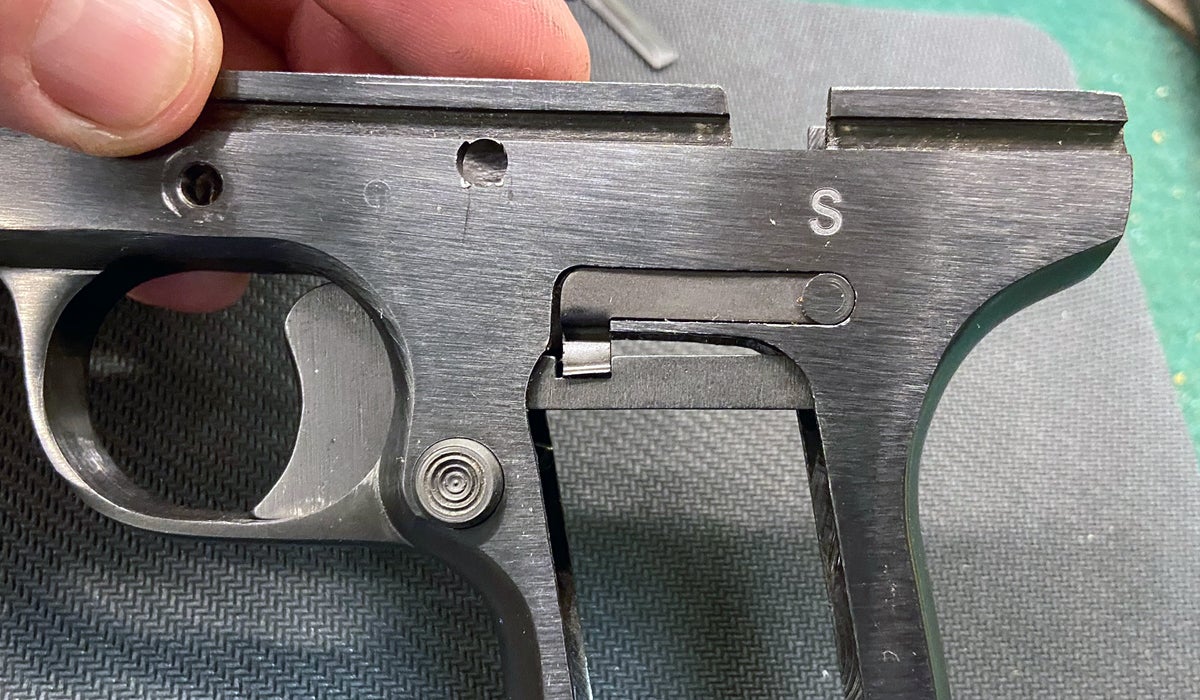
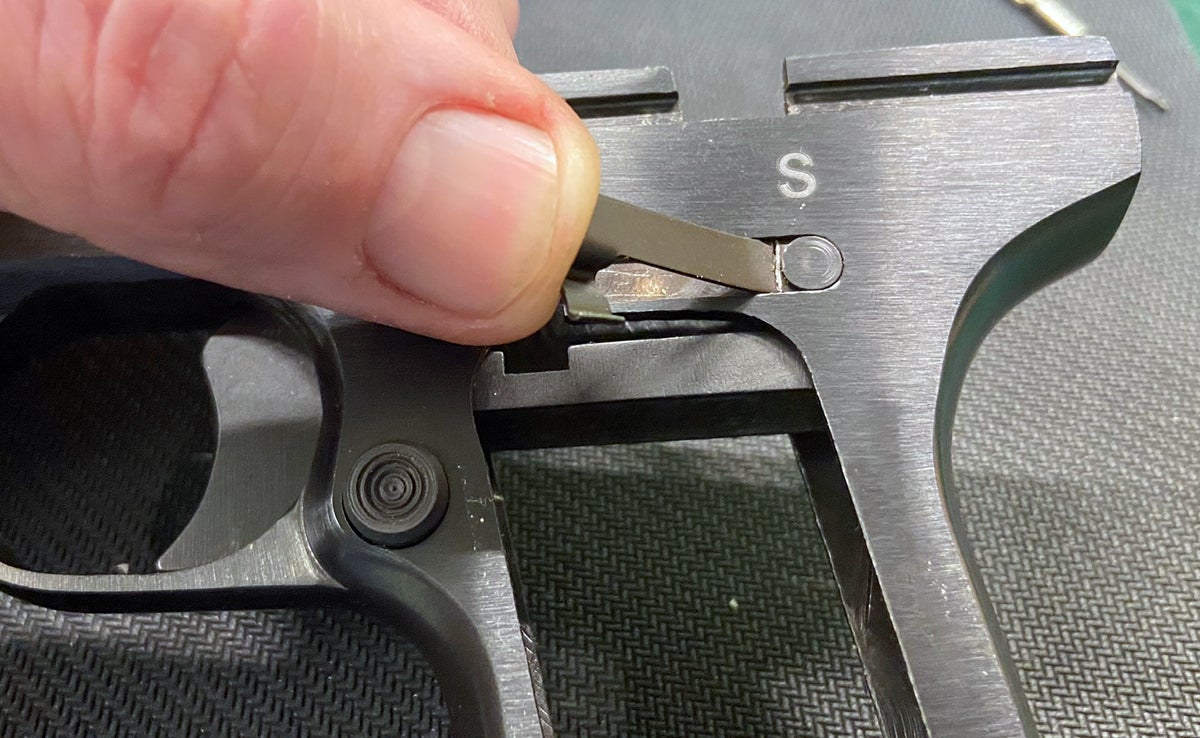
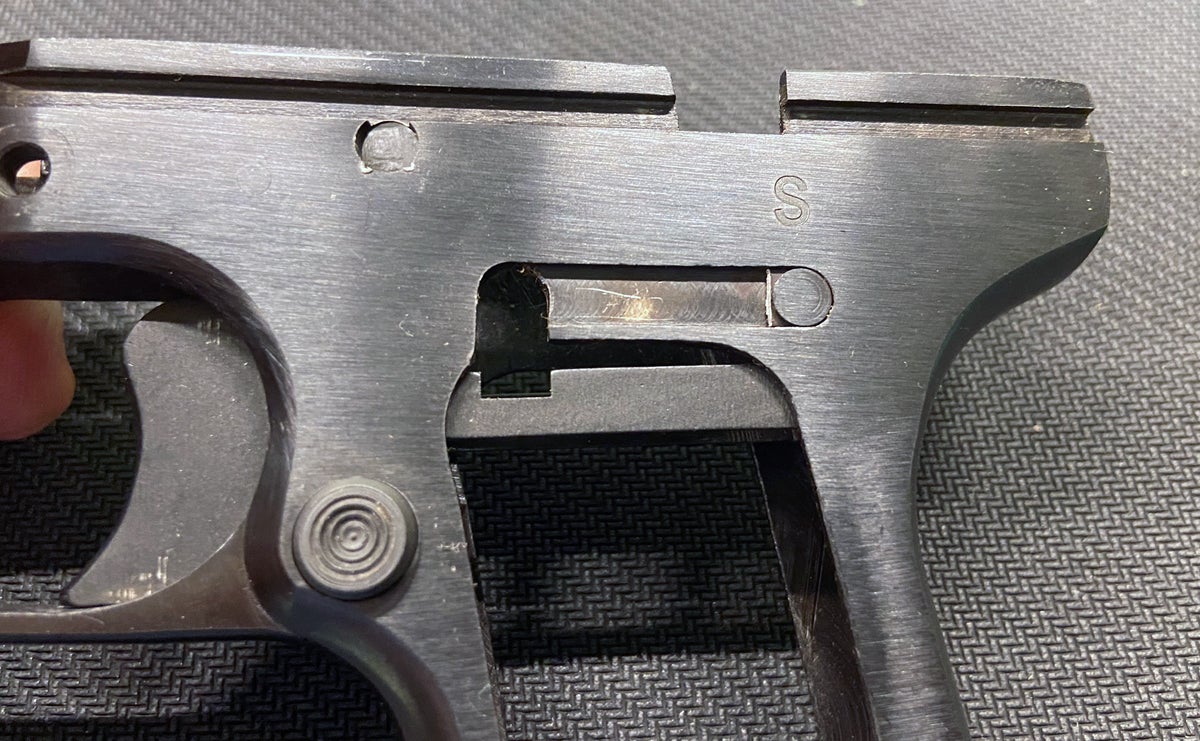
Time to get started! With the pistol field stripped and the grips removed, the left side of the frame looked like this. That thing above the trigger bar is the magazine safety, secured to the frame by a rivet just below the S etched into the frame. If a magazine was in place, the magazine would push that safety off to the side, allowing the trigger to move rearward to fire the pistol.
(Photo © Russ Chastain)
I’m not a fan of the mag safety, and later on in this article you’ll see what I did about it. For now, I remove the trigger so I can reduce the trigger pull weight. Start by simply moving the rear of the trigger bar downward toward the base of the grip.
(Photo © Russ Chastain)
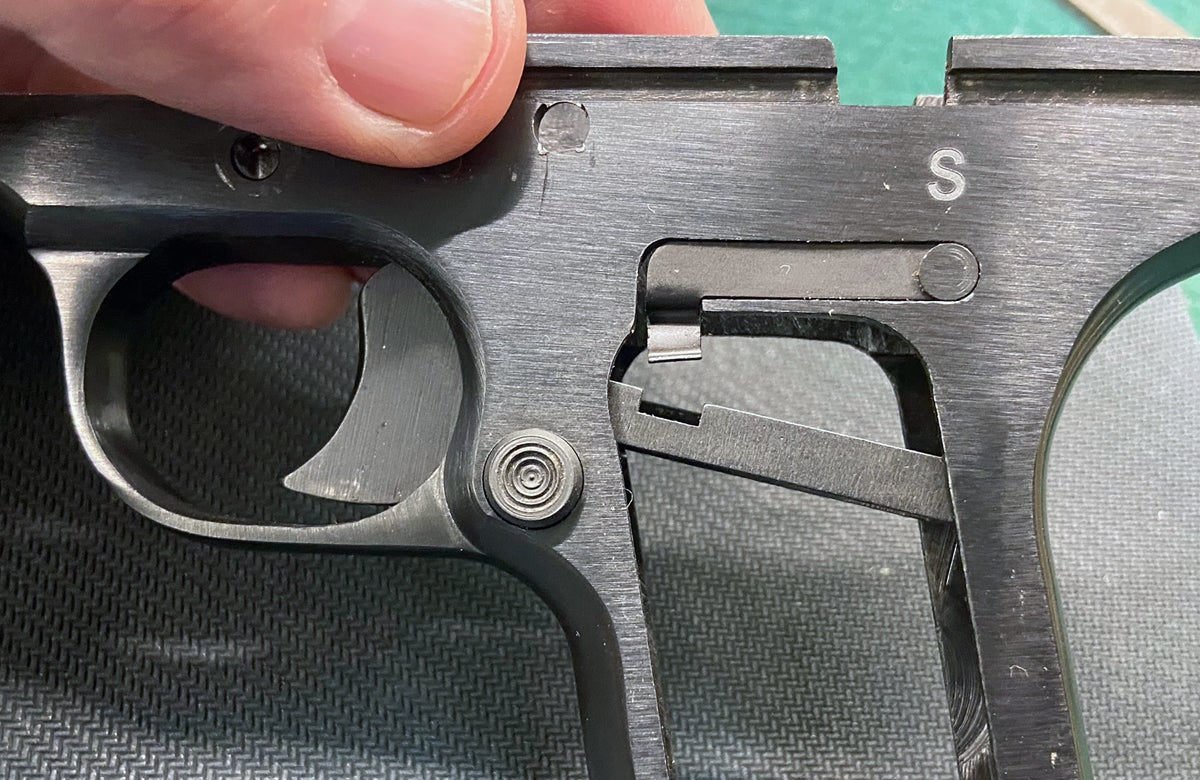
You’ll feel some resistance at first, then the trigger will come free of the trigger return spring, like so.
(Photo © Russ Chastain)
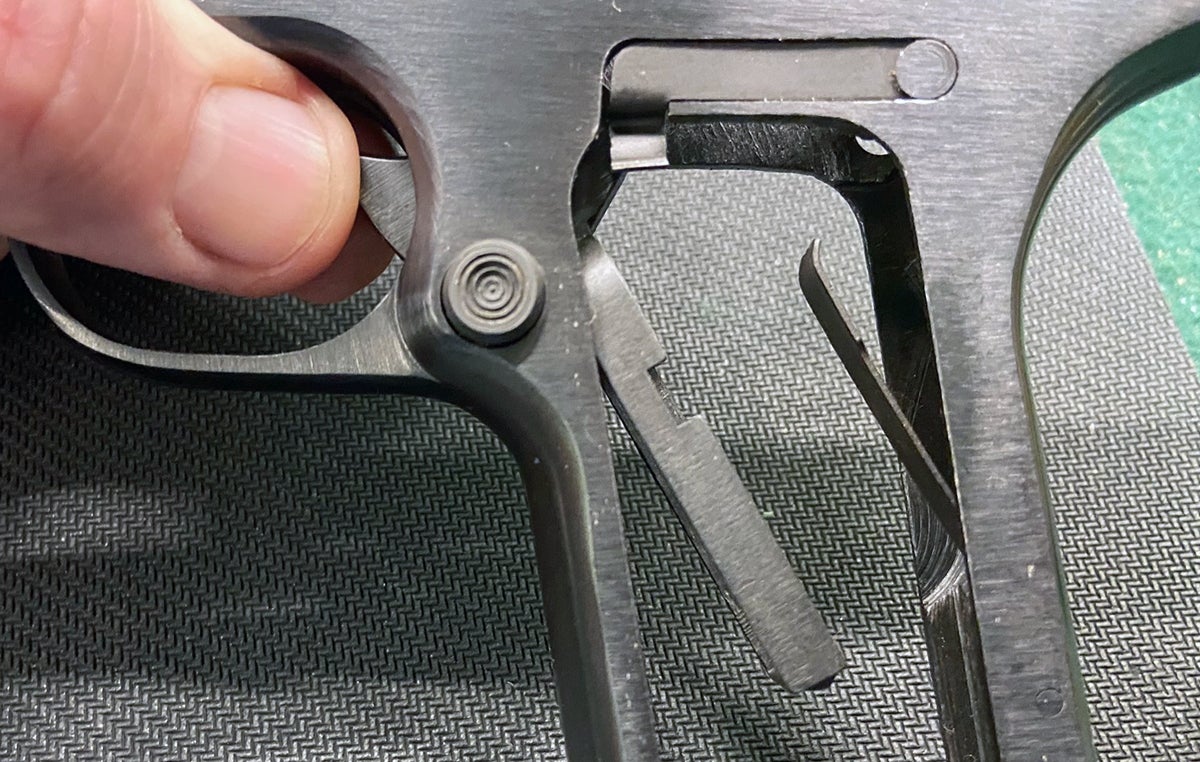
The trigger spring is the flat metal thing sticking out from the inside of the grip’s backstrap in the photo above.
(Photo © Russ Chastain)
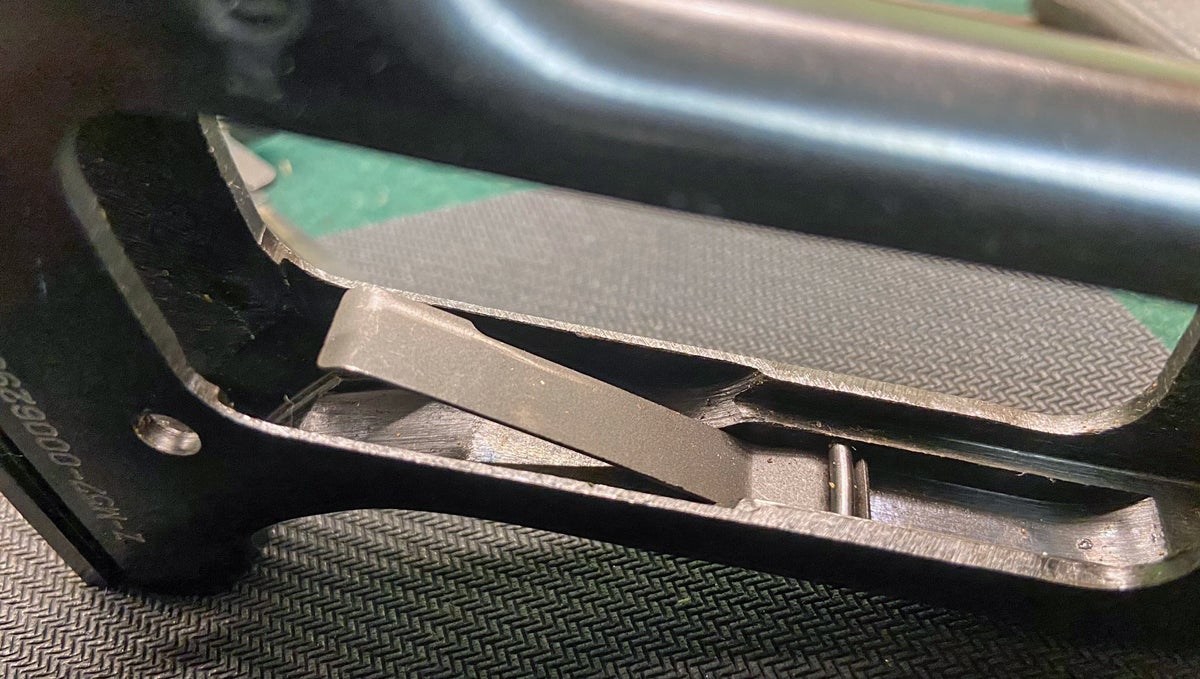
Trigger spring in place. That pin is what anchors it, but the pin doesn’t need to come out. Just tilt the spring forward, allowing it to hinge at that pin until it can be lifted free of the pin.
(Photo © Russ Chastain)
That’s all there is to the spring. I expected it to be difficult to bend, as most springs are. Nope!
Bend carefully; you don’t want to overdo it and have to bend it back. That’s what causes metal fatigue, which breaks stuff.

(Photo © Russ Chastain)
It didn’t take much to greatly reduce my pistol’s trigger pull weight. But the pull was still creepy and gritty, so I needed to delve into the trigger group.
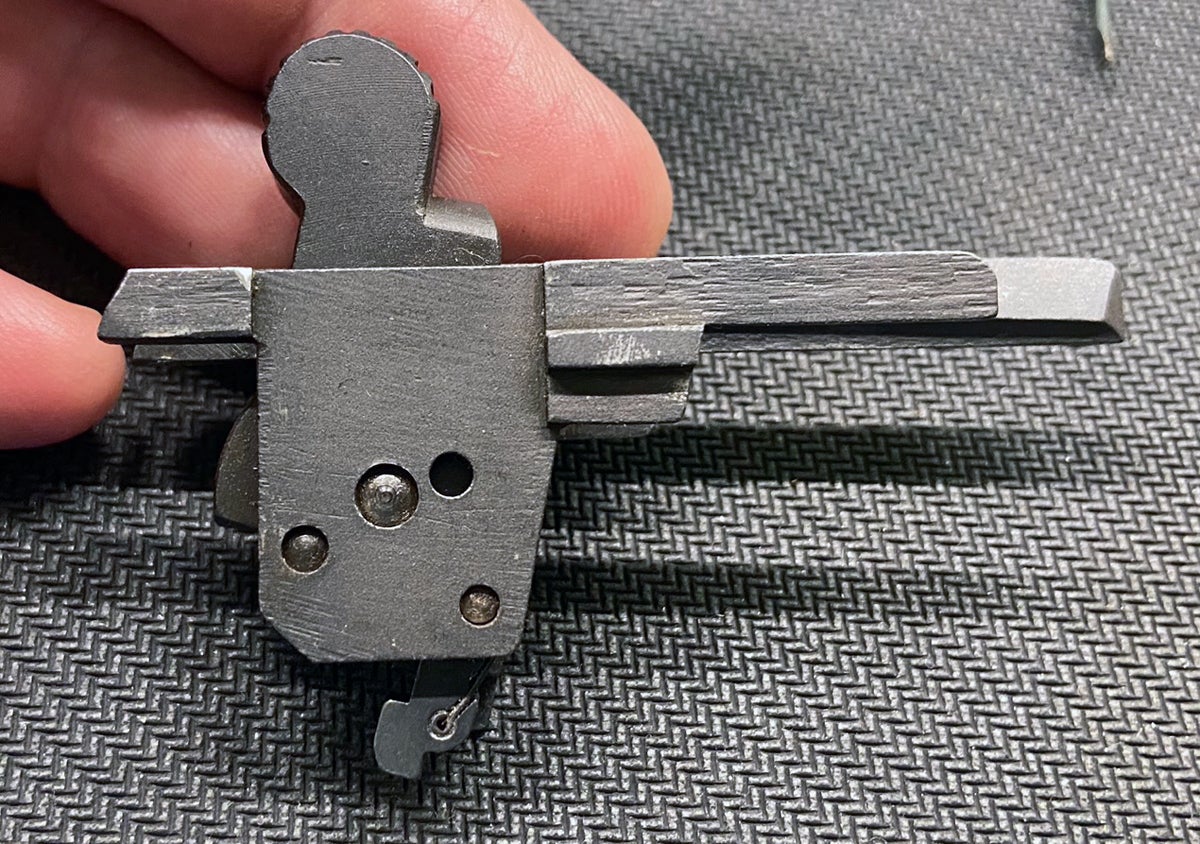
(Photo © Russ Chastain)
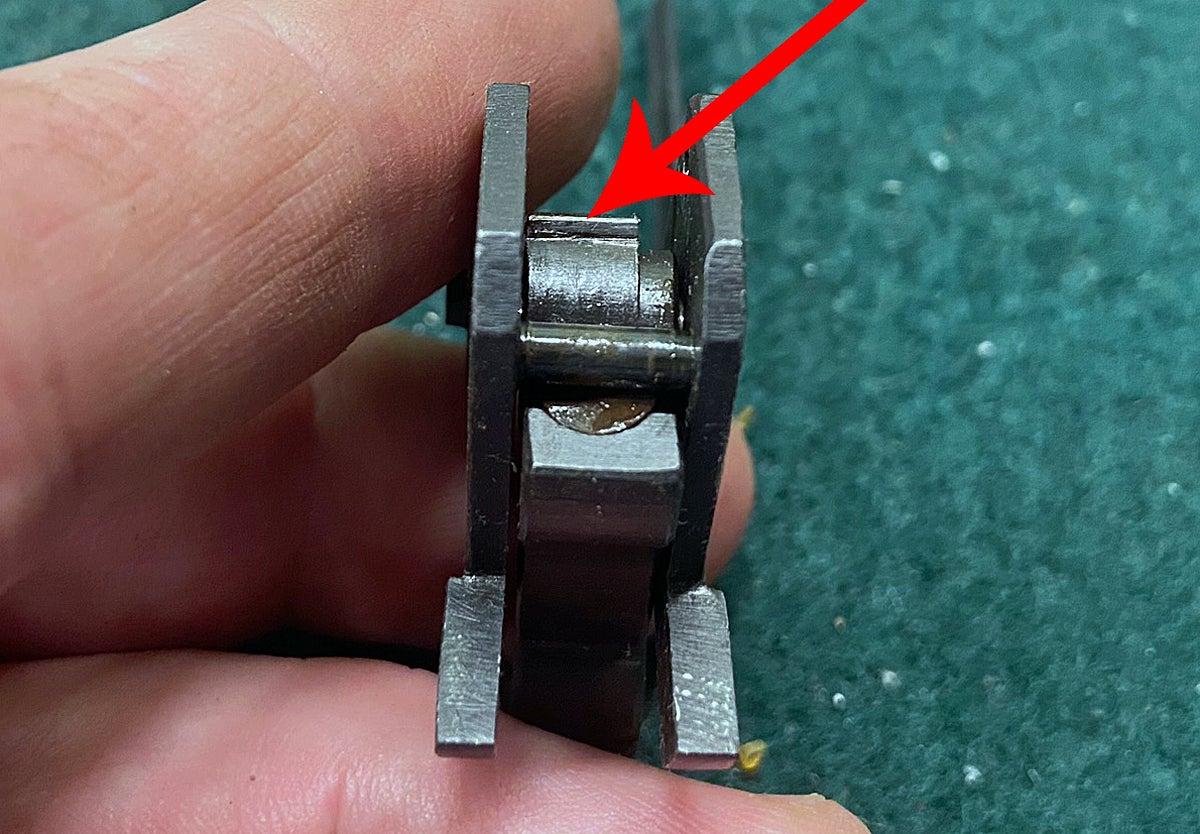
The pin at lower right in photo above is the sear pin. Push that pin out to remove the sear. The disconnector will also come out.
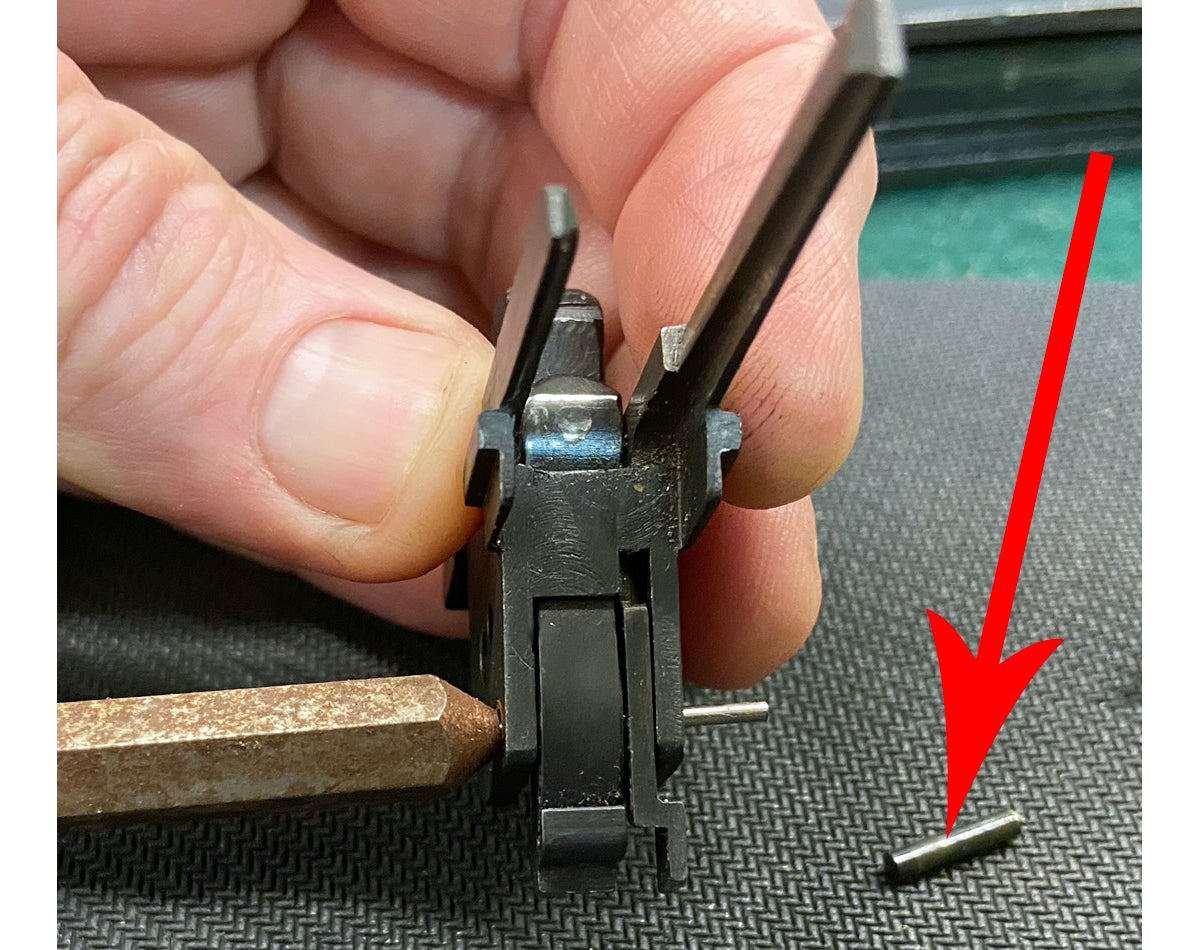
(Photo © Russ Chastain)
Now you can carefully remove the sear and disconnector.

(Photo © Russ Chastain)
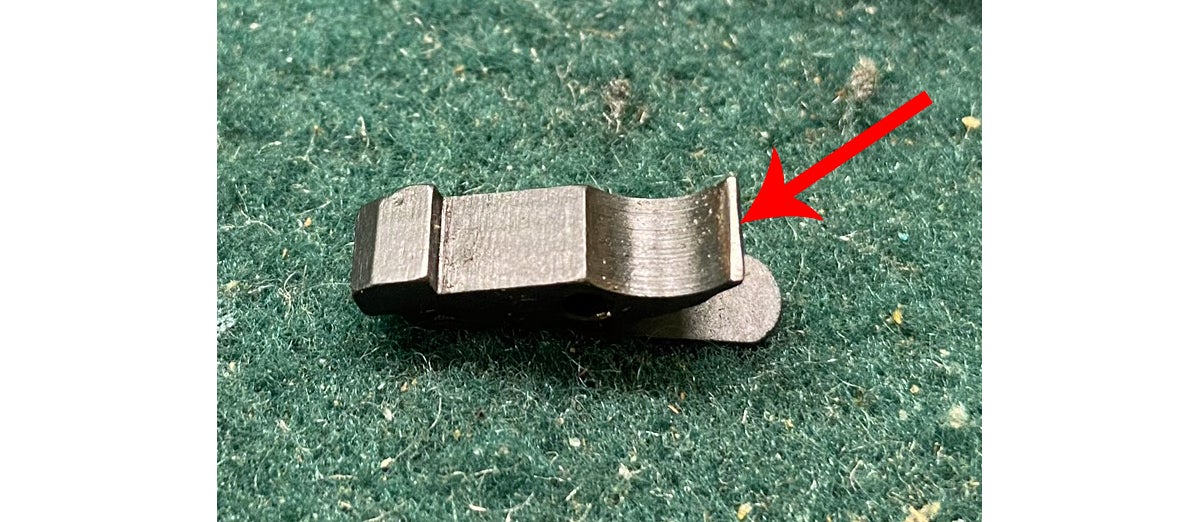
The engagement surface on this sear was uneven and a bit rough. A light rubbing on a fine whetstone polished it. It’s important to maintain the correct angle on this part.
The key to any trigger job is patience and a whole lot of putting-together and taking-apart. Do something tiny, then put everything together and try it. Sometimes a little bit of polishing can make a huge difference… and you don’t want to go too far.
(Photo © Russ Chastain)
The hammer was also rough and only engaged the sear across part of its surface.
(Photo © Russ Chastain)
I carefully polished the hammer’s sear notch just a smidge at a time using some well-worn 600 grit sandpaper backed by a slim screwdriver.
When I stopped, I had a much-improved trigger pull, having reduced the pull weight from 9 to 5 pounds. Some creep remains, but it’s no longer gritty and I decided to err on the side of caution. Removing all of the creep would have been difficult — and possibly dangerous, if I’d reduced the depth of the engagement surfaces.
(Photo © Russ Chastain)
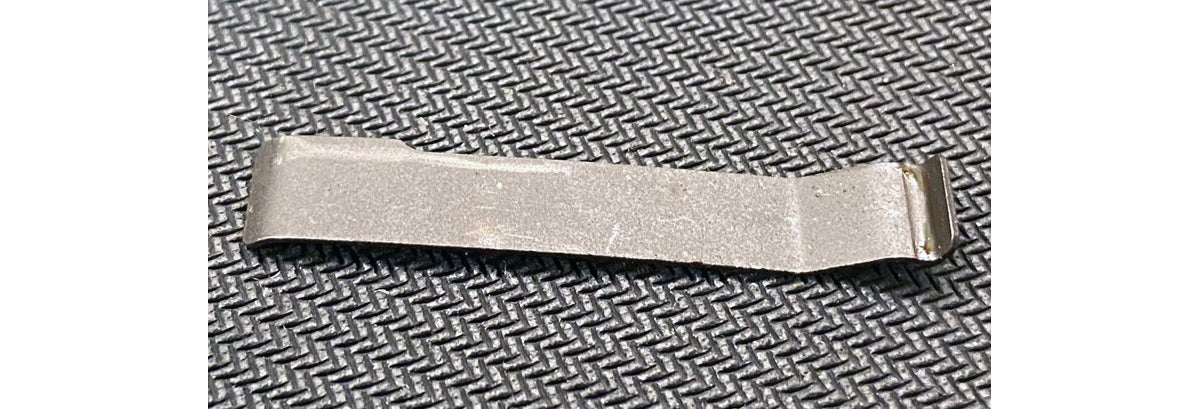
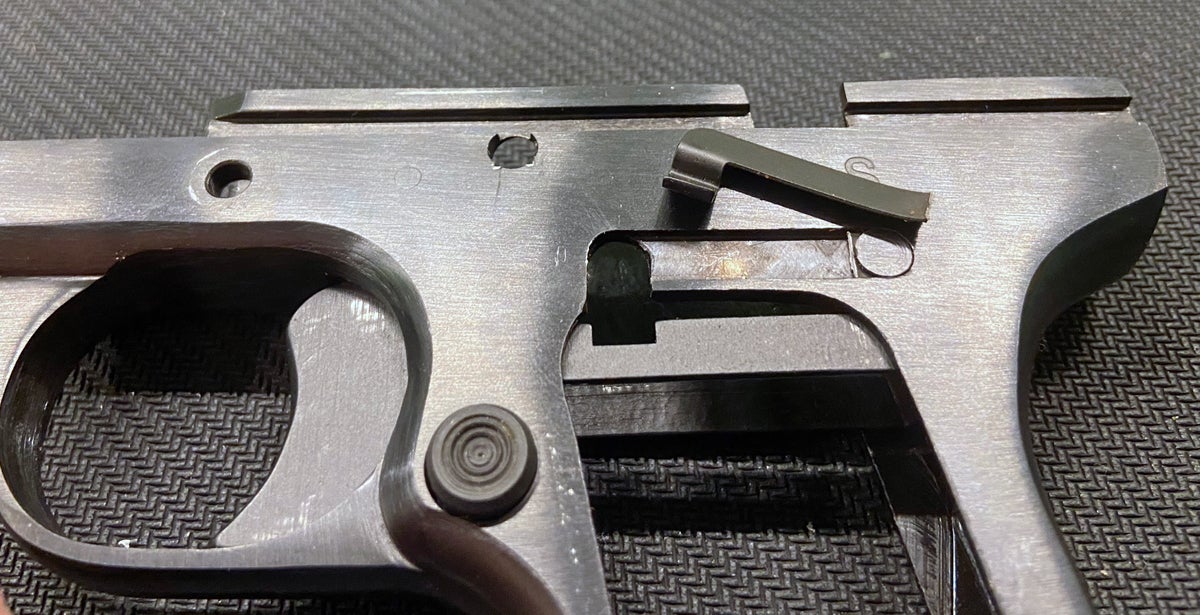
Early on in this process, I became unhappy with the magazine safety. It’s a simple spring bar which blocks the trigger’s rearward travel unless a magazine is inserted, at which time the mag shoves it off to the side. With as many times as I had to assemble the gun, test the trigger, and tear it back down, the added step of inserting a magazine (or using a small screwdriver to move the mag safety) was just a hassle. (And yeah I could have left a mag in the frame once I was done working on the trigger spring, but I was over it.)
(Photo © Russ Chastain)
In some cases, the mag safety also contributes to a poor trigger pull by rubbing on the trigger bar even with a mag in place. Mine didn’t do that, but I still wasn’t a fan.
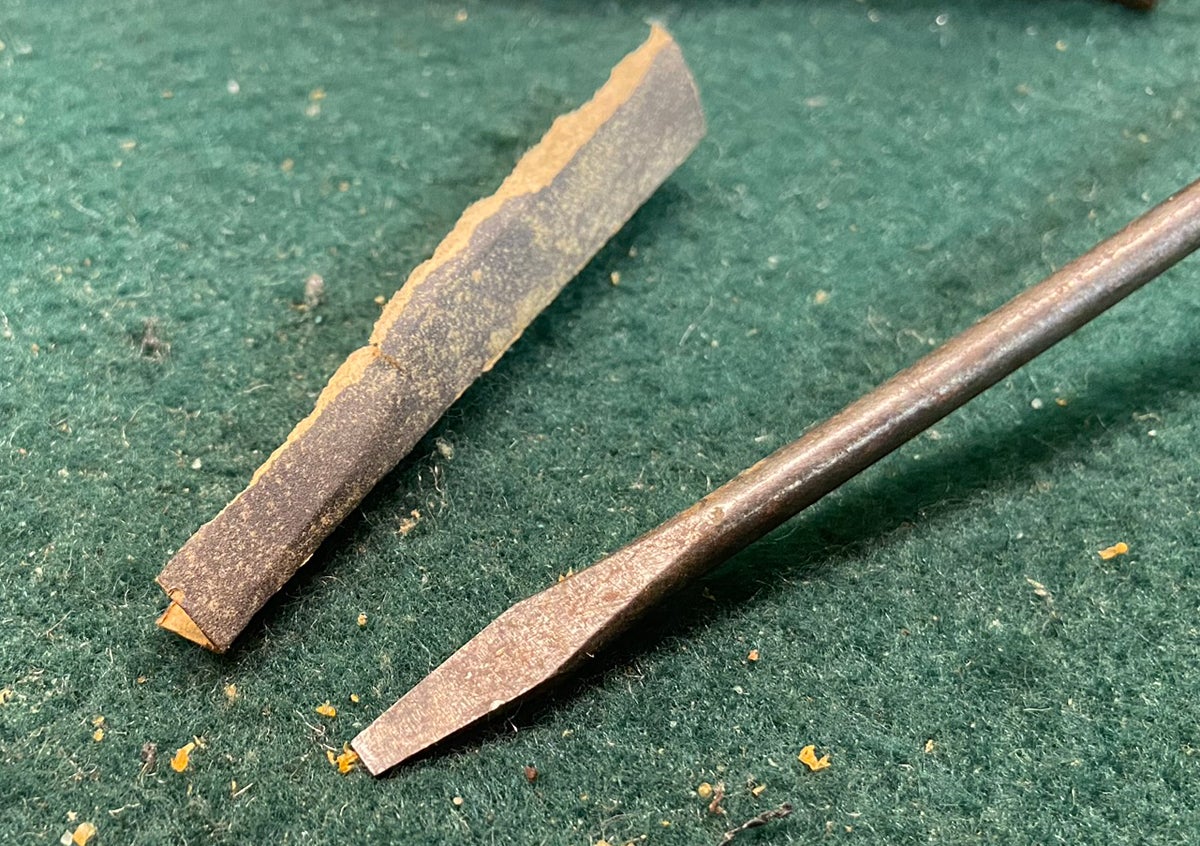
So I gave it just a little tweak by pulling it outward, and off it snapped!
(Photo © Russ Chastain)
I couldn’t ask for a better break; there aren’t even any sharp edges protruding. Nice!
I’ve never seen the value in a magazine safety, and in this case it was a real pain.
(Photo © Russ Chastain)
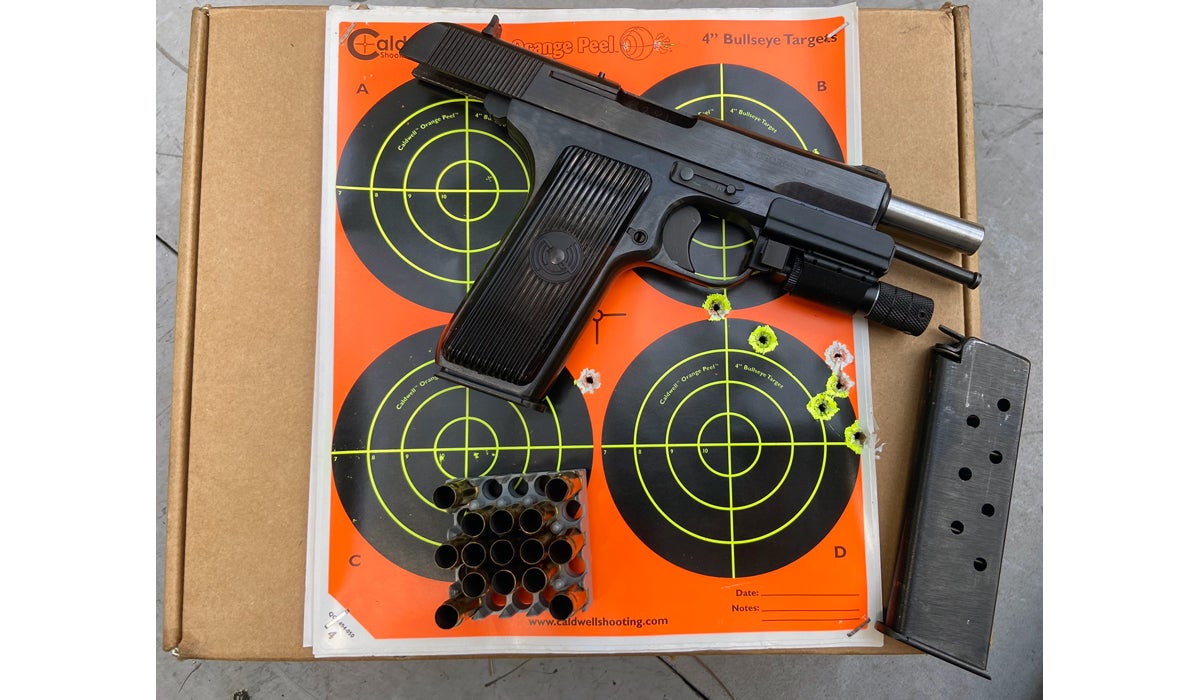
At the range, I remembered to bring a rest — after I got there without one! So I couldn’t really compare my groups to those I’d fired earlier. Instead, I rested my forearms on the shooting bench and used a two-handed grip. At 17 yards, I first fired 8 shots with the iron sights. The gun was much more pleasant to shoot with its nice new trigger job, but I was still hindered by the microscopic front sight and the group was about 7 inches across. Not great.
I had 7 rounds left in the box, so I stoked ‘er up again and fired up the Ramlite laser. I can happily report that it went right back to zero when I put it back on, an impressive feat considering its magnetic mount.
The laser itself was acting flaky, though, and kept dimming almost to the point of invisibility. It did allow me to get all 7 shots off though, and illustrated how much better the pistol can shoot when you can actually aim it. Group size here is about 3 inches if you ignore the flyer that makes it about 4.5 inches.
(Photo © Russ Chastain)
I like this pistol too much, considering the cost of 7.62x25mm ammo… so I’ve begun some handloading trials using a set of CH 30 Mauser dies and some 30 carbine bullets. Stay tuned!
