Tinkerer’s Dream Come True! 3D Printers Can Aid in Archery & More
Brian Miller 03.09.21

I have owned 3D printers for approximately 9 years. In my opinion, 3D printers are one of the most useful pieces of equipment a person can own. It is extremely liberating owning a 3D printer, and learning to use computer-aided design software.
The advancements made, almost daily, in the materials field revolving around the 3D printing field is mind blowing. The following is a brief description of the work flow for printing an object with a FDM style printer. There are always some tweaks needed on the settings, but once you gain some experience, it is a relatively easy process.
- Design – Design your model using a CAD system and export as a STL file, or acquire a STL file.
- Import & Slice – Import the chosen STL file into your slicer software. There are many free slicers available online. The slicer software generates the g-code file that commands the printer what and how to move. Adjust the slicer software settings for your specific filament. Extruder Temperature, filament feed speed, bed temperature and axis movement speed. Most slicer programs have stock settings that will get you close.
- Export Code – Export the g-code that you have generated to the printer. My printer uses an SD card to transfer the data.
- Heat & Level – Preheat the extruder, and load the filament. You will need to make sure your bed is level. The best method is to buy a printer that has auto bed leveling. The printer does not actually level the bed, but has a sensor that measures selected points on the bed and makes a map of the bed surface and builds this into the g-code.
- Send it! (Print) – Select your file and start printing. Some filaments work best with Elmer’s nontoxic glue applied to the build platform.
Real World Applications of 3D Printers
When I first acquired my printer, I basically had 2 choices of filament: PLA or ABS. PLA prints extremely well, is strong, but becomes brittle when exposed to UV light. I did not have a great experience with ABS. When I used ABS, I had issues with warping and peeling off of the build plate. ABS has an unpleasant odor when used in enclosed areas. I designed and printed a set of clips for quad loading my shotgun for 3-gun shooting as one of my first projects. They worked extremely well, as long as you prevented them them from becoming too hot in the sun.
Next, I turned my attention to using printed versions of compensator designs I had been working on. I initially printed a few pistol comps just to see a mock up of the design. I naturally had to try shooting through one. On a handgun, it was a one shot test. My PLA compensator exploded when the first shot was fired. I also needed a compensator for my Vepr 12 open class shotgun.
After I finalized my design, I printed the new compensator in PLA. When I test fired the shotgun, the comp was intact. I proceeded to shoot several hundred shells testing the design. As long as the barrel was kept relatively cool, the compensator worked fine for testing purposes. During this time I also built several holsters that used 3D printed drop attachments and optic covers.
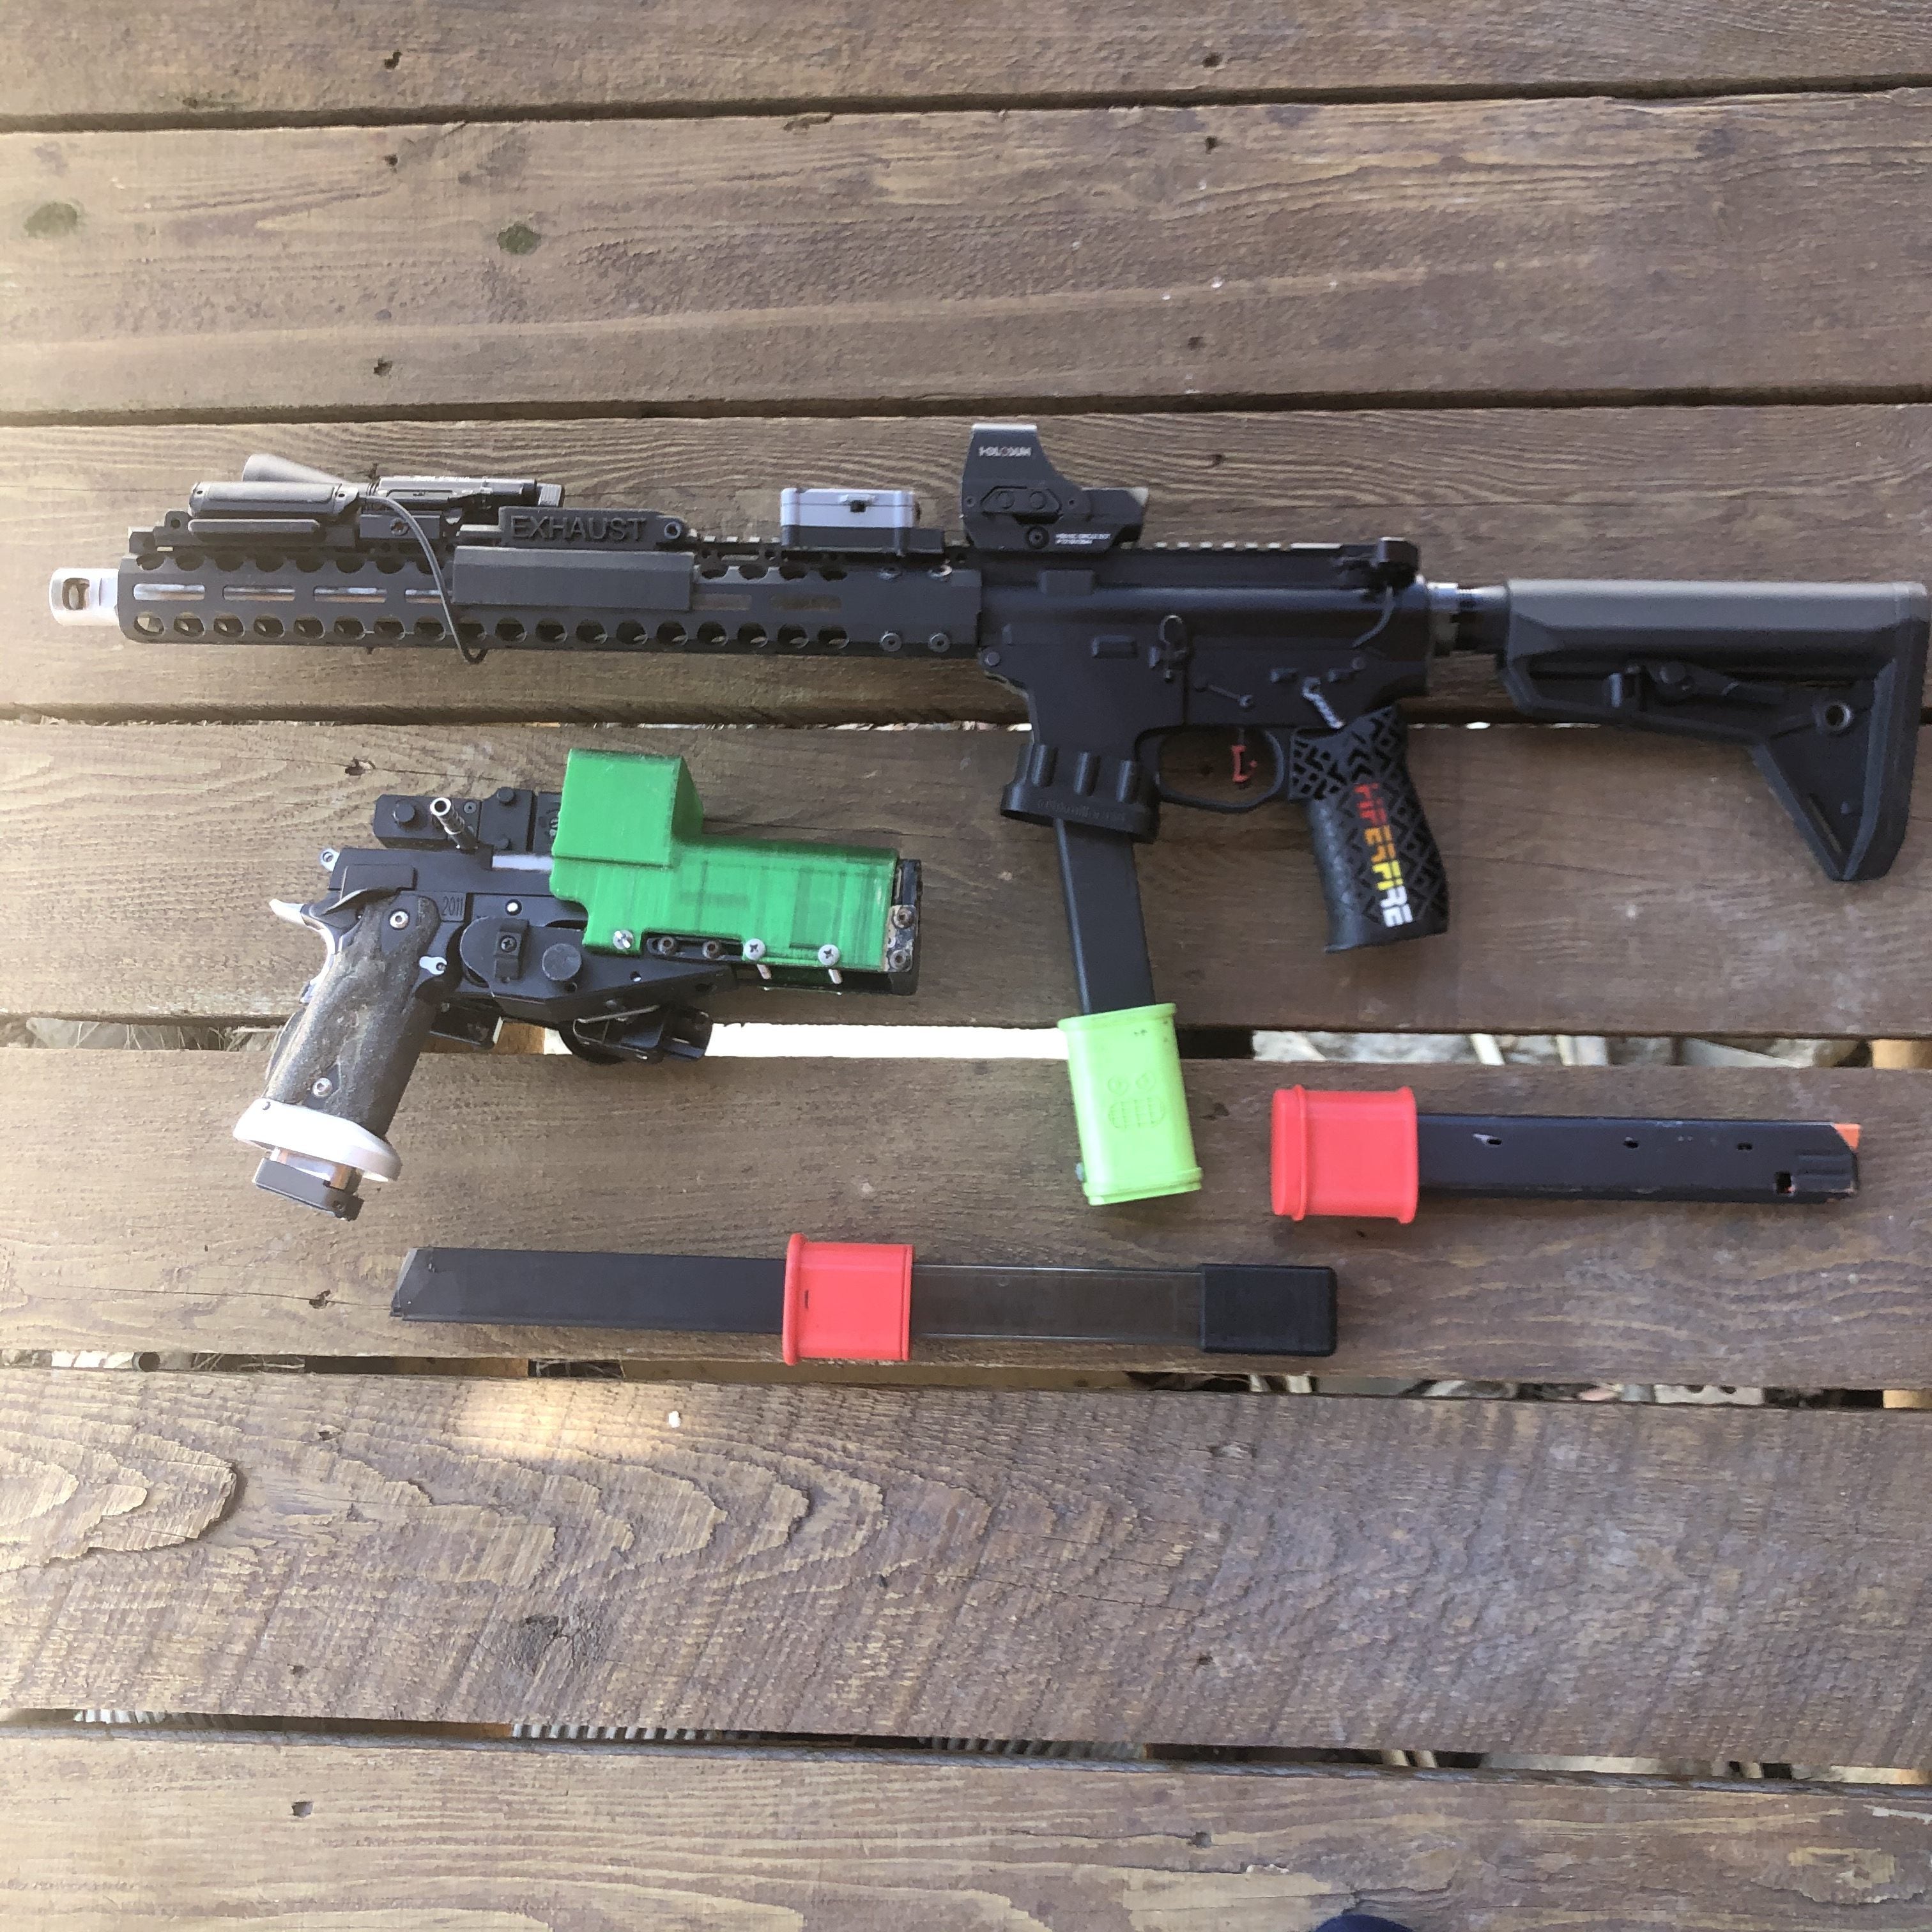
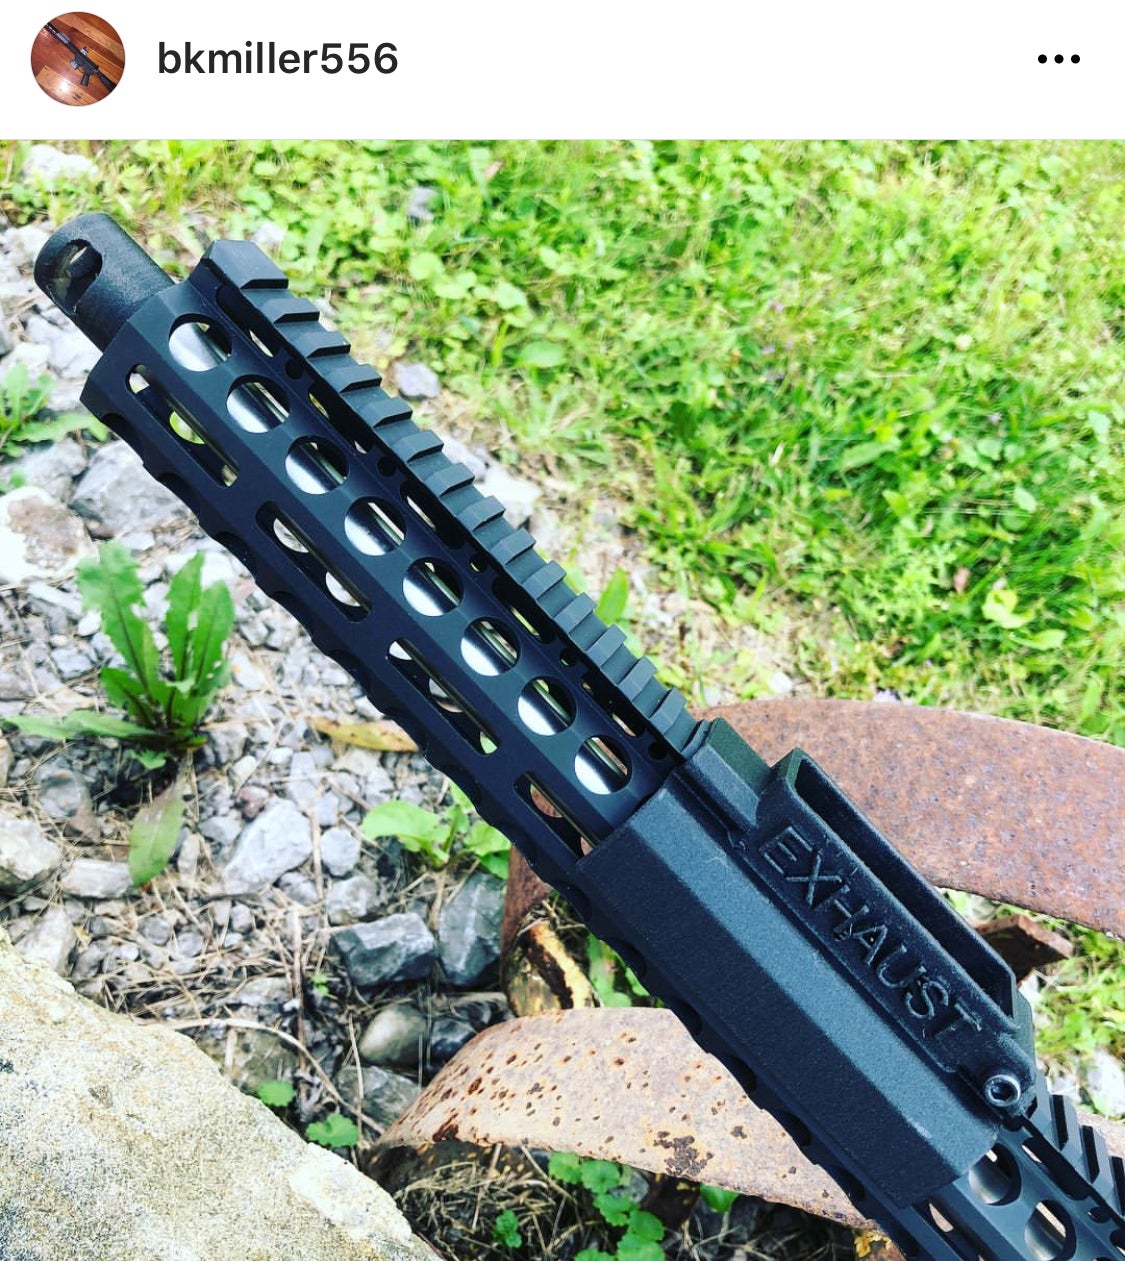
Then, along came nylon filament with chopped carbon fiber. To me, this filament was a major advancement towards functional 3D printed parts. I started printing magazine extensions, magwells, optic mounts, and pistol grips with Nylon. Nylon based filaments are resistant to solvents, oils, temperature, and really stand up to abuse.
I printed several compensators for my pistol caliber carbines. With this material, I could actually test my designs in match conditions. Once I finalized the design, I machined the final version in aluminum. Probably one of my favorite designs for the PCC is a mag coupler that requires no tools to take apart. I also designed simple extensions with the same concept.
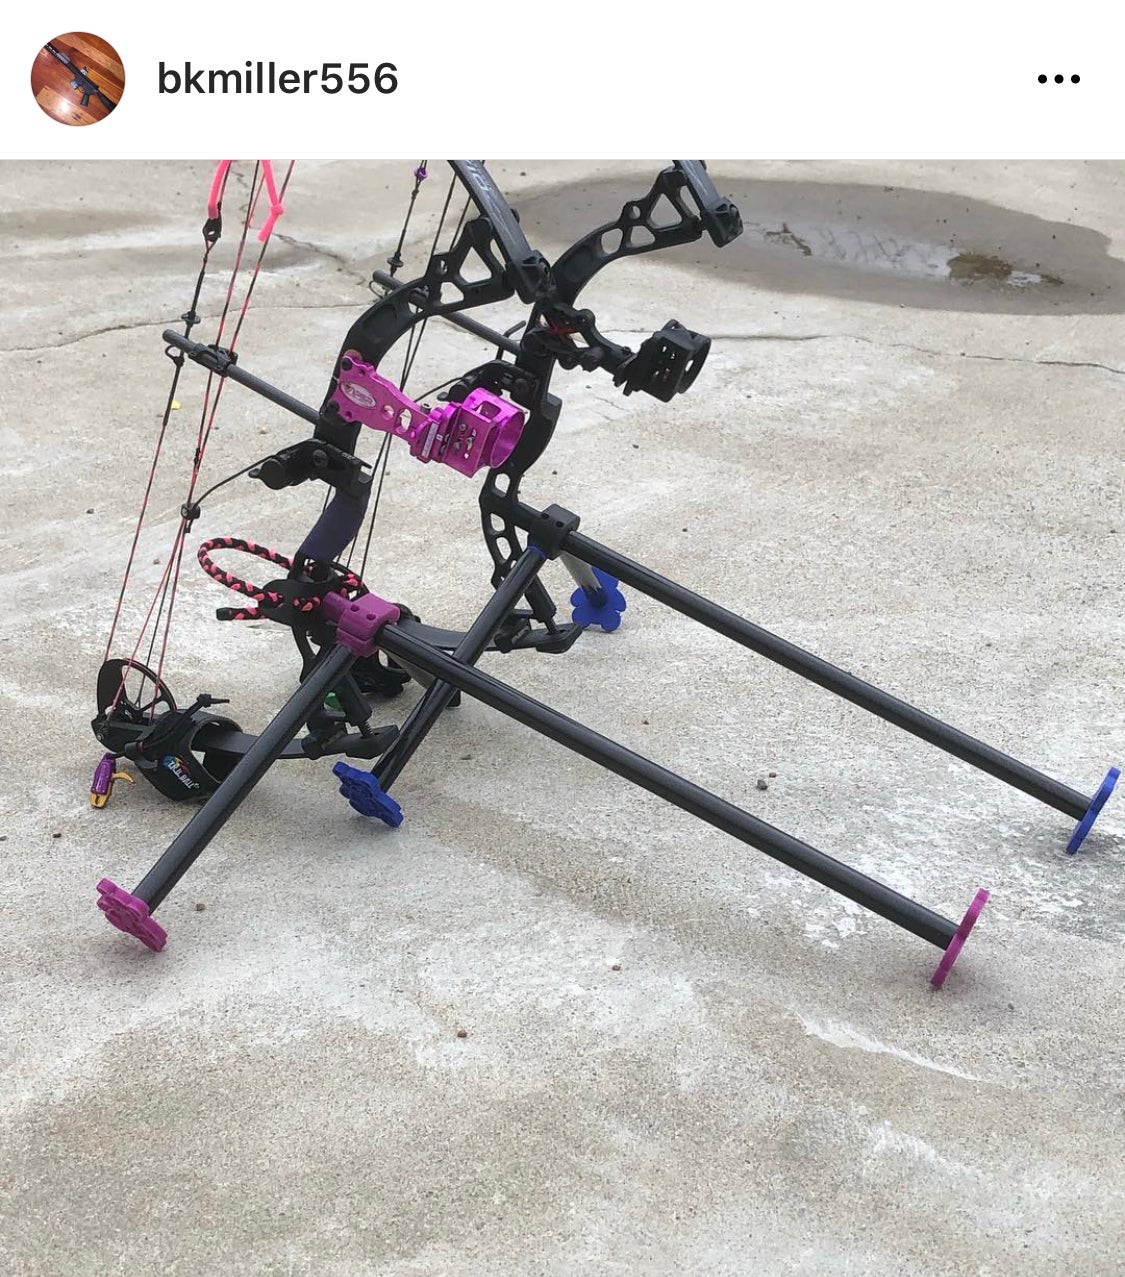
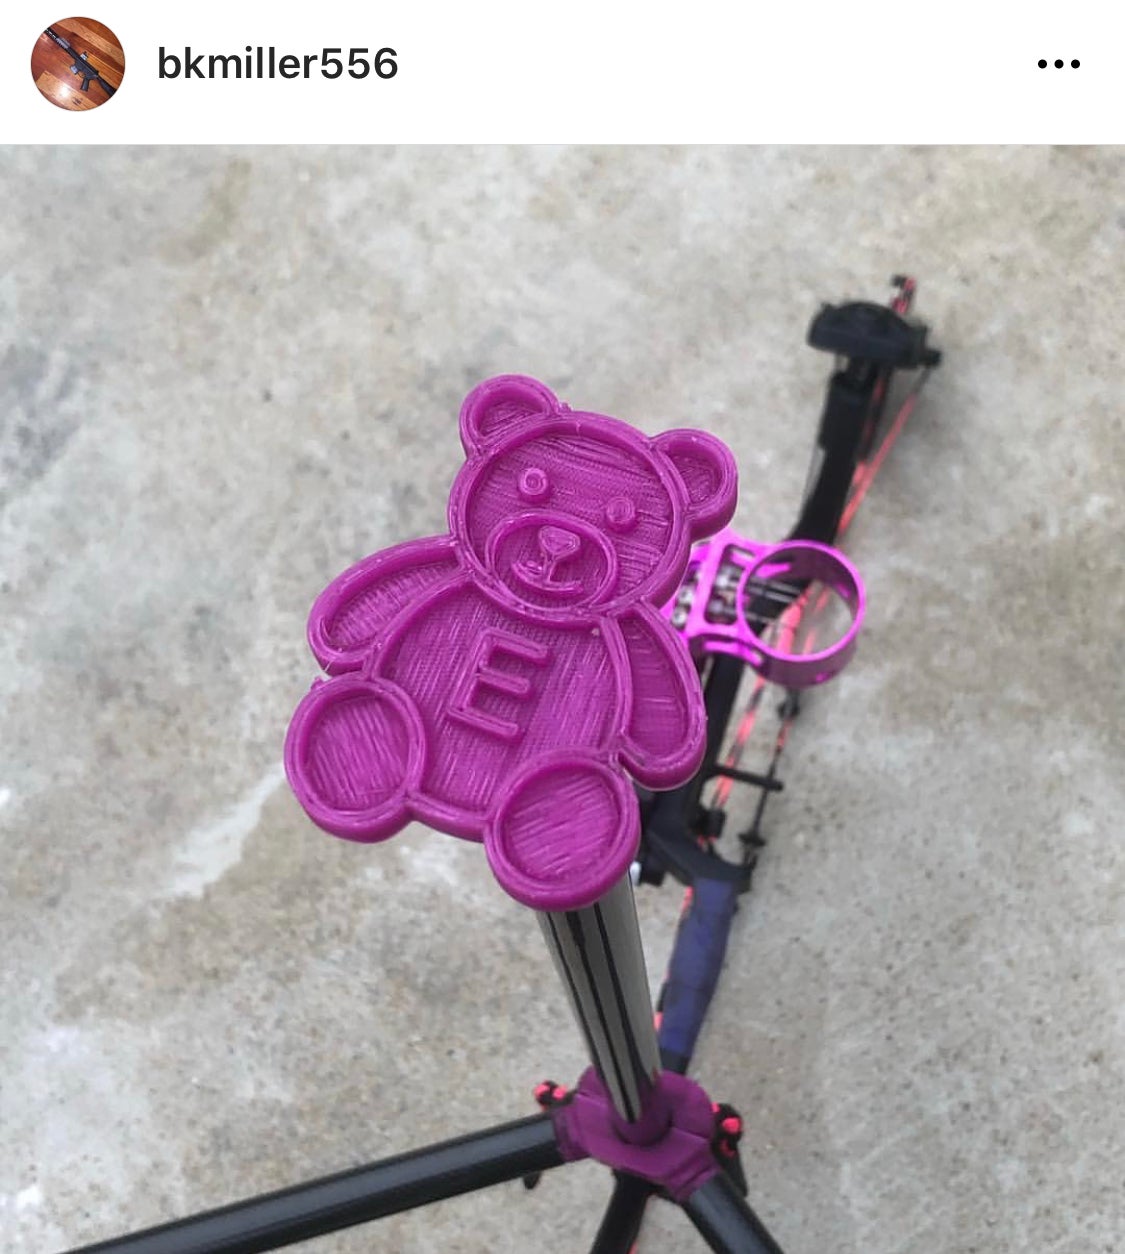
A couple of years ago my family started shooting 3D archery. I found many uses for 3D printers in archery. The first application was to build stabilizers for my kids Diamond Atomic youth bows. I wanted to design a stabilizer that could be used as a bow stand when they are not shooting. My children were 5 and 7 when they started competing regularly. I incorporated teddy bears with their initials on the legs on the stabilizers for a personal touch.
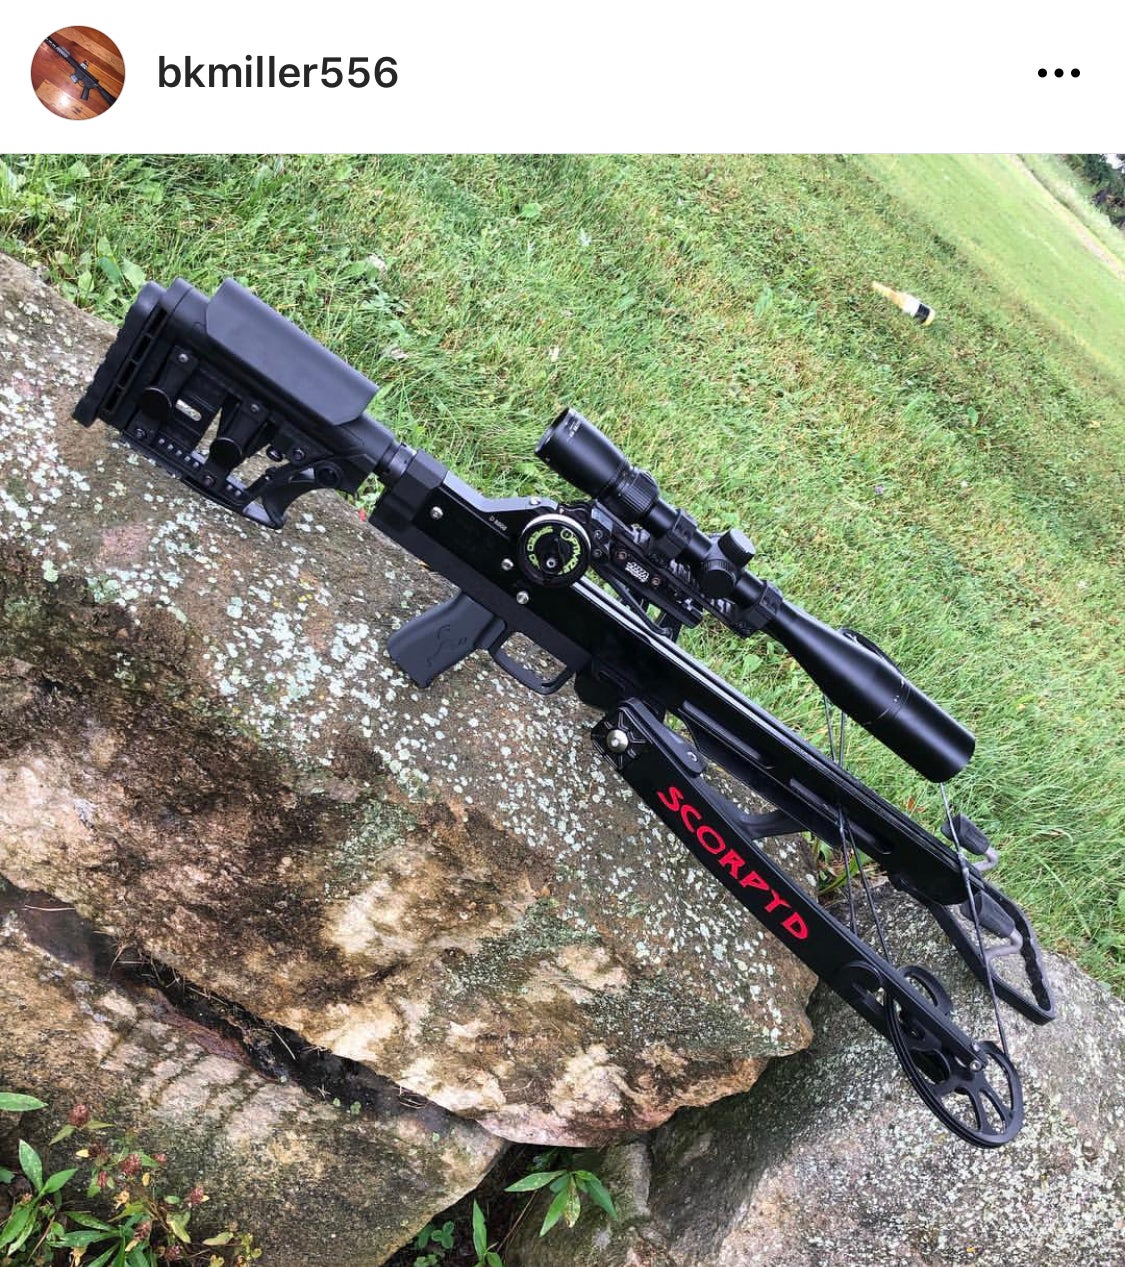
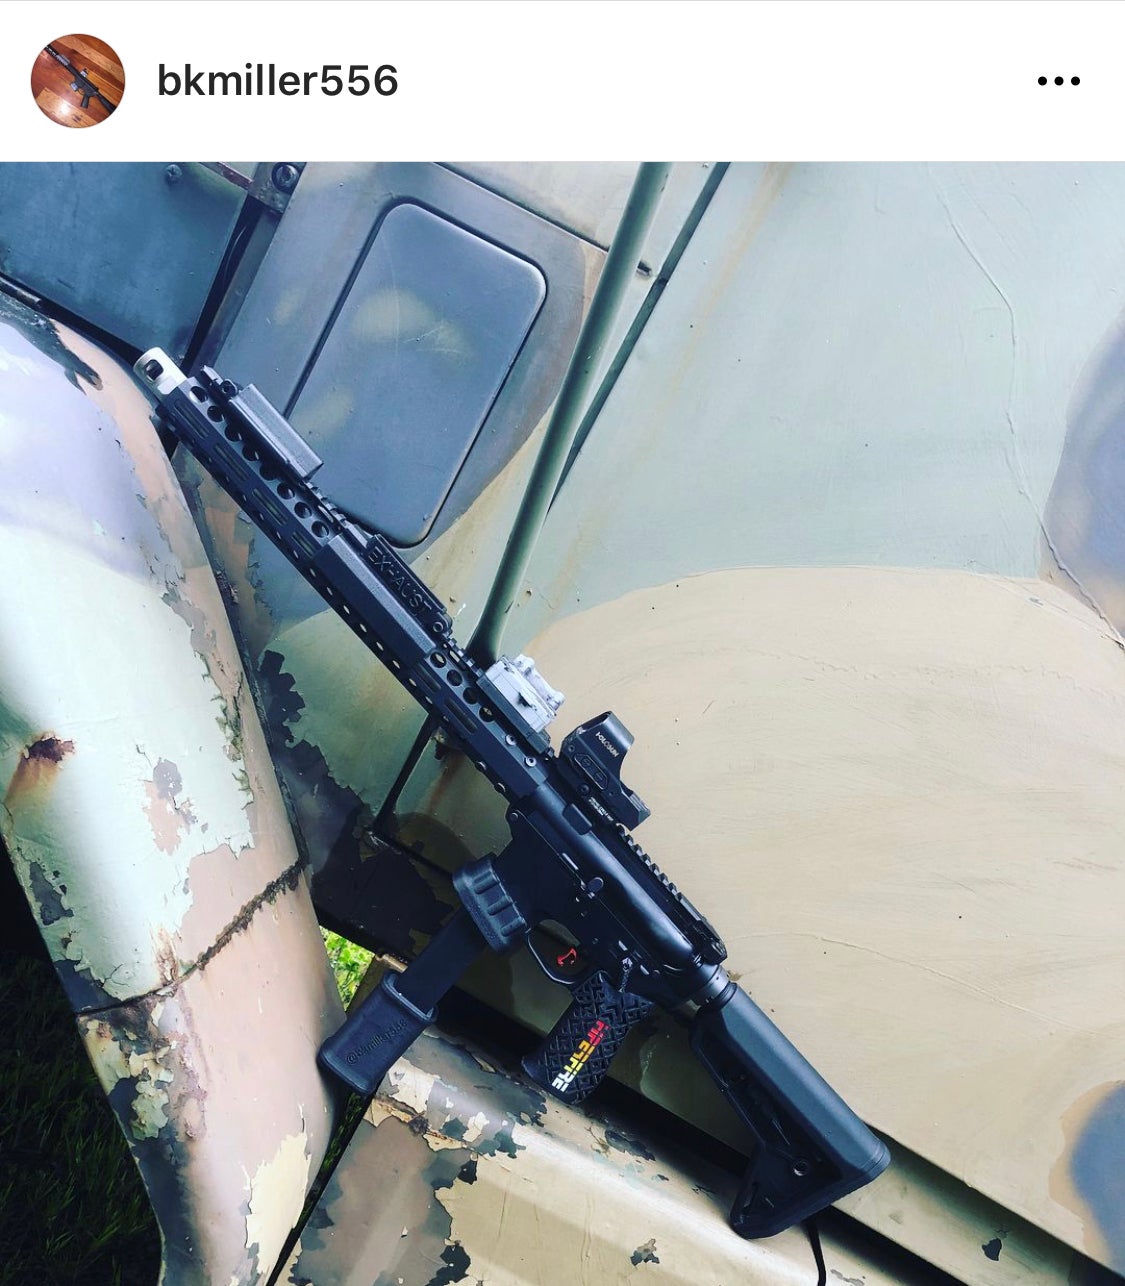
I next turned my attention to my Scorpyd Aculeus cross bow that I was using in competition. It had a decent stock on it from the factory, but I wanted to mimic the feel of my AR-15. I designed a chassis that took AR furniture, and I sent the STL file to a service bureau to have the chassis printed using the HP MJF technology.
They use Nylon 12 powder with glass filler. MJF results in a useable part that is equally as strong in all axis. With conventional FDM printing, parts are typically weaker in the Z axis and will fail between laminations. This can be overcome with the strategic application of threaded steel inserts. 3D printers are an extremely useful tool to anyone that likes to build and customize their gear.