How to Install the Franklin Armory Binary Trigger for AR-15s
Travis Olander 02.27.23

If you read our quick rundown about binary triggers, you might’ve decided you’re ready to upgrade your AR for some real fun. We got our hands on a Franklin Armory BFSIII AR-C1 unit. Let’s go over how to swap out your AR’s factory, boring, single-stage trigger for this mag dumpin’ thumper! Before we get started installing your Franklin Armory Binary Trigger, you’ll need just a few basic tools.
Franklin Armory Binary Trigger Install: The Tools
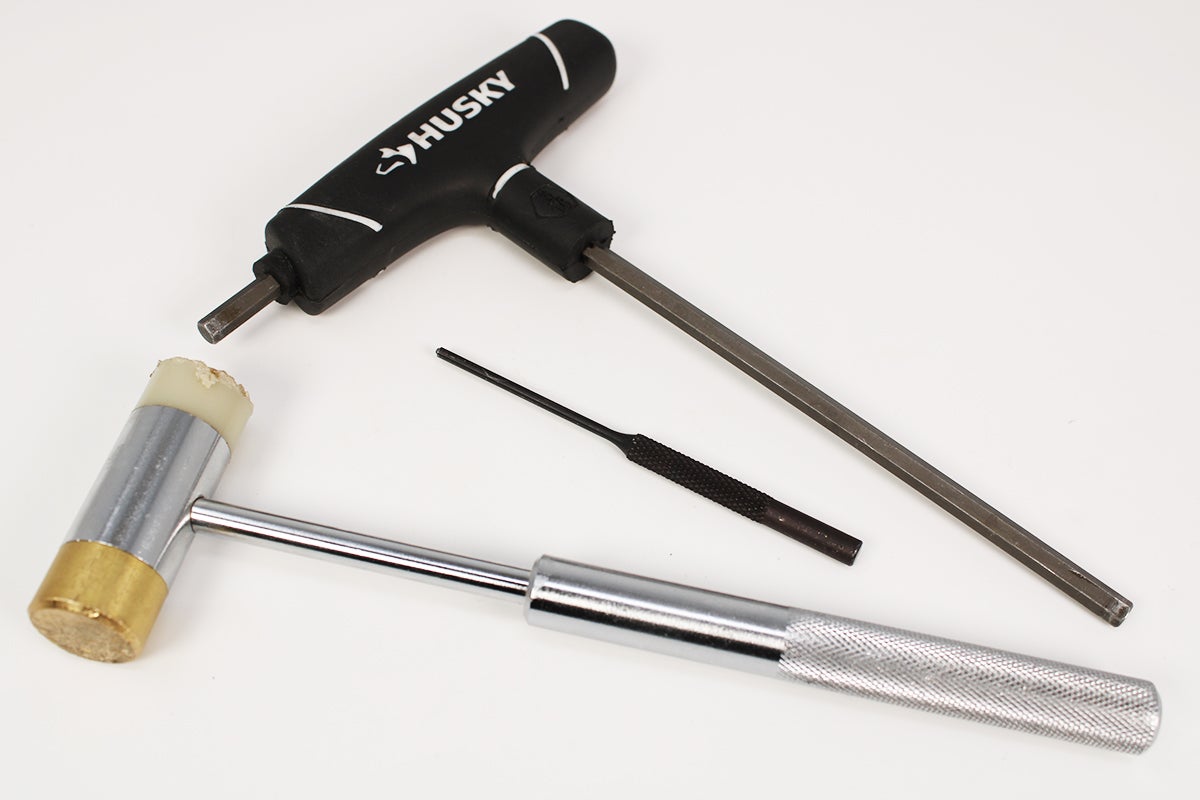
Grab a small gunsmithing hammer – preferably something with a polymer head, so you don’t nick your receiver – and a 5/32″ punch. You’ll also need the appropriate Allen key for removing your AR grip’s bolt and washer. Make sure you’re doing this in a well-lit place, so you can keep an eye on some of the small bits and springs we’re working with.
How to Install The Franklin Armory Binary Trigger
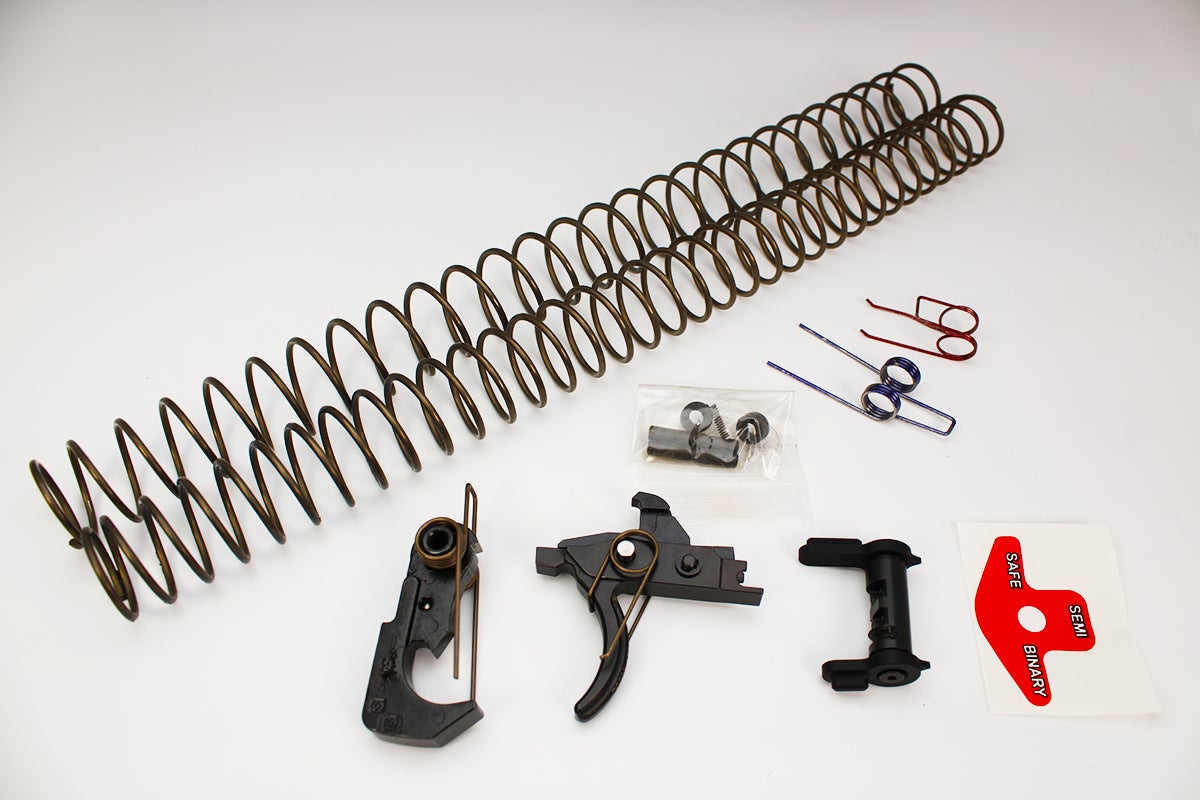
First, make sure your Franklin Armory Binary Trigger has all the necessary parts. It should come with the following:
- (1) ambidextrous, two-piece safety lever
- (1) pre-assembled trigger w/ two disconnectors
- (1) standard hammer
- (2) hammer springs
- (2) trigger springs
- (2) trigger pin shoulders
- (2) hammer and trigger pins
- (2) buffer springs (light, heavy)
- (1) nerdy safety indicator sticker (optional)
The Franklin Binary Springs, Explained
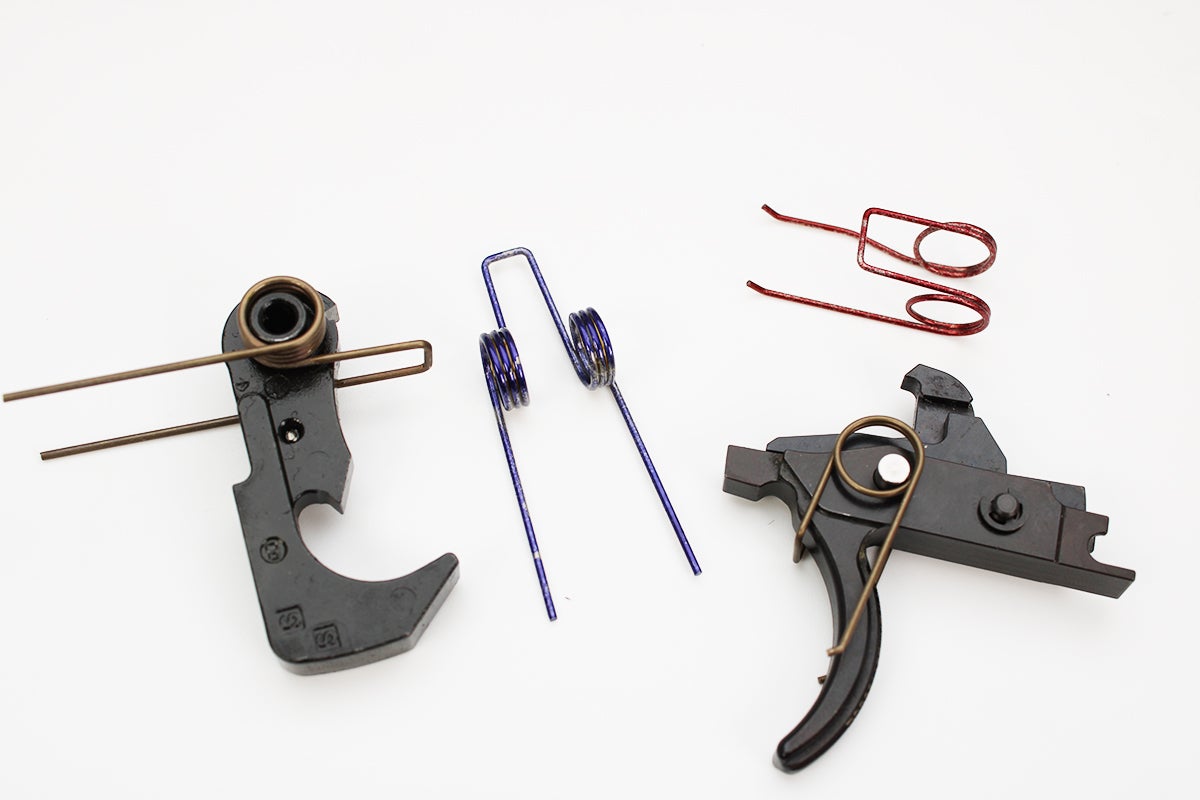
The colored hammer and trigger springs are lighter pull-weight options. They reduce the force required to pull the trigger and drop the hammer. If you’re running brass with hard primers, then you may want to swap back to the original (stiffer) hammer spring. The lighter trigger spring can aid in speeding up your binary function, but I just stuck with both OEM springs to keep things reliable – and I wanted a familiar pull weight.
The recoil/buffer springs are also designed to ensure reliable binary functionality. If your bolt’s getting hung up or failing to cycle on binary, you’ll need to use the stiffer spring with more coils. Otherwise, similar logic applies: The lighter spring can help make your binary function a bit faster. Onto the install.
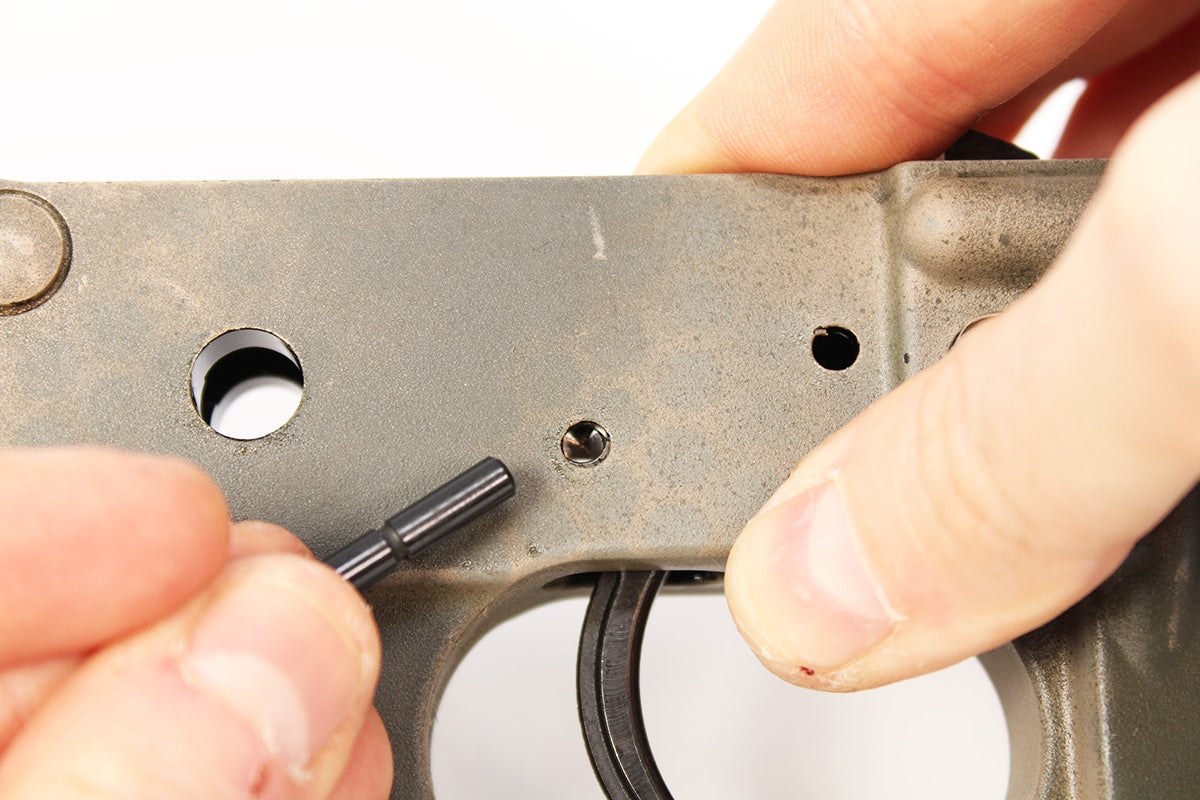
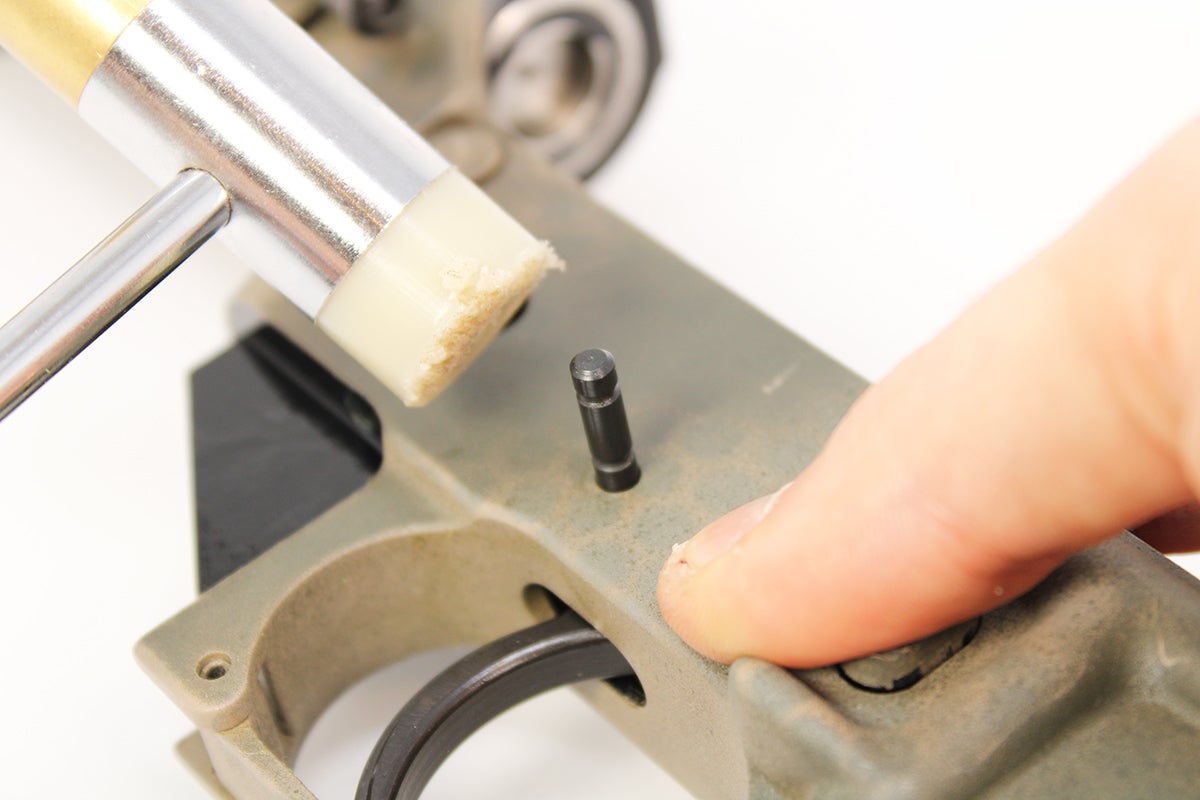
Step 1: Remove Factory Hammer and Trigger

Use your punch and hammer to drive the factory hammer pin out of the receiver. The hammer spring has some decent tension, even when it’s not cocked, so keep gentle pressure on the assembly as you remove it from the receiver. Repeat this process for the trigger pin and remove both units from the receiver.
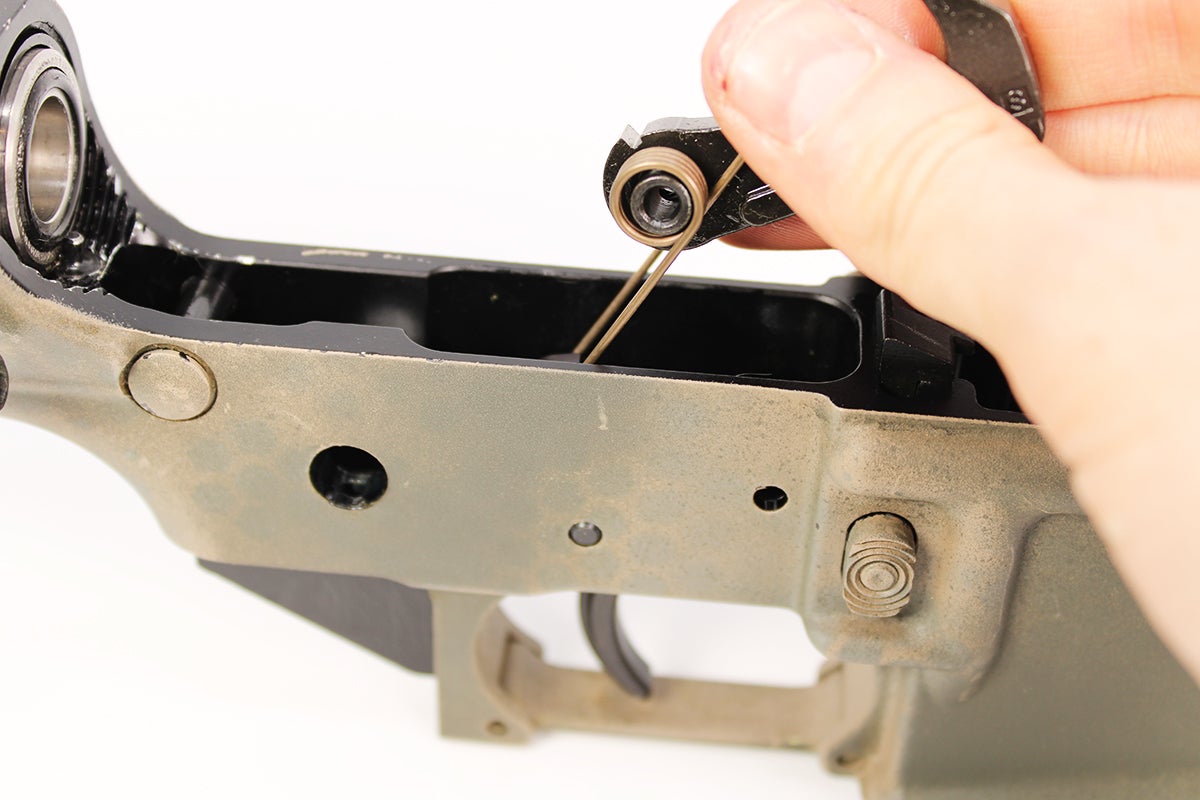
Step 2: Remove Factory Grip & Safety
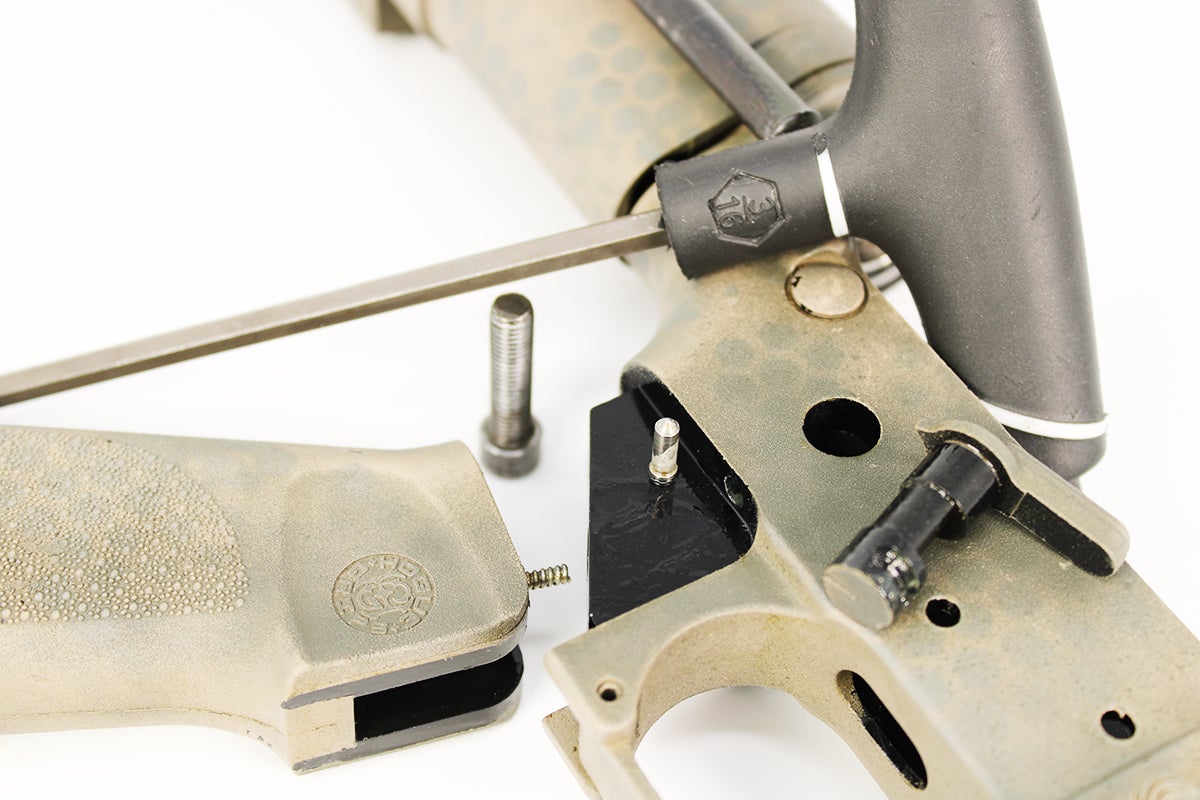
You’ll need to first loosen and remove your factory pistol grip. This will allow you to remove the spring and small brass detent that holds the factory safety selector lever inside the receiver’s cavity. The spring and detent are small, so be sure not to drop them into the void of your carpet or garage floor.
Step 3: Install Shoulders on Binary Trigger
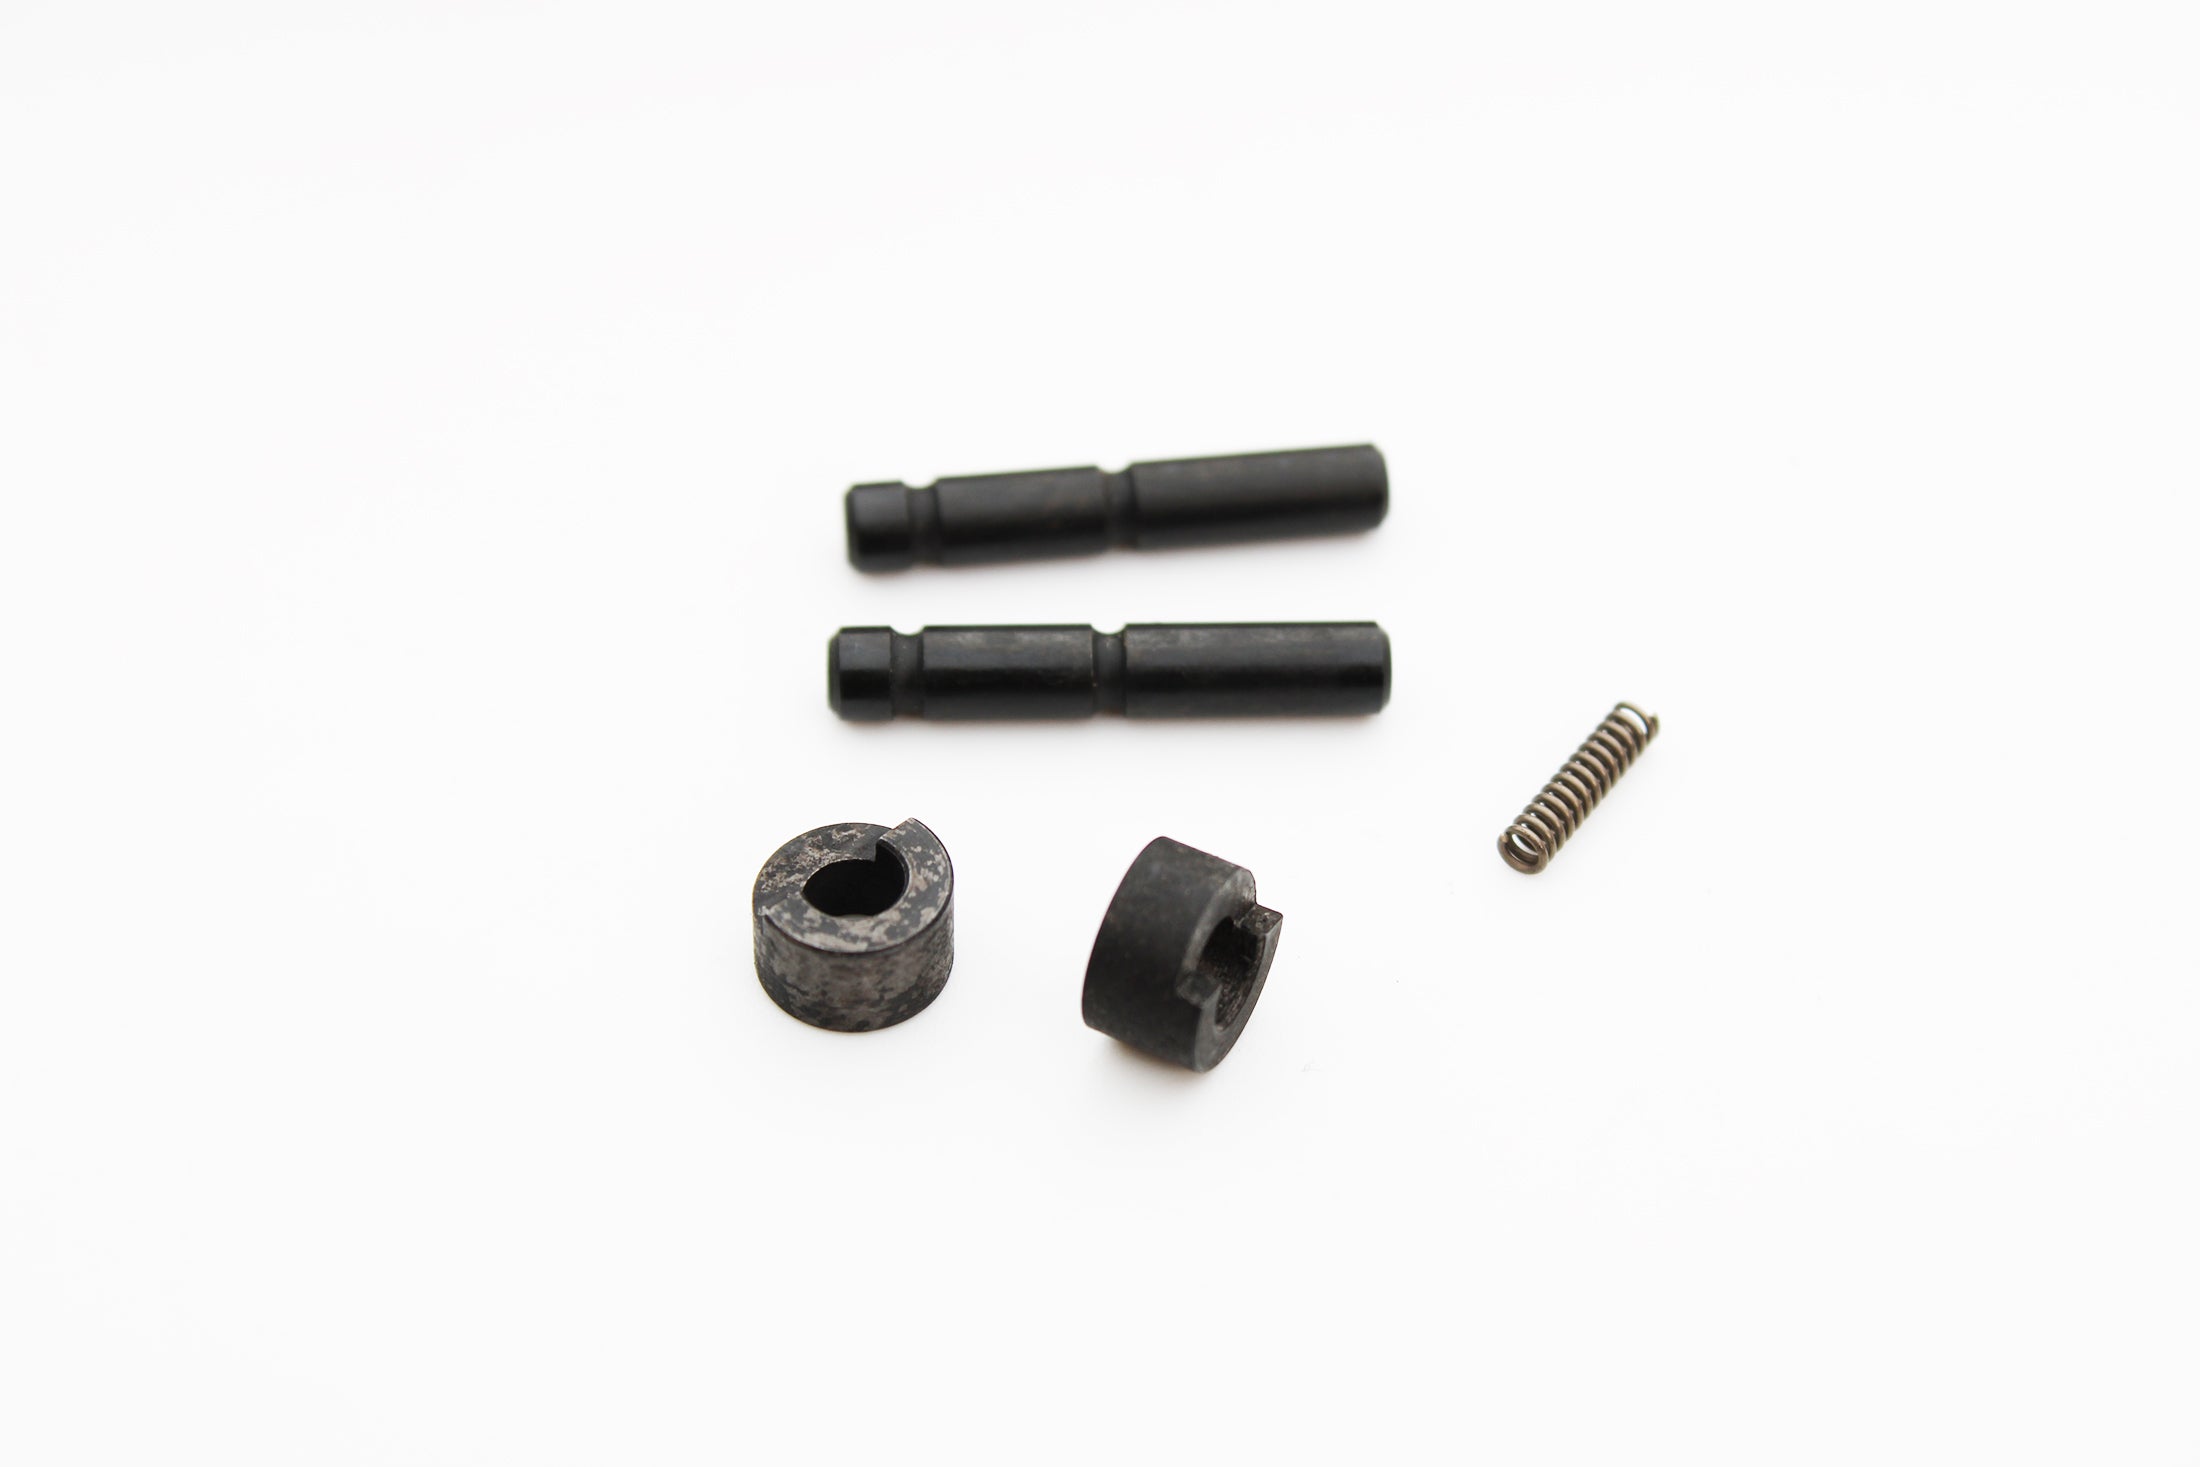
The small donuts that came with your trigger are shoulders that are intended to rest on either side of the trigger pin. They help ensure the binary trigger remains in the absolute center of the receiver cavity, so both disconnectors function reliably.
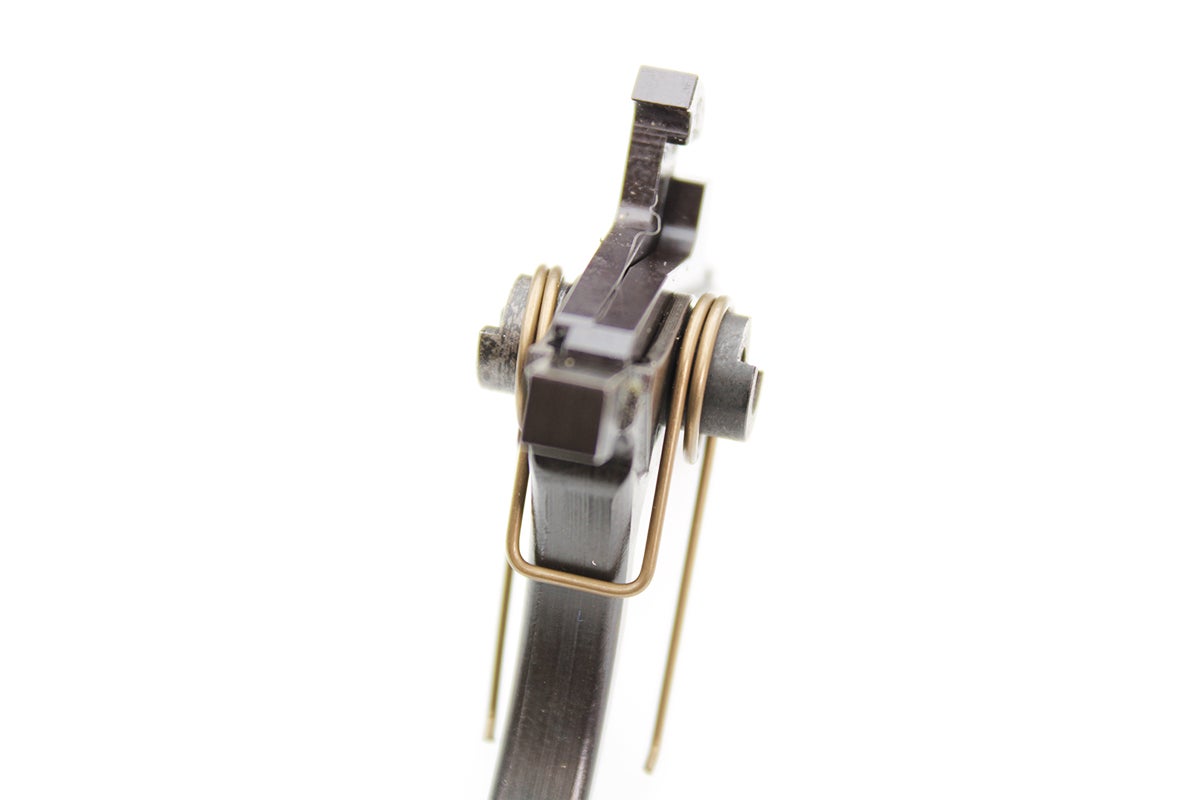
Insert one pin shoulder on either side of the temporary stainless trigger pin that’s holding the assembly together. Ensure the flat cut-outs on either shoulder are facing upward; they provide a place for the hammer spring ends to rest.
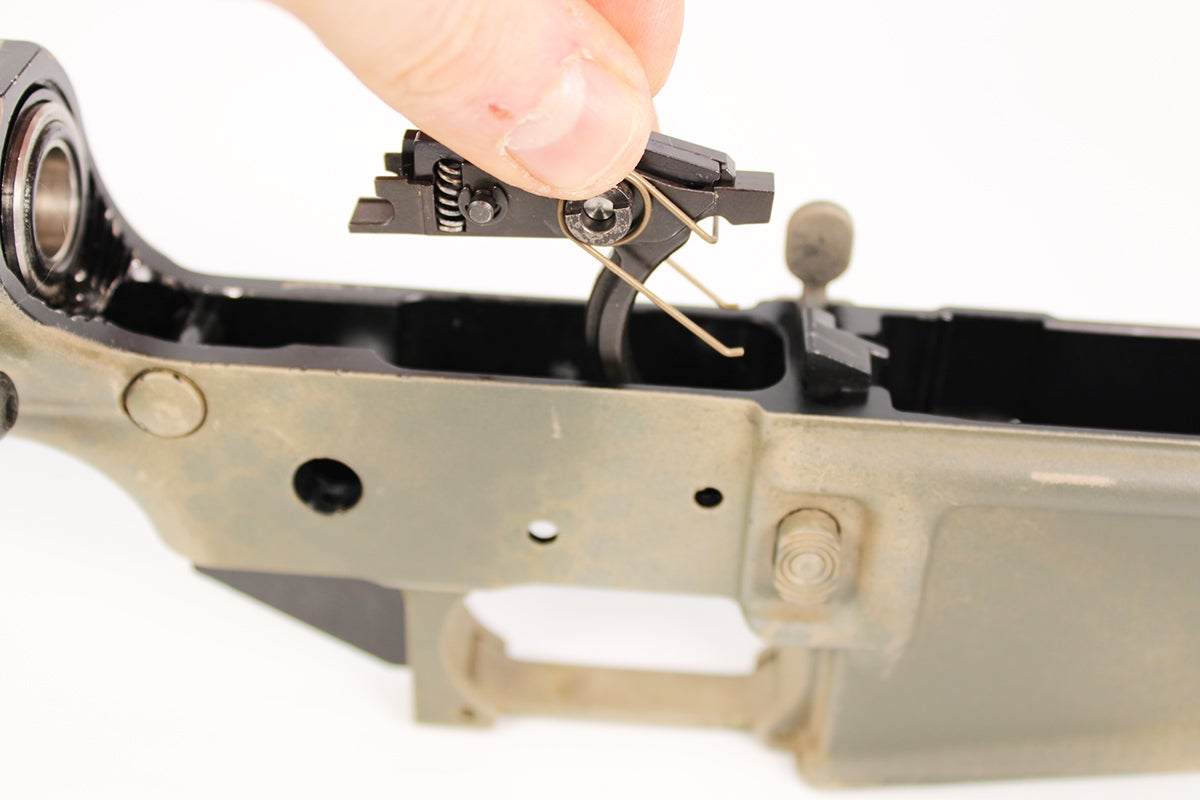
Next, you can drop the binary trigger unit into your receiver’s cavity. Once the trigger is resting in the receiver, align the trigger pin holes.
IMPORTANT: As you hammer the new trigger pin into the receiver, it will drive the temporary stainless pin out the other side. It’s critically important you do not allow the trigger assembly to separate during this procedure. If you do, the disconnectors, which are under spring tension, will separate from the trigger.
If this occurs, you will need to remove the trigger assembly and carefully put it back together with the temporary pin and shoulders before attempting the installation a second time.
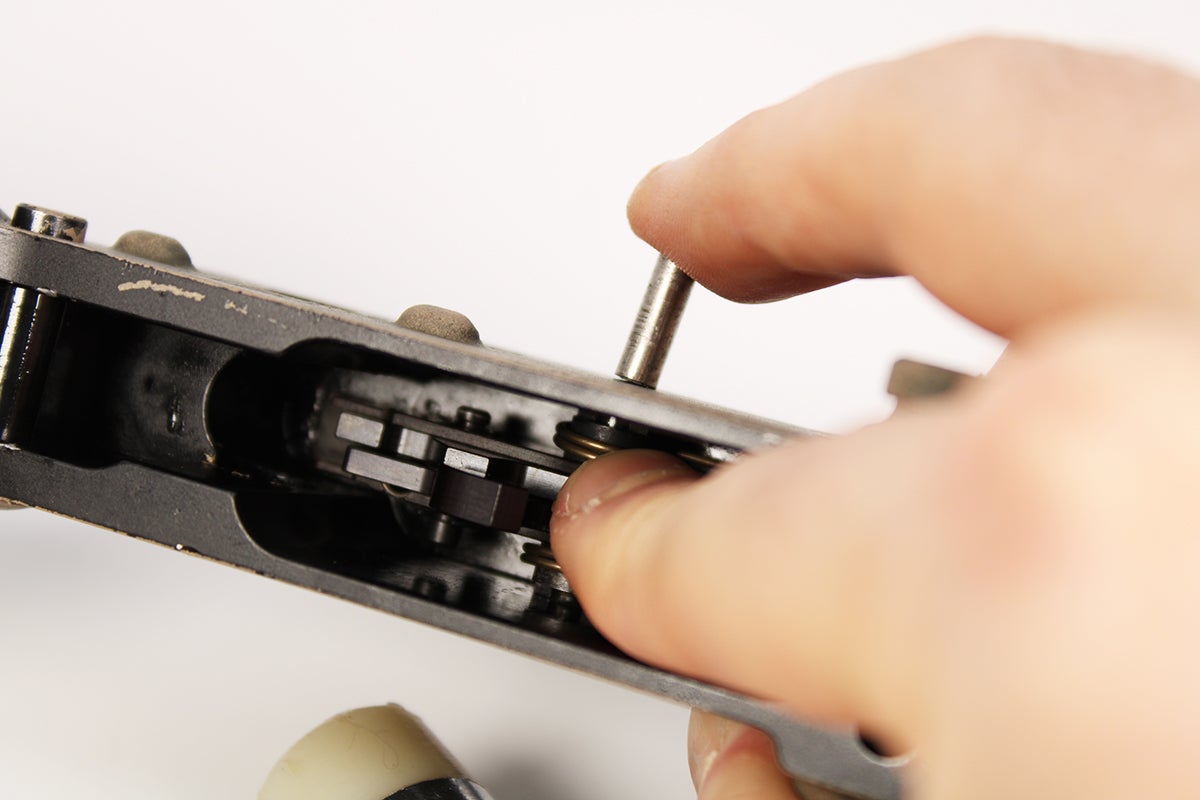
Once the trigger pin is fully seated, the temporary pin will fall out the opposite side. Look down into the receiver, and verify the trigger assembly is center with both shoulder’s cut-outs facing upward, as shown:

Step 4: Install New Hammer and Spring
With the trigger seated, you can now install the new hammer, spring, and hammer pin. The installation process is the exact reverse of the factory hammer’s removal.
As you insert the hammer, ensure the leads of the hammer spring rest atop the trigger pin’s shoulders. Hold the hammer in place to align the pin holes, and tap the hammer pin into the receiver until it’s fully seated.
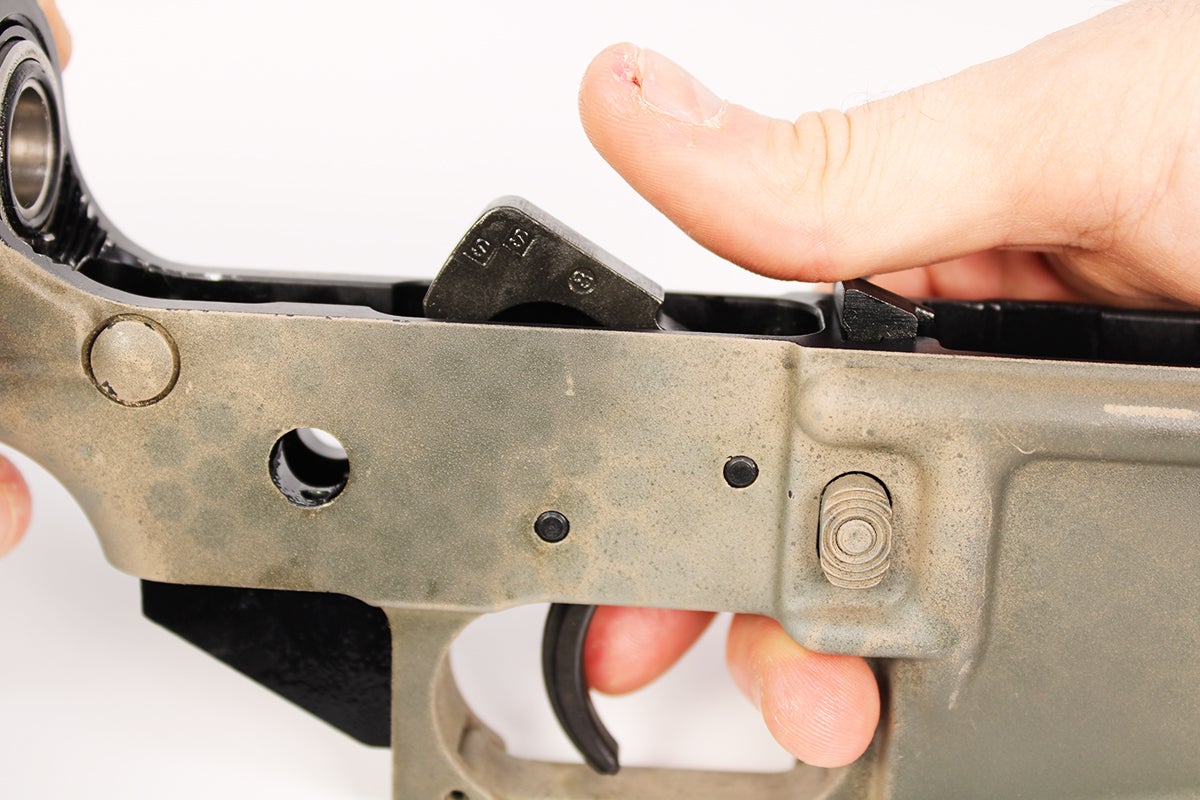
Once the hammer is installed, press down on the strike face to ensure the hammer cocks and remains locked to the trigger assembly.
Step 5: Insert New Safety Lever
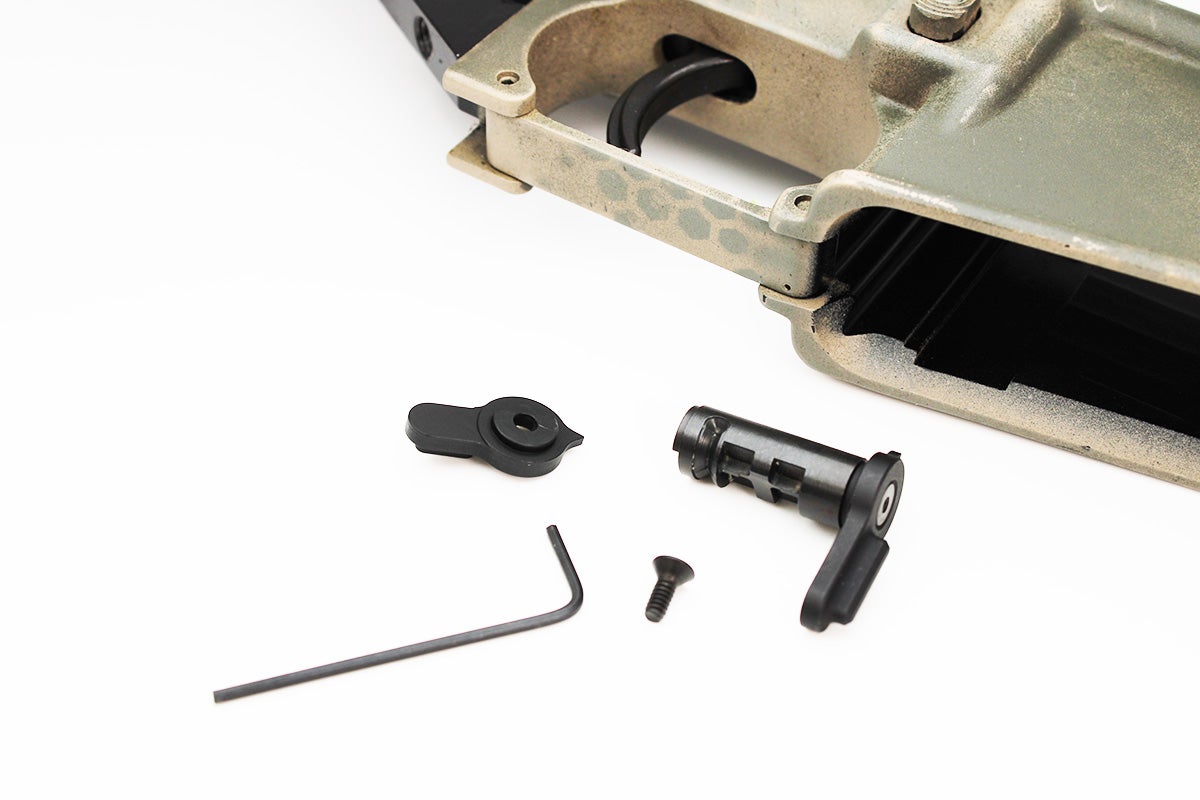
The safety lever is ambidextrous, with a larger primary lever and secondary smaller lever on the opposite side. The smaller lever is secured to the safety pin via a small hex-head bolt. Start by inserting the primary lever side and pin through the receiver’s left side.
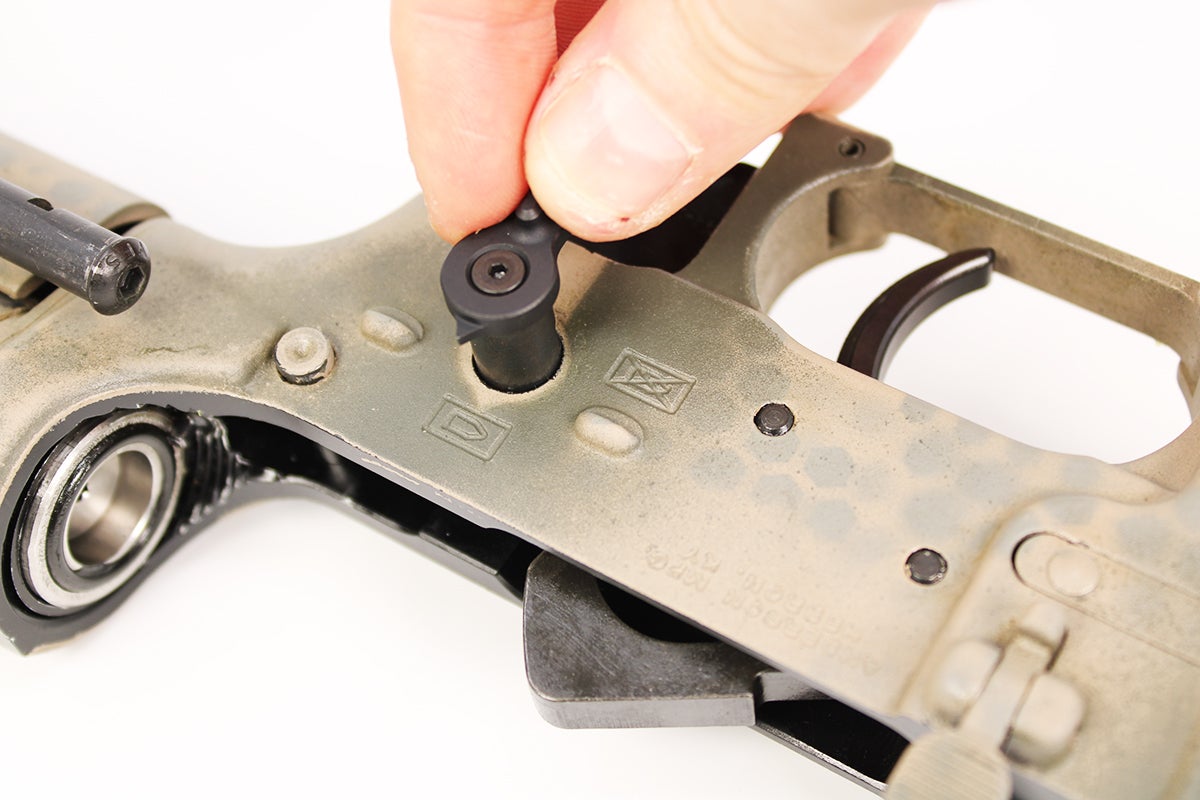
Once the safety pin is fully seated, you can thread the opposite lever onto the pin.
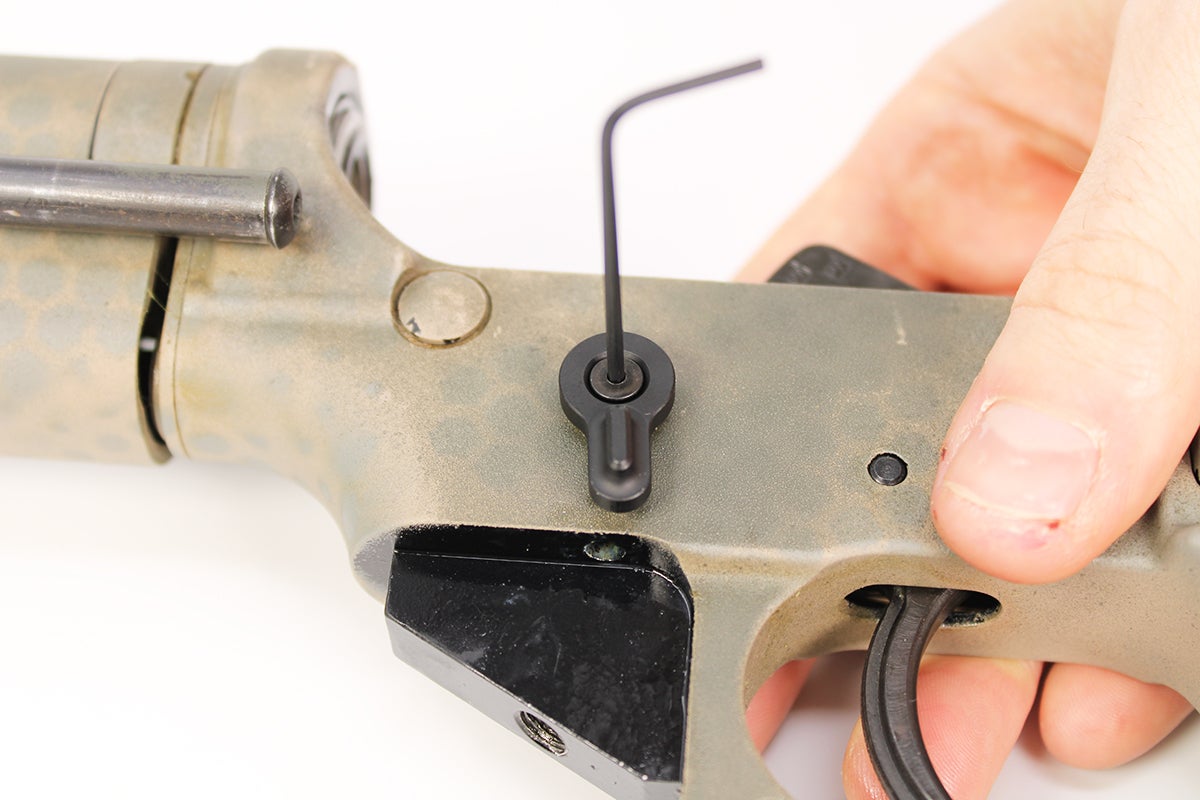
Take care not to cross-thread the bolt; it has small, fine threads.

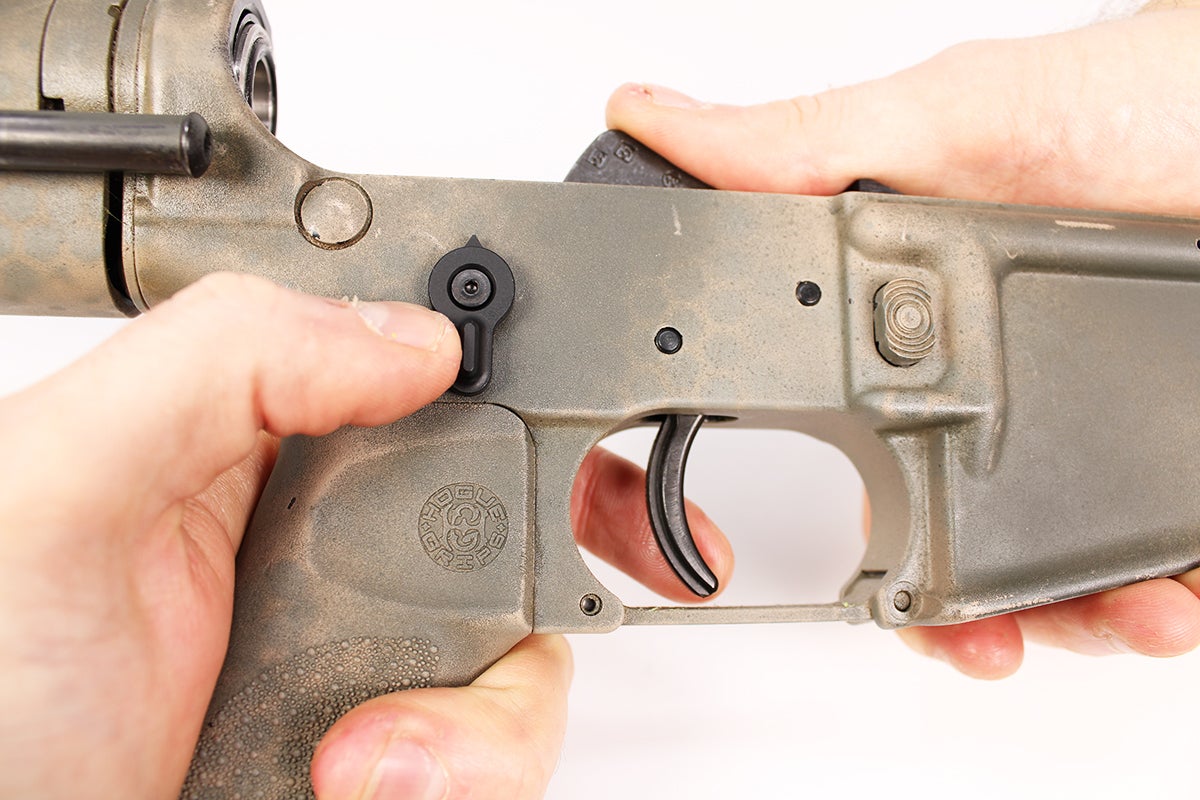
Next, reinsert the safety detent below the right-side safety lever. Then reinstall the pistol grip, ensuring the detent spring aligns with the detent’s hole. Your binary trigger is installed!
Franklin Armory Binary Trigger: Perform Semi and Binary Function Checks
Before using your receiver, you must verify the trigger functions correctly in the SAFE, SEMI, and BINARY positions.
Safety function check: Cock the hammer, place the safety lever to the “SAFE” position, and attempt to pull the trigger. The hammer should not fall, and the trigger bow should not move.
Semi function check: Cock the hammer, and place the safety in the upright position. Pull the trigger, and the hammer should release. While keeping the trigger squeezed, press the hammer back down until it’s captured by the disconnector. Once you hear it click, the hammer should remain held. Release the trigger, and you should hear a second click. This is the disconnector handing the hammer off to the trigger’s sear. The hammer should remain in the cocked position.
Binary function check. Switch the safety lever to the rearward position. Pull the trigger, and the hammer should release. While keeping the trigger squeezed, press the hammer down until the disconnector captures it. Release the trigger, and the hammer should fall a second time. If it does, binary functionality is working.
Cancel binary function check. Switch the safety lever to the rearward position. Pull the trigger, and the hammer should release. While keeping the trigger squeezed, press the hammer down until the disconnector captures it. While still squeezing the trigger, rotate the safety selector lever to the upright (SEMI) position. Then release the trigger. The hammer should not fall, but should instead remain cocked. If it does, binary cancellation is functioning correctly.
If your trigger passes all functions checks, then congratulations! You’re ready to hit the range and have some rapid-fire fun.
