ATV Photography 101: Tips, Tricks, and Techniques for Phenomenal Shots
Martin Banks 07.03.23

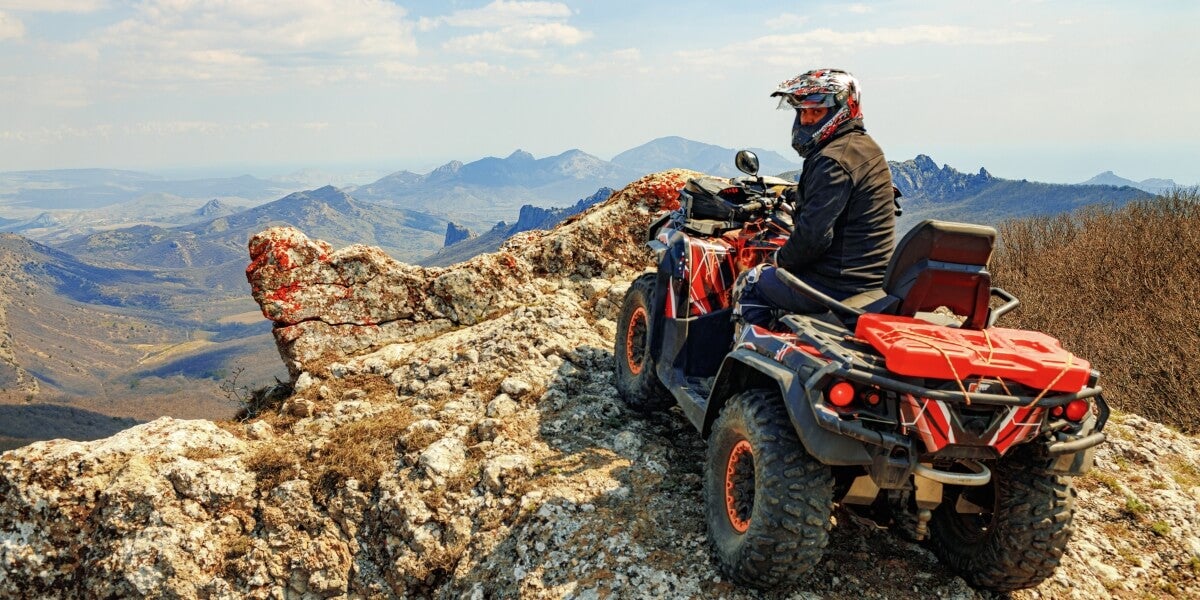
For an off-roading enthusiast, no sight is more beautiful than candid ATV photography of your favorite vehicle. However, getting quality action shots of your ATV can be difficult if you’re not a professional photographer. These tips will help you get phenomenal pictures and add a new layer of enjoyment to your off-roading hobby.
1. ATV Photography – Find the Right Scenery
Aside from the vehicle itself, location is the most important aspect of photographing your ATV. You must find the right scenery for your pictures to make an impression. Fortunately, off-roading can take you to many unique locations. The following parks are popular destinations where people photograph their vehicles:
- Grand Canyon, Arizona
- Death Valley National Park, California
- Moab, Utah
- Upper Peninsula, Michigan
- Hidden Falls Adventure Park, Texas
- Black Hills National Forest, South Dakota
- Bald Eagle State Forest, Pennsylvania
These destinations will take you to remote areas, giving you highly authentic outdoor photographs. However, weather conditions and other factors might make some places inaccessible. It’s also best to avoid riding during hunting season in popular parks so you don’t disrupt animal activity.
2. ATV Photography – Use the Sun to Your Advantage
Once you find an ideal location, you must wait for the right moment to start the photo shoot. Overcast conditions make photographs look dark, monochromatic and uninspiring. Wait for a sunny, cloudless day and take lots of pictures during sunrise and sunset when the sun is low in the sky. Professional photographers call these times of day the golden hours. High noon is a good alternative if you can’t take pictures at those times. The 12 o’clock sun will give you strong downlighting, reduce shadows and put your ATV completely in the spotlight. Experienced photographers know how to use the sunlight to their advantage, no matter the time of day.
3. ATV Photography – Incorporate Artificial Lighting
Natural lighting is almost always the better option, but artificial lighting is easier to control. Feel free to incorporate fixtures if you have trouble getting a good shot. These tools designed for photography will come in handy:
- Ring light: It’s made to illuminate the subject in close-up shots.
- Softbox: This provides a soft, warm texture that resembles the golden hour.
- Wireless trigger: A remote control lets you perfectly time the camera’s flash.
The right lighting will help your ATV jump off the screen, highlight its best features and give more detail to candid action shots. Most importantly, it will make your photographs look much more professional.
4. ATV Photography – Shoot From Various Angles
You always need to take pictures from several angles. The front three-quarter angle is the king of vehicle photography because it shows off all the important features from a flattering perspective. Here are some other angles you should try:
- Front head-on
- Front 1/3 angle
- Side head-on
- Rear 1/3 angle
- Rear 3/4 angle
- Rear head-on
You can also do small visual tricks to make the angles look better. For example, turning the ATV’s wheels to face the camera is a common car photography technique. Shooting from ground-level positions makes the vehicle look larger and more imposing. Experiment until you find the perfect shot.
5. ATV Photography – Get Plenty of Action Shots
The best ATV photographs tend to be action shots. They look cooler and capture the best memories of your off-road adventures. Pictures of your vehicle flying through the air, driving through a mud pit and navigating large boulders evoke much more emotion than stationary pictures. Capturing your vehicle while moving at high speeds will be challenging, but that’s part of the fun. Getting phenomenal shots in a rugged environment isn’t supposed to be easy. Like off-roading, you must do some dirty work to reach your goal. You might have to do the same trick dozens of times before getting your desired image.
6. ATV Photography – Edit Your Collection
Action shots can turn out blurry and unfocused, but that’s where editing comes in. The photo shoot is just the first step in creating the perfect image. You must edit each picture’s brightness, contrast, saturation, shadows and other visual aspects until it’s just right. Use an editing app on your phone or computer software. Be careful not to do too much editing. Keep the original pictures in a separate folder. That way, you can always start over if you accidentally mess up or delete your images when fixing them up.
Get the Perfect Shot of Your ATV
You don’t have to be a professional photographer to take stunning pictures. You just need to pay attention to location, lighting, angles and action. A little bit of editing will also go a long way. Focusing on these features will help you get the perfect shot of your ATV and make digital memories of your off-road adventures.
