Home on the Range #053: Northstar Forge Knife Forging Process – Part II
Adam Scepaniak 09.22.23

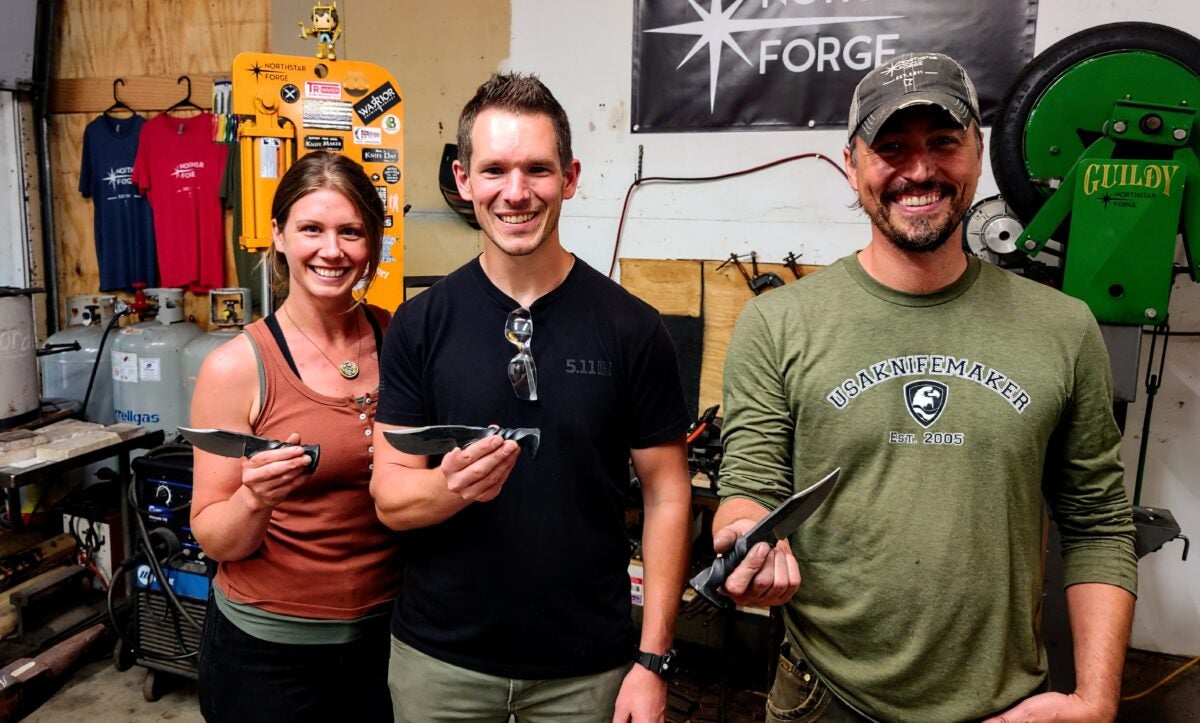
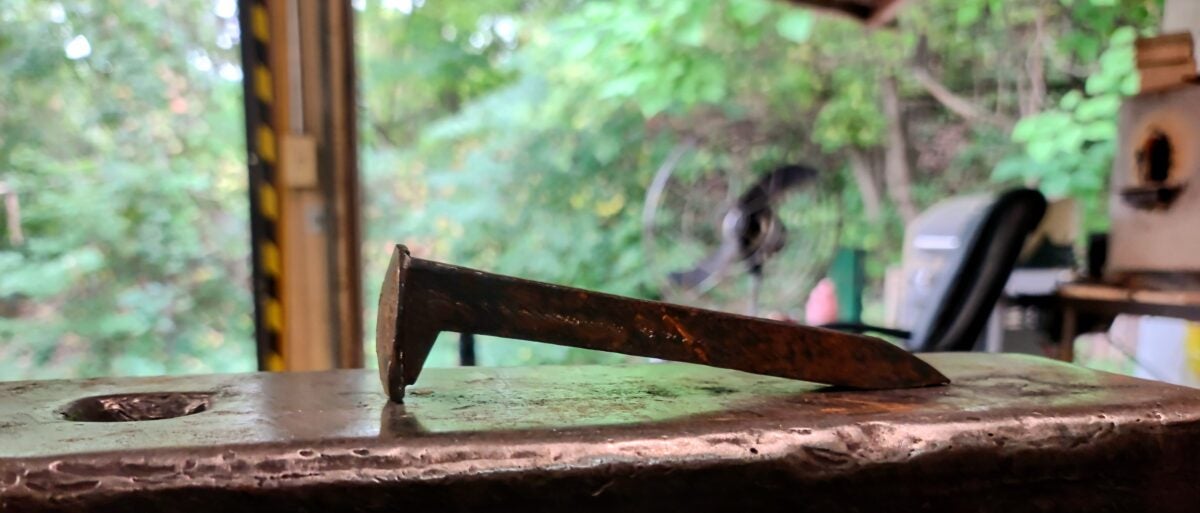
Over the last few weeks here on “Home on the Range,” we have been chronicling our experience of forging a knife from scratch at Northstar Forge in Minnesota with our base material being a discarded railroad spike. A lot of people have romanticized the idea of wielding metal and fire to proudly declare that they can make their own knife since the advent of the TV shows “Forged in Fire” and “Master of Arms.” In fact, those two shows are exactly what got me excited in trying this primitive, but rewarding hobby. Having never visited a professional forge before, my wife – Andrea – and I visited Northstar Forge in Carver, MN and it was a phenomenal experience! We took a dusty railroad spike and throughout the course of one day Jason Kraus – the owner, founder, ABS (American Bladesmith Society) Journeyman – guided us in making a blade that we’re both supremely proud to own, and we can say we made ourselves! Last week on “Home on the Range,” I outlined the process of starting with a railroad spike and fashioning it into something reminiscent of a blade. Today, we will finish our journey and explain the process Jason lead us through to complete our railroad spike knife. Let’s dive in!
“Home on the Range” Series Coverage on AllOutdoor
- Home on the Range #052: Northstar Forge Knife Forging Process – Part I
- Home on the Range #051: Railroad Spike Knife Forging at Northstar Forge
- Home on the Range #050: Honey, Bees & Beekeeping – How Sweet It Is!
- Home on the Range #049: Still Hunting – Ground Hunting Deer w/o a Blind
- Home on the Range #048 – Competition Shooting to Improve your Hunting
Welcome to our reoccurring series of “Home on the Range.” Here, we would like to share all of our experiences for those who may be homesteading, living off the land, hunting, farming, ranching, and truly investing in nature and the great outdoors. The ability to provide for yourself and your family can be tremendously rewarding and simultaneously difficult at times. So, in “Home on the Range” we want to share our different exploits so you can learn and hopefully we can receive your feedback along the way as well.
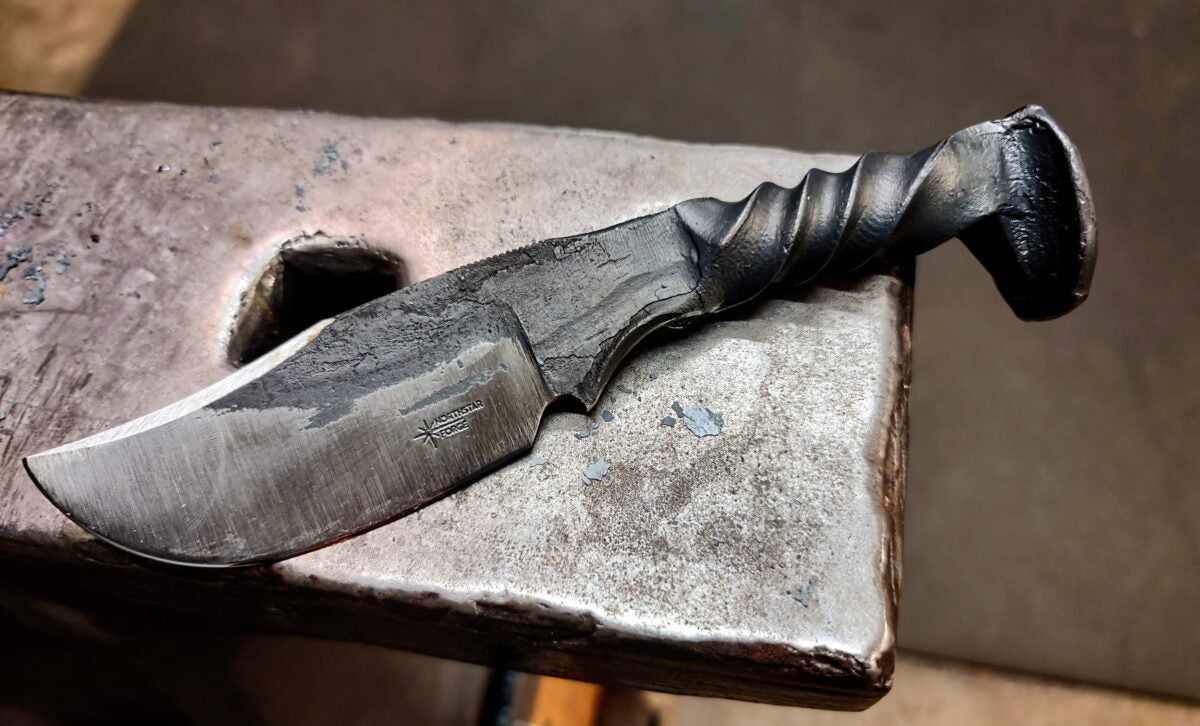
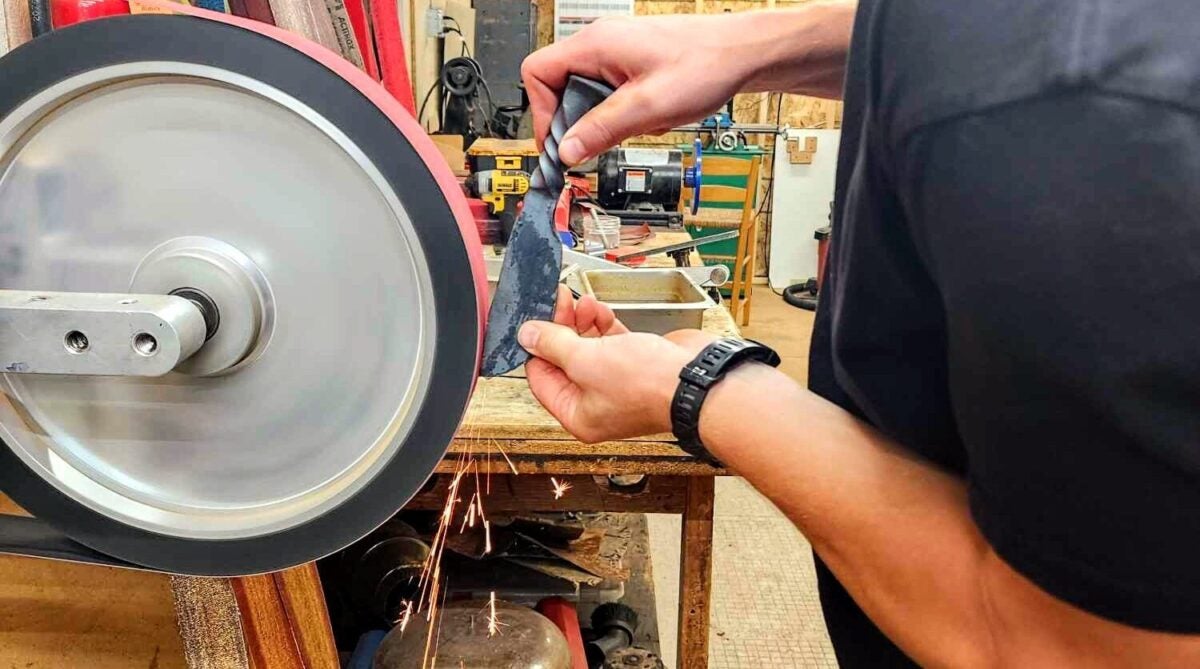
Contouring our Blades
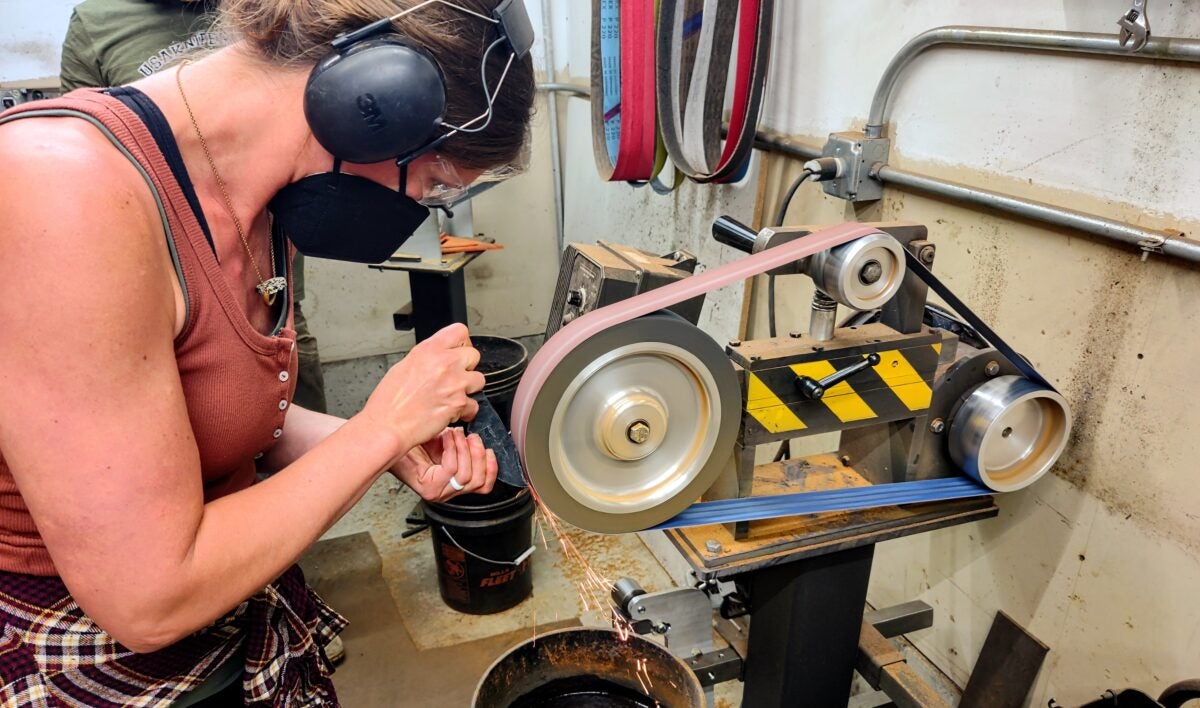
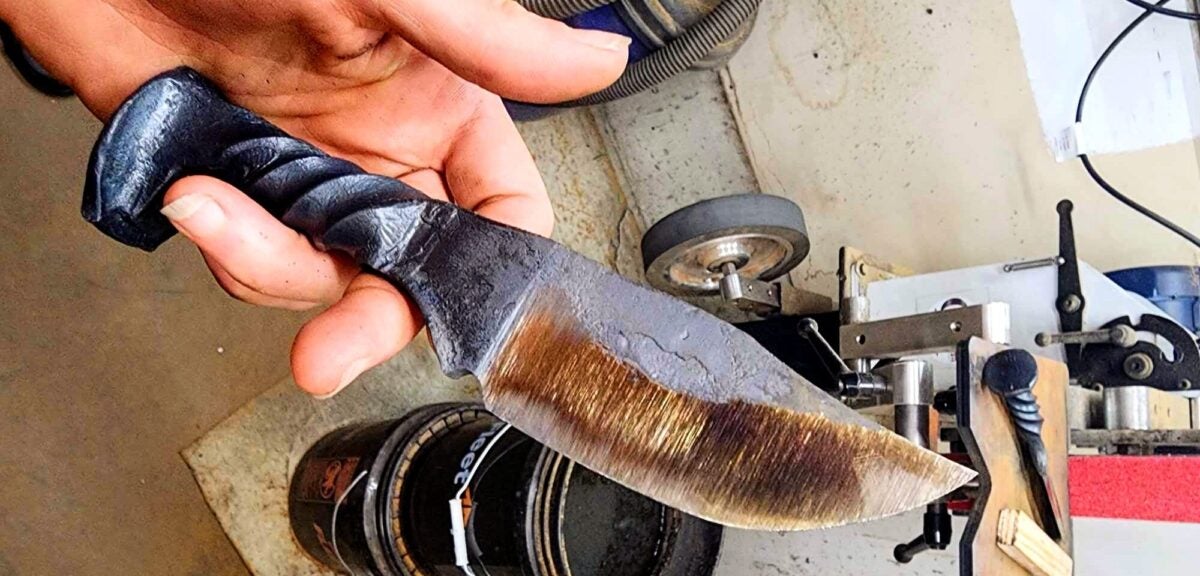
Last week we left off at our lunch break in the forging process. We had taken a railroad spike and heated, smacked, pounded, squished, and flattened it into something – if you squinted really hard – that looked sort of like a knife. Now, Jason was going to put us through the process of adding the final touches. This would include contouring the shape of our blade, adding jimping to the spine (serrations for dexterity for your thumb), and a false edge on the front of the spine as well for an attractive aesthetic. This meant a lot of work grinding, polishing, and delicately honing our blades to the vision we originally had for them.
To begin, Jason showed us how to remove some material from our knives to start creating an edge. This needed to be centered, uniform, and still leave enough material so a fine edge could be polished and leave the blade to be strong enough for chopping as well. As fun as playing on grinders and sanders can be, these steps needed to be taken seriously so our morning’s work wouldn’t be for not.
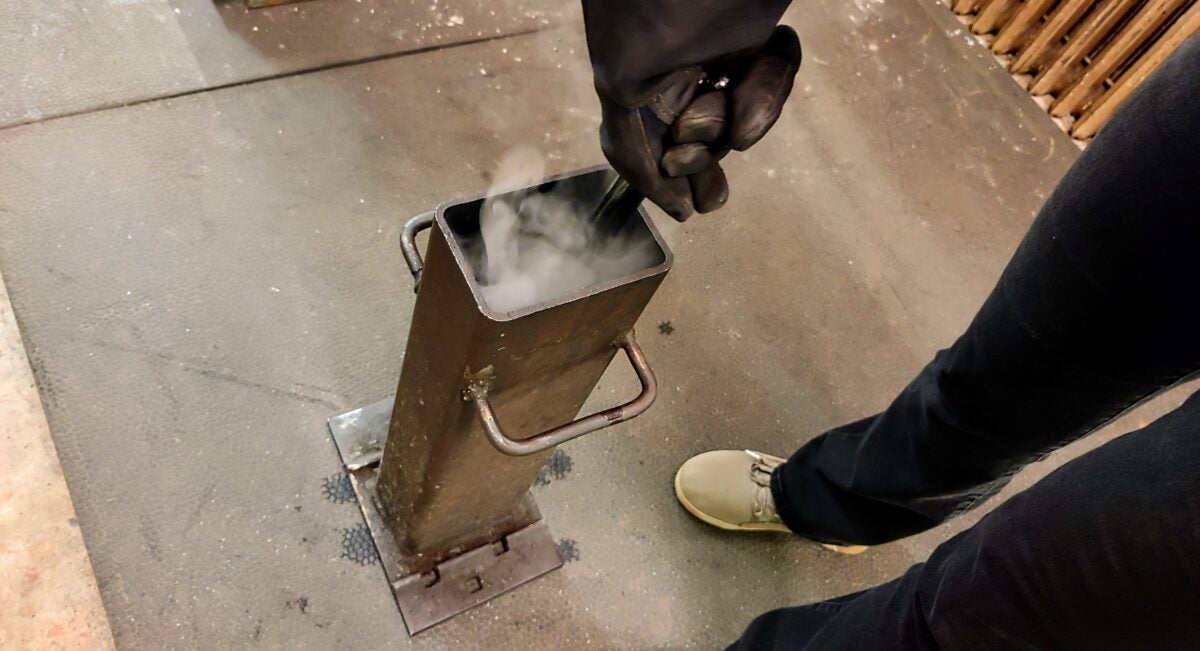
On to the Quench
The next interval in our journey was to quench our knives. We had moved a lot of metal from the time we had spikes up until now, but we needed to quench our blades. This meant heating them back up in the forge. So, into the flame they went. Once heated up again, we dunked them in a quenching oil for a period of roughly 1 minute to make sure the quench was complete. This process ensures that our knife blade will remain strong and intact for years to come.
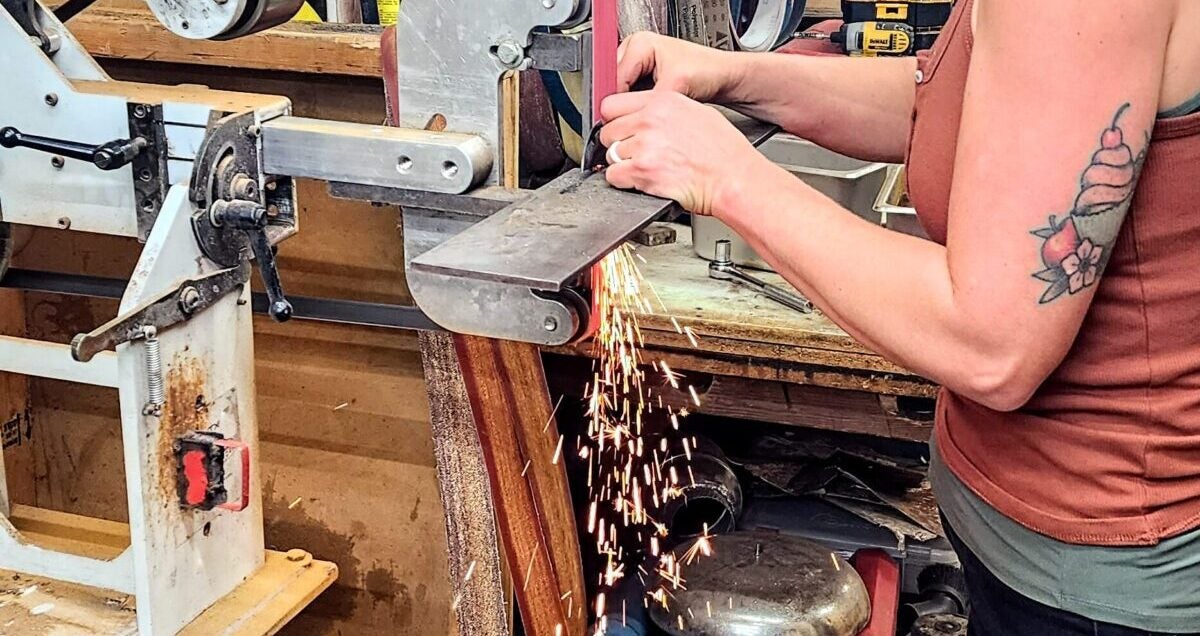
Polishing an Edge
After our blades were done going for a swim, we needed to get back on the grinders to polish our blades again. This meant getting rid of any occlusions (funny pockets) and making it shiny. This was a slow, delicate process because, again, we did not want to remove too much material. If at any point we daydreamed and honed away too much metal our knives would be ruined. So, while this wasn’t difficult work like we accomplished in the morning, it was very important.
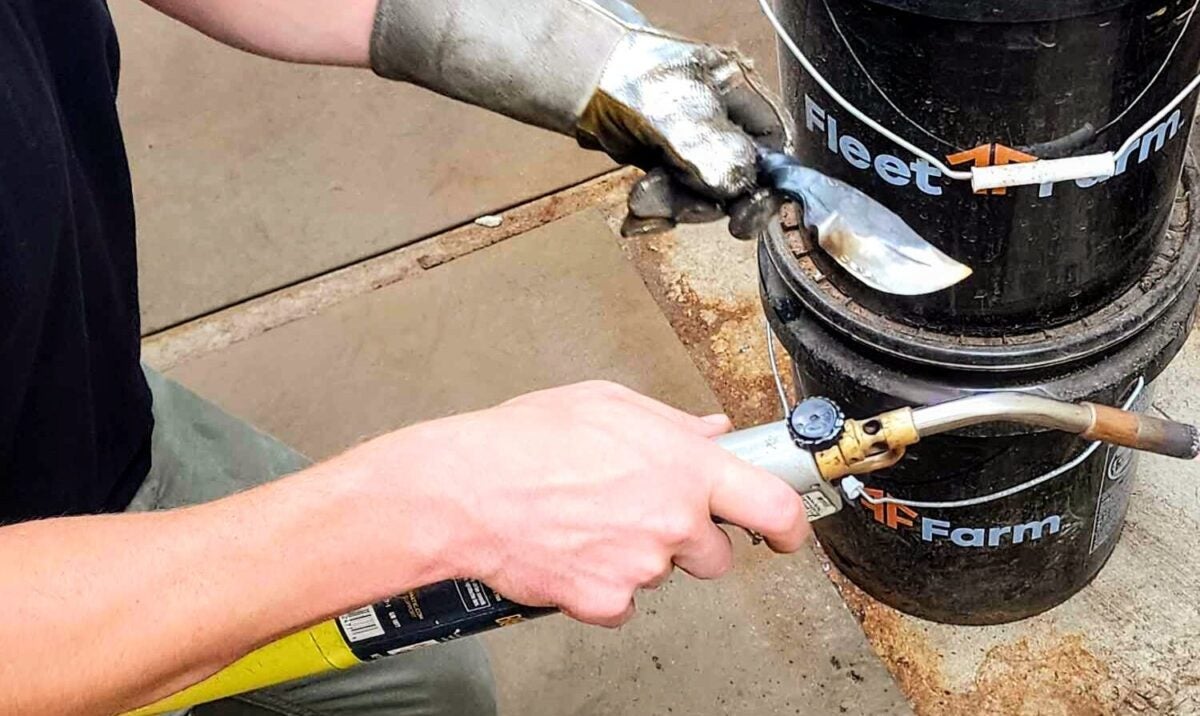
Tempering our Knives
So, let’s review. We have contoured our knives, quenched them, and polished them again. We were definitely on the home stretch at this point. Next, Jason showed us how to temper our blades with a blow torch so they would be less brittle. This was a cautious process of heating up the edge just a bit, but not too much. It was a fine line we were walking, but it could be done.
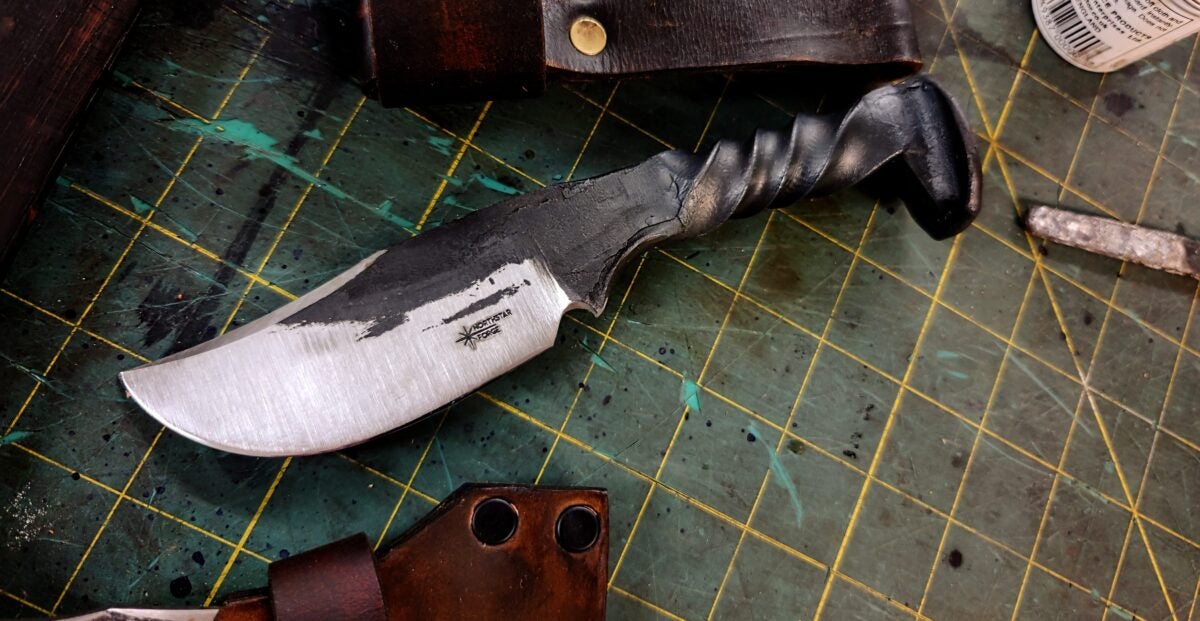
Final Polish, Jimping, and Insignia
With our blades tempered and now less brittle, we had to polish them again for that gorgeous curb appeal and a sharp edge so it will cut just like Doug Marcaida from “Forged in Fire” always says. This was a slow, but rewarding process on the polishing sander because all of our hard day’s work was coming together into a beautiful knife.
I failed to get photos of Andrea and I adding jimping to the spine of our knives, but that was a fast and slick process. Jason had a couple different precise files that you could slowly work to add jimping. Andrea and I both opted for more coarse jimping (think of coarse versus fine sandpaper) so it was something our thumb could easily grip, but it wouldn’t be too abrasive to us.
Next, I asked to have Jason’s insignia or company logo on our knives. Some of his samples had his logo on it that we handled earlier in the day. After a full day of receiving his welcoming, knowledgeable, and enjoyable instruction I absolutely wanted to have his brand – his “maker’s mark” – on my knife. I knew I’d being bragging about my knife like hell to all of my friends, and I knew I wanted to tell people that it hailed from Jason Kraus from Northstar Forge: competitor on “Forged in Fire,” competitor on “Master of Arms,” longtime knifemaker, and an authentically good man. So, Jason did both Andrea and I the honor of putting his logo on our knives.
Final Thoughts – Northstar Forge Railroad Spike Knife Class
So, it’s been 16 days since my wife and I made our very own railroad spike knives at Northstar Forge with Jason Kraus (Jason’s wonderful wife, Kristen, stopped by too for a moment and she was a delight to talk to as well). Ever since our class its all I talk about to most of my friends and readers, here, at AllOutdoor. If you happen to live remotely close to Minnesota, I cannot recommend Northstar Forge enough. The class was challenging, fun, engaging, empowering, and badass! Even if you can’t make it to Northstar Forge, search around where you live to see if you can give knife forging a try locally. Have you ever tried a knife forging process like this before? Would you be willing to give it a try? As always, let us know all of your thoughts in the Comments below! We always appreciate your feedback.