AllOutdoor Review: Caldwell Lead Sled Solo – Shooting Sled Setup
Travis Olander 10.31.23

A shooting sled should always be a tool in your range arsenal. Even if you’re working on a light rifle or small-bore shotgun, a sled can make zeroing your irons or optics easier. A sled’s also a great way to work on the fundamentals of marksmanship. Strapping your long gun down allows you to focus on trigger squeeze and sight picture without effects from your shooting stance, and felt recoil. But what’s in a good shooting sled? Lead Sled Solo gets it right. Here’s our setup and review of the Caldwell Lead Sled Solo shooting rest.
Shooting Coverage on AllOutdoor
- Noise Reduction Ratings: How Much Shooting Ear Pro Do You Need?
- Primos Partners w/ Spartan Precision Equipment on Shooting Supports
- Meet Lisa Clemons, founder of LIPS – Ladies into Practical Shooting
- Home on the Range #048 – Competition Shooting to Improve your Hunting
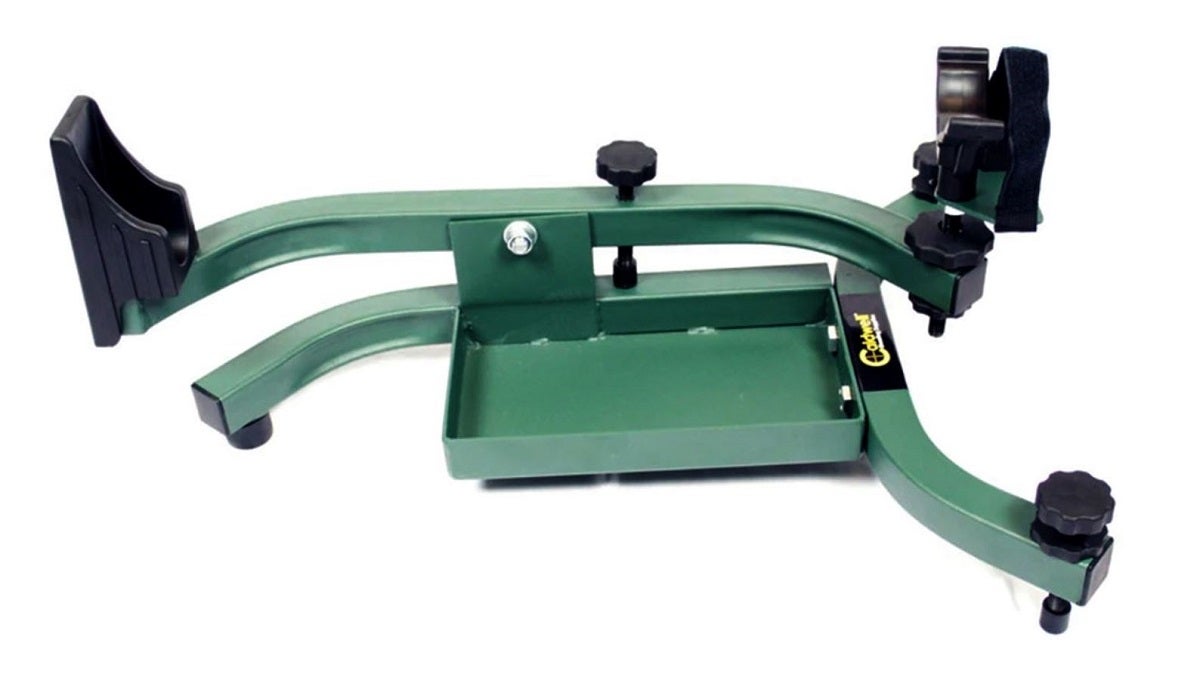
Caldwell Lead Sled Solo – Specs & Features
- All-steel, box frame construction
- Powdercoated, rustproof finish
- Adjustable arms for leveling optics
- Weight tray for recoil stability (up to 25 lbs)
- Height-adjustable for distance and bullet drop
- Rubberized stock rest for reducing felt recoil
Caldwell Lead Sled Solo – How’s It Perform?
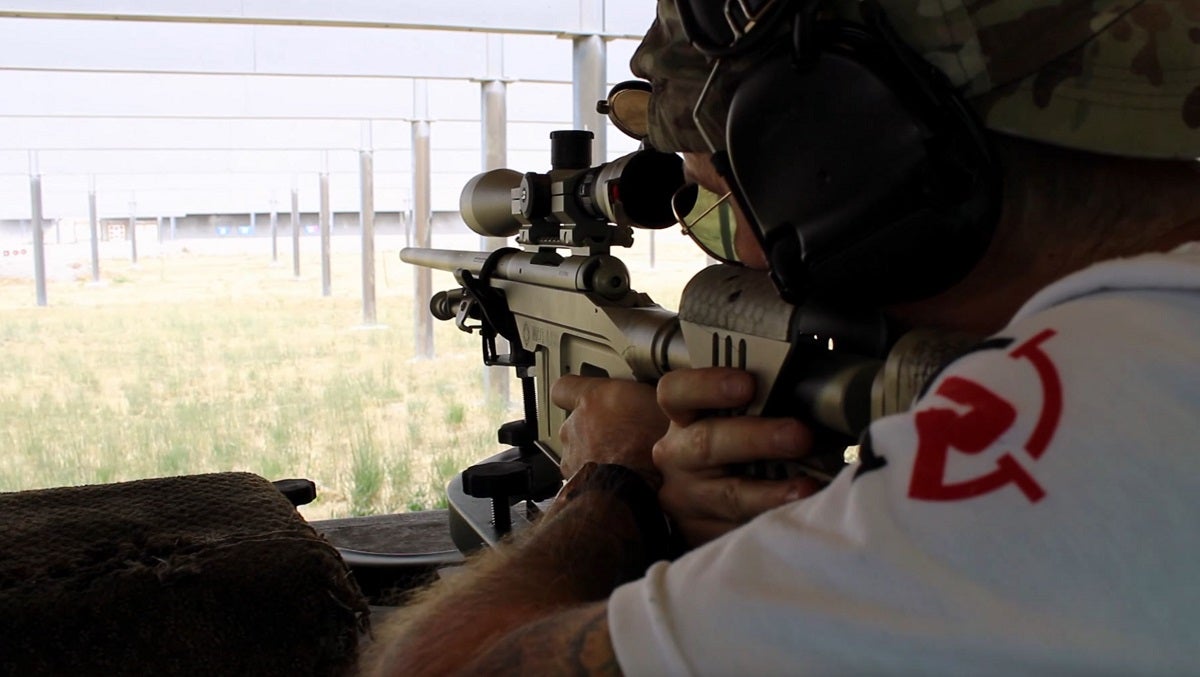
For any cartridge up to 7.62x51mm (.308), the Lead Sled Solo’s a great option. The 25-lb. weight tray provides enough stability to eliminate recoil and keep the rifle and sled itself planted in the same spot, without any movement. You’ll need to top out the tray, though – any less weight will lead to things shifting around with anything more than 5.56/.223. The Solo’s meant to be compact and easy to carry, and, well, it is. It’s light enough for one-handed carry, and bringing it to and from the range isn’t a problem, even if you’ve got a bit of a walk or hike to the bench from the car. It takes up relatively little space, and should fit in the truck of any compact car without issue.
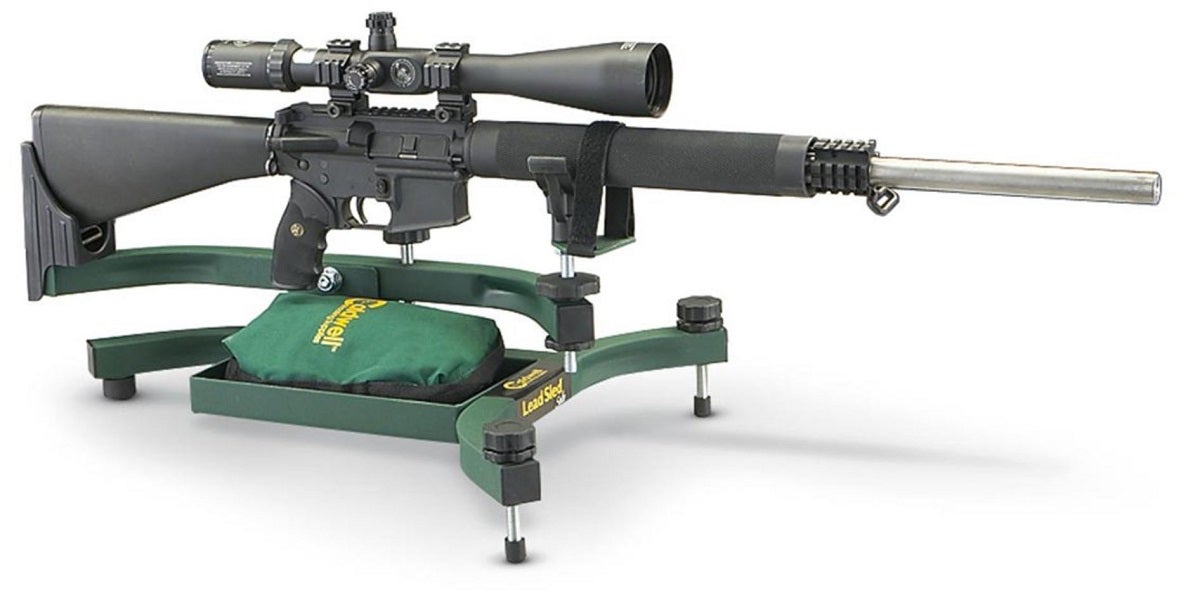
To be clear, there are heavier sleds out there intended for serious bench work. The Solo’s more of a money saver and practice assistant: It provides enough stability to reduce your round count for zeroing and testing out loads, but it’s not going to provide the kind of comfort and stability you need for, say, .30-cal magnum loads or F-class warmup. If you’re the typical range goer who needs to sight in a new red dot on your AR-15, or you want to dial in your deer rifle before the season starts, the Solo’s the ticket. If you’re testing loads on a magnum bolt gun, or you’re recording holdover data on 800-meter targets to come up with drop tables, you might want to consider the larger Lead Sled DFT 2.
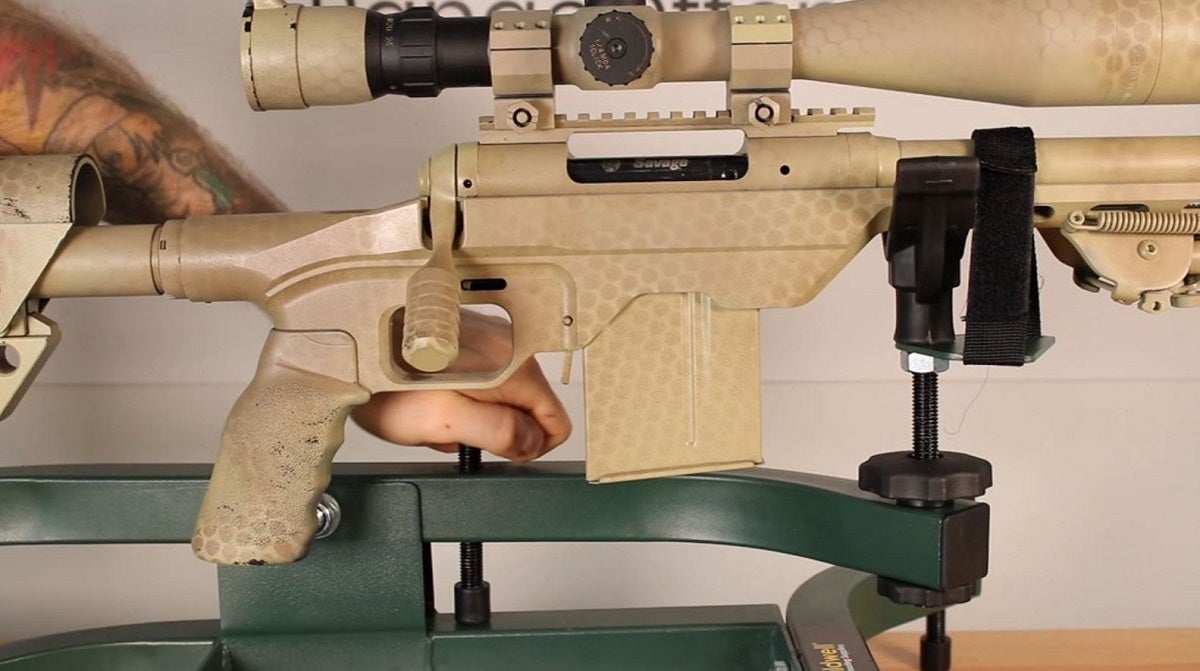
But, so long as you strap a rifle in the appropriate caliber to this sled, it works quite well. The front cradle has a decent hook-and-loop strap to cinch your forend or barrel down, and the adjustable height relative to the tray ensures you can fit any semiautomatic rifle with a long magazine. The elevation knob on the swim arm is useful for aligning your optics or irons downrange to basically any distance. Each of the feet are individually adjustable for height, too, ensuring you can get your rig perfectly level on any bench. Setup is pretty simple, with just some hand tools needed.
What’s Not To Like?
Once you’ve got the sled set up, that’s it! It doesn’t fold or collapse or break apart otherwise. But like I said, it’s small enough assembled to fit neatly amongst your rifle cases and other gear. This isn’t a problem unless you’re cramped for space, but keep in mind that you can’t remove any components without wrenches. I wish the sled was properly ambidextrous, too. I’m a left-handed shooter. I can still use the sled just fine, but depending on which long gun you’re using, you might find some issues with getting a decent grip or cheek weld if you’re a leftie, too.
Lastly, the buttstock rest leaves some comfort to be desired. It mitigates recoil well enough for most rifles, but if you’re pushing the sled to its limits, you’ll find the rest’s rubber backing provides relatively little cushion, so you’ll want to throw as much weight in the tray as possible to mitigate any felt recoil. Overall, though, the Lead Sled Solo is a budget-priced, functional, compact little shooting sled that works great as an easy-to-transport rest. It costs less than $100 – about $80 at publication – which puts it in the “cheap-but-good” category for gun gear, in my book. Oh – mine didn’t come with instructions. I’m sure they’re supposed to be included. But if you pull the trigger on one of these (pun intended) and find yourself lacking the requisite documents, here’s how to set it up.
Setting Up The Sled
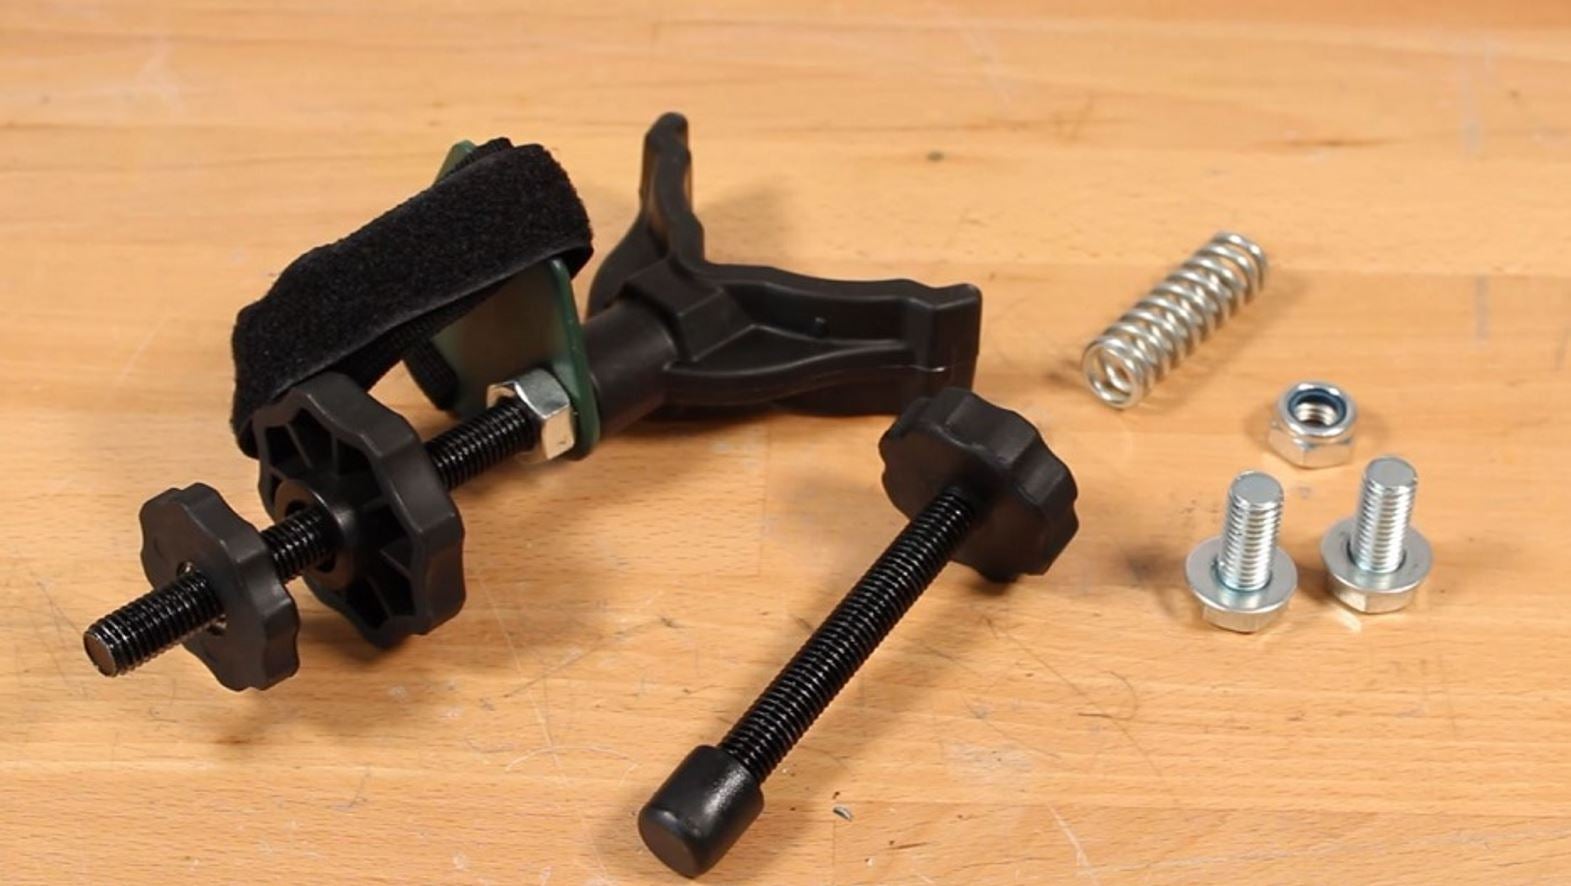
Make sure your sled comes with all the necessary hardware: Two 19mm bolts with washers, a third larger 19mm bolt (not pictured), one nut, one coil spring, the front cradle with strap and two plastic knobs (pre-assembled) and an adjustment knob for the pivot arm.
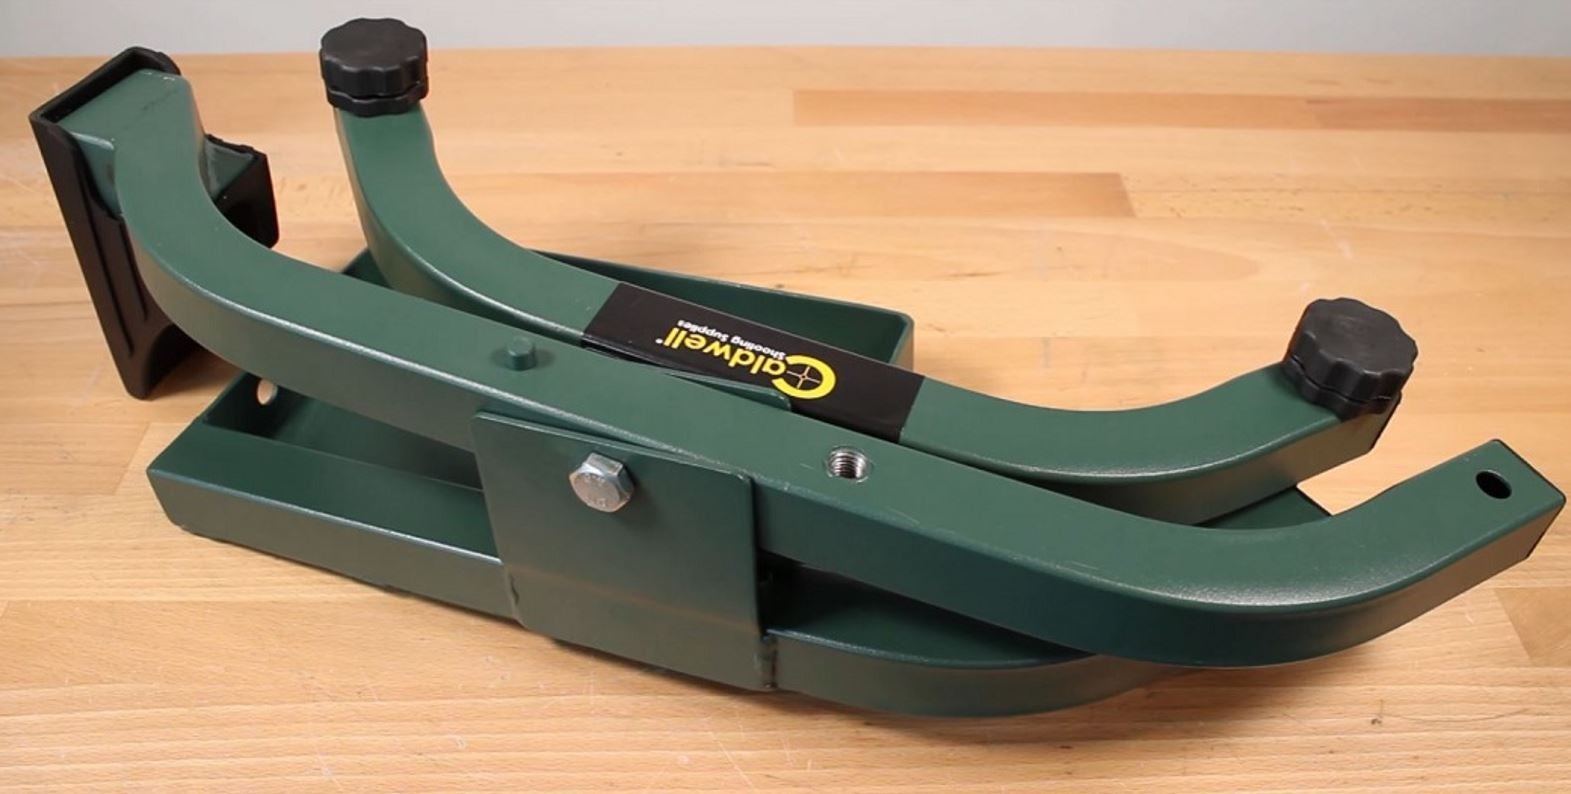
The sled comes mostly assembled, save for the spring underneath the pivot arm, the front legs, and the cradle. Each of these is a simple matter of screwing some fasteners together to bolt them down.
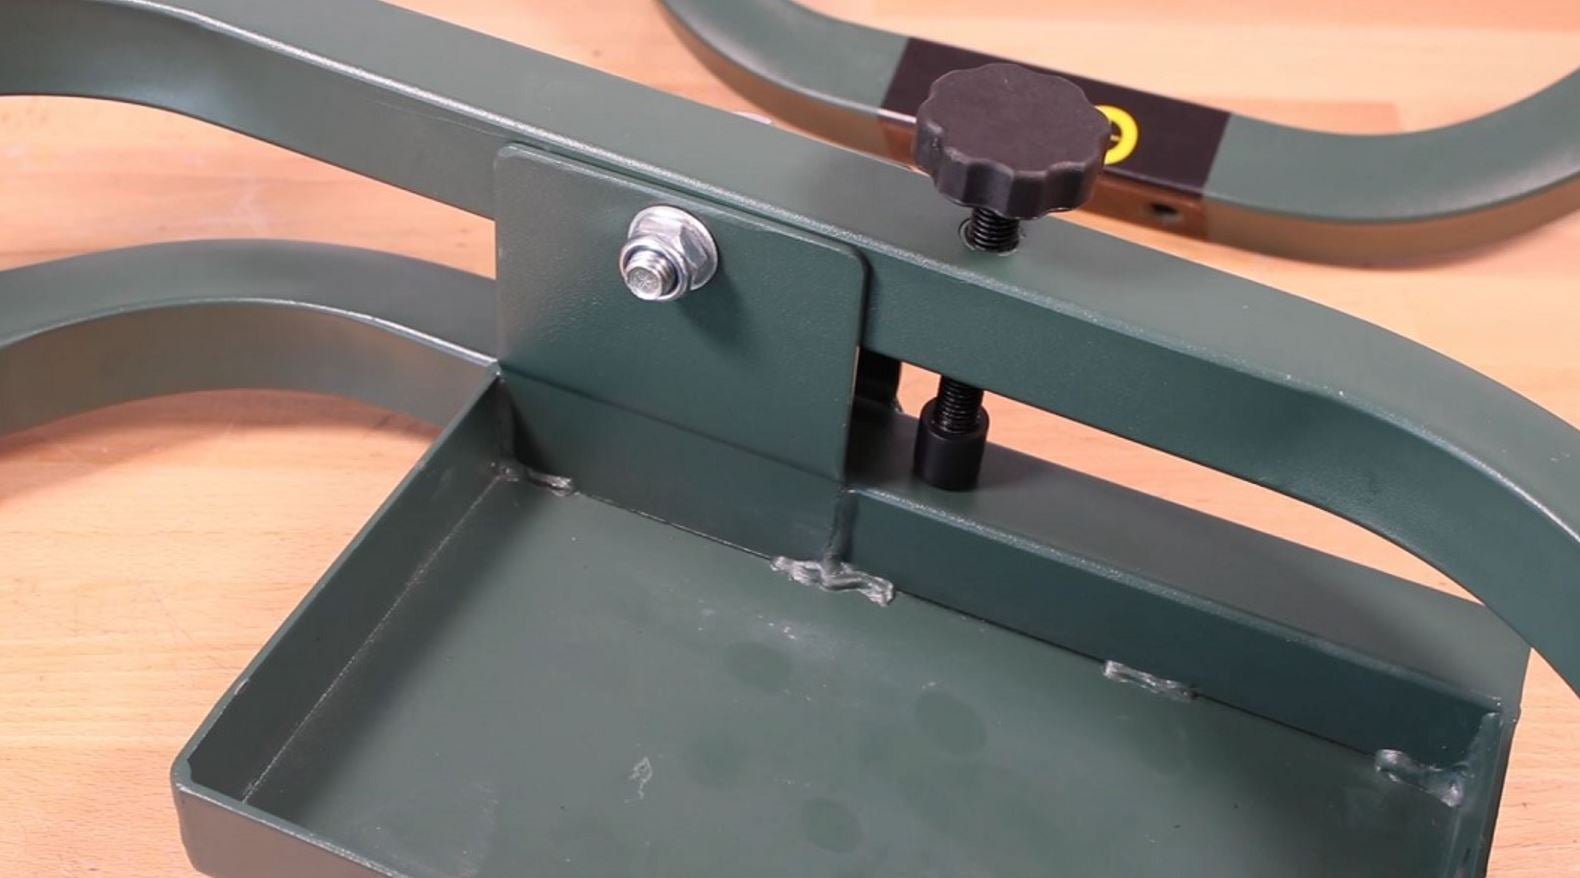
The corkscrew adjustment knob for the pivot just threads through the hole drilled through the center of the box frame. Although you can’t see it, there is a spring that rests inside the arm’s mount – you’ll need to insert it before screwing the adjuster in place.
The bolt and nut securing the arm to the base requires a 19mm socket and wrench. It’s a nylon lock nut, so there are no torque specs – you want to keep this nut relatively loose; lest you cause the pivot arm to bind.
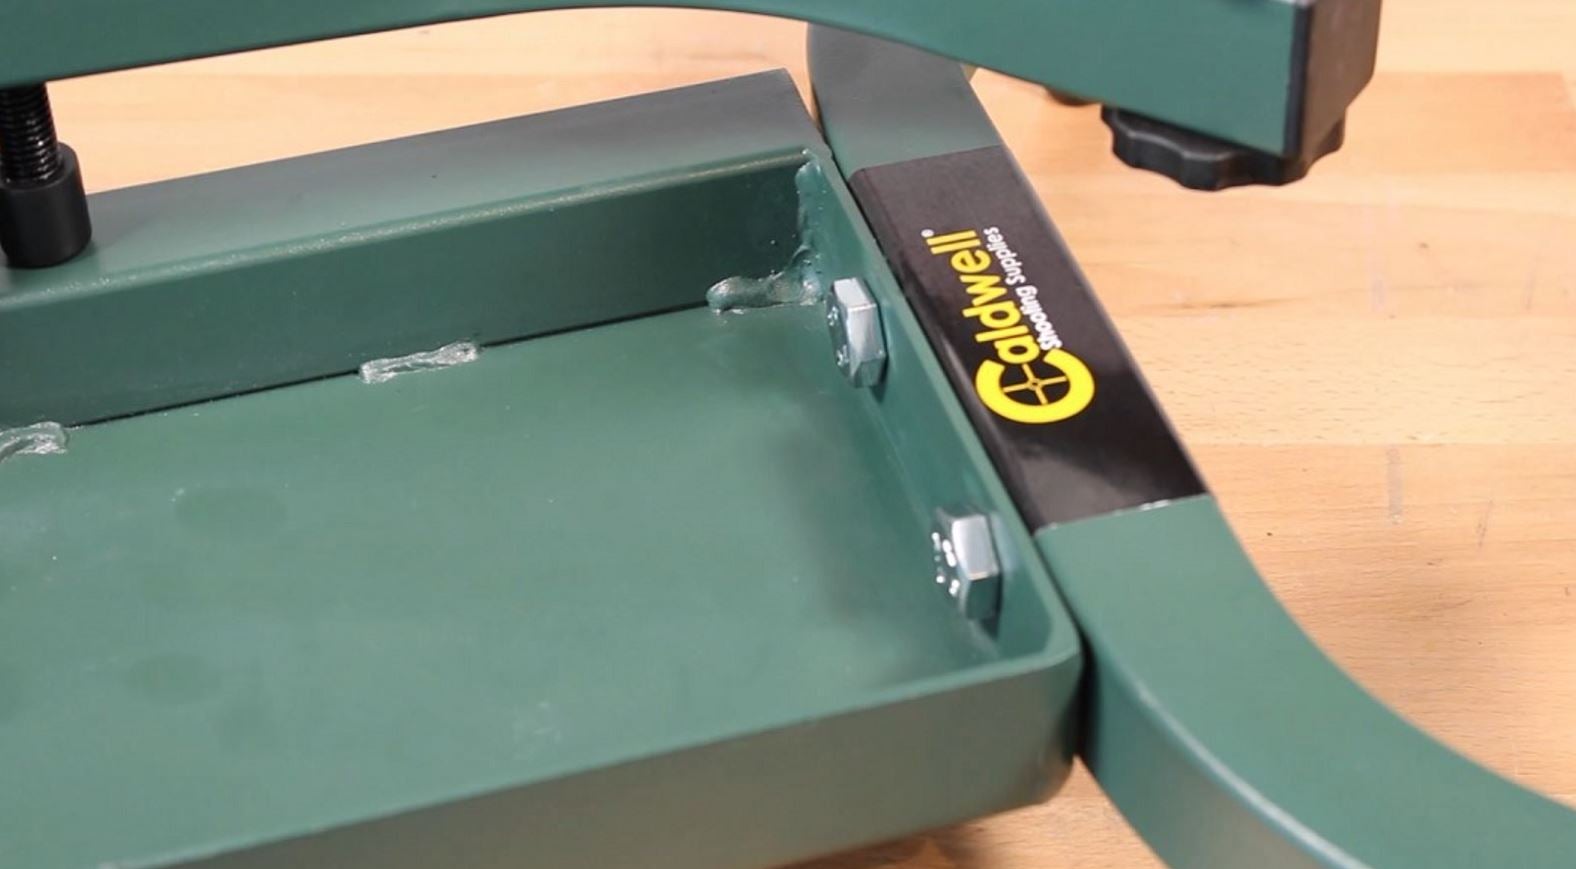
Next, just bolt the front feet (attached to a single bent tube) to the front of the weight tray. You’ll use the same 19mm wrench, here.
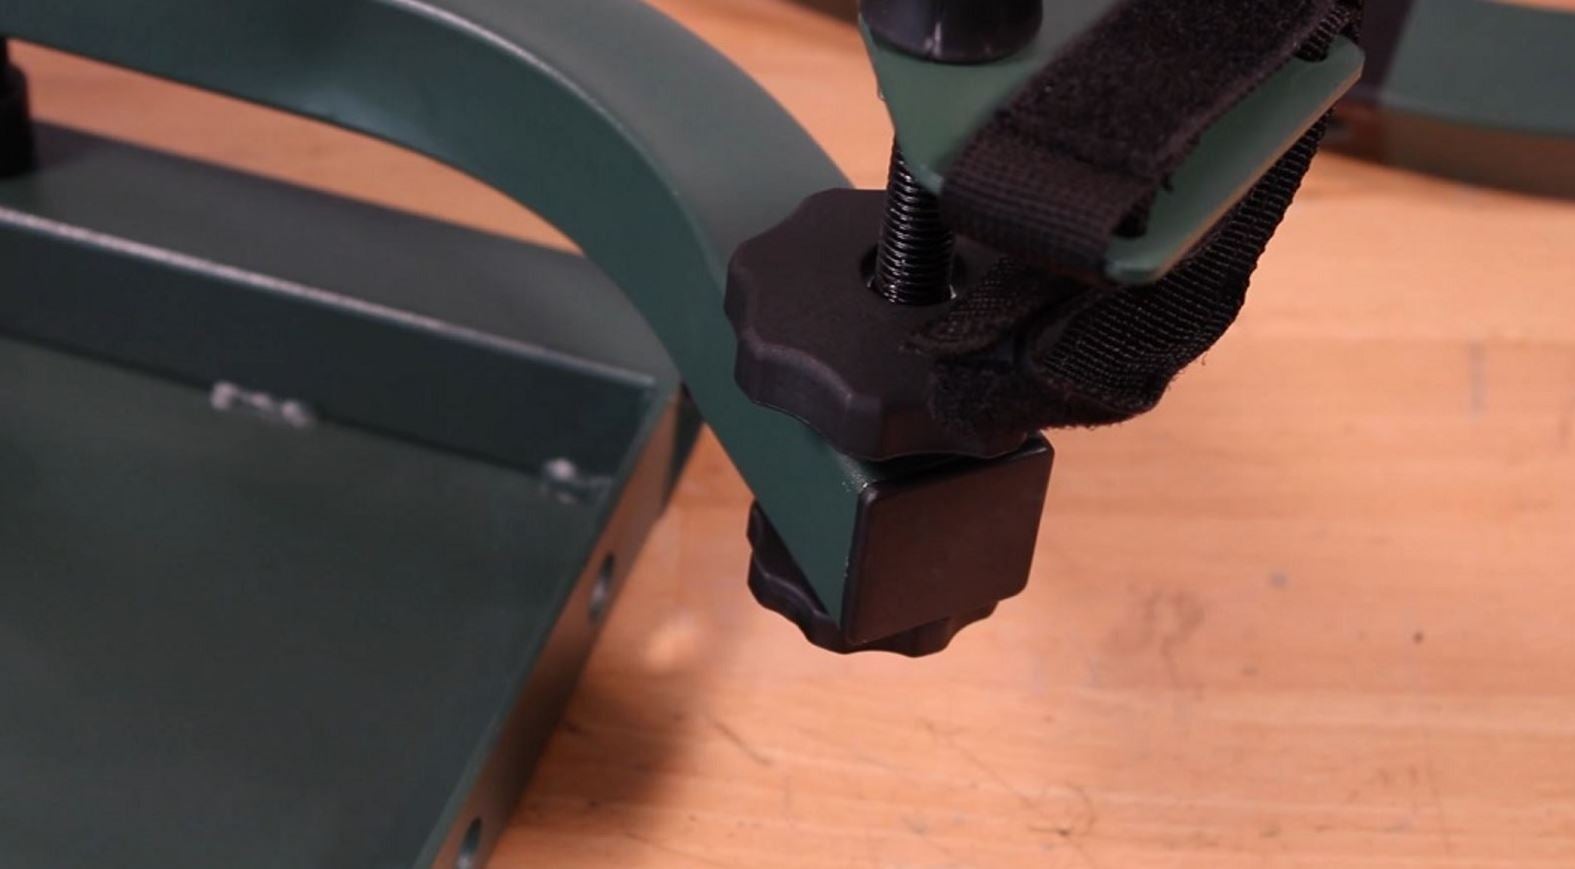
Last comes the front support cradle: To install it on the pivot arm, you’ll need to remove the smaller, bottom plastic knob from the bolt. Then insert the bolt through the hole on the end of the arm, and reinstall and tighten down the plastic knob you removed a moment ago. By rotating the two knobs on the cradle, you can adjust the height relative to the arm and weight tray. Want a beefier sled? Check out our review of Caldwell’s larger (and, thankfully, ambidextrous) Fire Control FCX Sled.
